Tuesday, April 26, 2011

Lemony Cornmeal Shortbread


One thing I've learned as a member of Tuesdays with Dorie is to expect the unexpected. Even if I think I know how a recipe will taste, this isn't always the case. Take this week's pick, cornmeal shortbread cookies, picked by Valerie of Une Gamine dans la Cuisine. My last experience with cornmeal in cookies was with these biscotti, which I made when I first joined the group. I was still pretty clueless, I just didn't know it.

The crunchiness of the cornmeal in the biscotti was texturally challenging for me, and this time I wanted to overcome that issue. So I made the dough two days ago and let it rest - and hydrate - in the fridge. I rolled it a little too thin, and baked the cookies a little too long, but they were delicious. The lemon zest lent a lovely floral back note. The cornmeal added a pleasant crunch without being distractingly hard, a real win-win.

If you'd like to make these unusual cookies, Valerie has the recipe (and cookies look the way Dorie intended!) for you here. And you can see what the other TWD bakers thought by checking them out here.

Monday, April 25, 2011

Maple Oatmeal Wheat Bread


Not to overstate it but this recipe underscores the beauty of the recipe sharing that happens among bloggers.

I first saw this bread on my buddy Margaret's blog Tea and Scones (recipe here). I made it and my coworkers flipped for it. Mags saw my post, and she reworked the recipe to use whole wheat flour (you can see her post here). When I saw her version, I wanted to make it but I wanted to make it even better.

In this case, better means easier. I am in love with Dan Lepard's kneading technique, which involves three 10 second kneads, each followed by a rest period. I wanted to revise this recipe so it would be easy for yeast phobics (I used to be one of you!) to make a flavorful, healthy bread without a stand mixer or big muscles. Although I think this version is just about perfect, I hope you'll make the recipe your own just as Mags and I did.

This bread is wonderful while still warm from the oven, great dipped in a little maple syrup or with maple butter, and makes a spectacular turkey sandwich.

Maple Oatmeal Bread
Printer friendly recipe
2 1/2 cups boiling water
1 cup (80 g) rolled oats
2 1/4 cups (300 g) whole wheat flour
2 3/4 cups (415 g) unbleached bread flour
2 teaspoons instant yeast
2 teaspoons salt
2 tablespoons vital wheat gluten
1/3 cup (50 g) dried milk powder
3/4 cup maple syrup, at room temperature
2 tablespoons butter, melted
Maple syrup for brushing (optional)
Oatmeal for sprinkling (optional)

In bowl of stand mixer, combine boiling water and oats. Cover and let sit for one hour. It's OK if you leave it a bit longer.

In a medium sized bowl or large measuring cup, whisk together the whole wheat flour, the bread flour, yeast, salt, wheat gluten and dried milk powder. Set aside.

When the oats have cooled for one hour, add the flour mixture and mix in with a wooden spoon or spatula. Pour in the maple syrup and stir together with your wooden spoon or spatula then with your hands to bring together as a soft, sticky dough. Pour the warm melted butter over the dough and mix into the dough with your hands. Cover the bowl and let stand for 10 minutes.

Grease a flat clean surface with olive oil (or, use a Silpat as I do). Remove the dough from the bowl (it will be a bit damp and very sticky) and knead for ten seconds, then form the dough into a smooth round ball. Wipe the bowl clean and grease with olive oil, then return the dough ball to the bowl and leave for 10 minutes. It's OK if you leave it a few minutes longer.

Repeat this ten-second kneading and resting process every 10 minutes twice (a total of three kneadings), then let the dough rest for 30 minutes.

Grease two loaf pans (you can use 8 x 4 or 9 x 5). Divide the dough into two equal pieces, shape into two loaves (which I do by dividing half the dough into two pieces and forming each into a ball, placing them side by side in the pan) and place each in a loaf tin. Lightly cover with plastic wrap and let rise for about one hour, or until the dough crests about an inch over the top of the pans. If using the larger loaf pan, your dough may not crest as much. It should feel lightly springy to the touch.

Preheat oven to 350 degrees. If desired, brush tops of loaves with maple syrup and sprinkle with oatmeal. Place loaves in oven and bake for 40 minutes, rotating pans 180 degrees halfway through the baking time. Remove loaves from the pans and cool on a cooling rack for one hour before slicing. Warm bread is pretty irresistible, but your loaf will have the best texture if you wait until it cools completely. That said, if you cut off a few slices to try, only the cut end will be a little moist, the rest of the loaf will completely normal.

Thursday, April 21, 2011

Wheat Berry Salad


When you're as big a fan of chocolate and cookies as I am, you need to eat a healthy meal that reverses the effects of too many brownies. I can always count on recipes from Ellie Krieger to be delicious in a way that "healthy" becomes an afterthought. That's what I had in mind this week when I made this because this week's Craving Ellie in My Belly recipe was chosen by me!

I love wheat berries and yet I'd never prepared them at home. The preparation is easy - cover with water and boil for about an hour.

I changed up the recipe a bit, substituting toasted pine nuts for the walnuts, cilantro instead of parsley (which I hate), and I added some chopped red bell pepper for color. This one needed a lot of tinkering, which may be a result of using 1 3/4 cups of wheat berries because that's how much I bought.

Here are a few suggestions:
  • When making this recipe, you can do as I did and cook the wheat berries one day and assemble the salad the next.
  • I salted the water the wheat berries cooked in. One thing I've learned from making Ellie's recipes is that they always need salt -  and I'm not a food salter.
  • My dried cherries weren't old but they weren't as soft as I wanted. You could substitute chopped dried apricots, quartered grapes or diced mango for a completely different twist.
  • If you have walnut oil, it would be a great substitution for the olive oil if you're using walnuts.
  • Speaking of the walnuts, toast them in the oven or in a skillet. It will intensify the flavor.
  • The completed salad needed a lot of seasoning. And more lemon juice. An maybe a tiny clove of garlic smashed into a paste and combined with the oil and lemon juice before adding to the salad. Or 1/2 teaspoon of curry powder or smoked Spanish paprika. 
Can you tell I found this a little lacking in flavor? Sad but true, this one was a little boring for me. I'll probably play around with it before I serve it for dinner tonight, just because it needs something else to keep from being blah. If you'd like to see what my fellow Ellie cooks thought, you can find them here.

Wheat Berry Salad - serves 6
1 1/2 cups hard wheat berries
3/4 cup chopped walnuts (I used pine nuts)
2 stalks celery, finely chopped
1/2 cup chopped red bell pepper
1/2 cup tart dried cherries, chopped
1 scallion, white and green parts, chopped
1/2 cup finely chopped parsley leaves (I used cilantro)
3 tablespoons olive oil
2 tablespoons lemon juice, more to taste
Salt and freshly ground black pepper

In a large pot combine the wheat berries and enough water to come 2 inches over the wheat berries. Bring to a boil and cook uncovered for 1 hour, or until tender. Drain and let cool. Toast the walnuts in a medium dry skillet over medium-high heat until fragrant, 2 to 3 minutes.

In a large bowl, combine the wheat berries, walnuts, celery, dried cherries, scallions, parsley, olive oil and lemon juice. Season, to taste, with salt and pepper.

Per Serving:
Calories 360; Total Fat 17 g; (Sat Fat 2 g, Mono Fat 6 g, Poly Fat 8 g) ; Protein 9 g; Carb 46 g; Fiber 8 g; Cholesterol 0 mg; Sodium 15 mg

Excellent source of: Fiber, Vitamin K, Manganese

Monday, April 18, 2011

Chocolate Chip Pecan Banana Bread


As the weather gets warmer, I am often left with spotty bananas as my warmer kitchen makes them ripen faster than we can eat them. Sometimes they get cut up for smoothies, but often they get made into banana bread.

This recipe is adapted from the Flour Bakery recipe. I recently bought the Flour cookbook and I'm discovering the wonderful recipes, which include many of the measurements in grams as well as cups.

This banana bread was delicious. The chocolate played well with the banana, pecans and slight hint of cinnamon. Healthy and delicious don't always go together but this one was a winner. Here's my take on Flour's recipe.

Chocolate Chip Pecan Banana Bread (adapted from Flour Bakery)
Printer-friendly recipe
1 1/2 cups/210 grams all-purpose flour
1 teaspoon baking soda
1/4 teaspoon ground cinnamon
1/2 teaspoon kosher salt
1 cup plus 2 tablespoons/230 grams sugar
2 eggs
1/2 cup/100 grams canola oil
3 1/2 bananas, very ripe, mashed (about 1 1/3 cups/340 grams)
2 tablespoons creme fraiche or sour cream
1 teaspoon vanilla extract
2/3 cup/75 grams pecans, toasted and chopped
3/4 cup/125 grams semisweet chocolate chips

Preheat oven to 325 degrees. Spray a 9x5" loaf pan with cooking spray.

Sift together the flour, baking soda, cinnamon and salt. Beat sugar and eggs with the whisk attachment of your mixer on medium speed until light and fluffy, about 5 minutes. Reduce the speed to low and slowly drizzle in the oil. Add the mashed bananas, sour cream, and vanilla. Fold in the flour mixture, pecans and chocolate chips. Pour into the prepared loaf pan and bake for about 1 hour to 1 hour 15 minutes or until it tests done. Cool in the pan on a rack for 10 minutes before turning out on the rack to cool completely (unless you don't mind if your banana bread looks as mangled as mine, which was cut 10 minutes out of the oven.)

Wednesday, April 13, 2011

Chocolate Pudding Cake


It's Wednesday. Time for some chocolate. Chocolate so deep and dark that it made a frantic workday muuuuch better. It was much easier to eat that it was to get a decent photo against the darkness of my desk.

This chocolate cake is so easy that the steps are melt, whisk, stir and bake. It came from a cookbook that has multipage recipes for grand concoctions. And this humble, moist in the center, crunchy on the outside, melting chocolate cake. Topped with a simple chocolate glaze that had as many fans as the cake did, it was a wonderful way to scratch a midweek chocolate itch.

My dear blogging buddy Peggy of Pantry Revisited chose this recipe for Chocolate with Francois last month. I'm late posting (I'm late in almost everything these days) and I was so grateful to her for choosing such a simple and delectable recipe. If you'd like to make it yourself and scratch that chocolate itch, Peggy has the recipe for you here.

Tuesday, April 5, 2011

Espresso Ice Cream Tart


When life gets busy, I head to the kitchen. Lots of you do rational things (like laundry), but I'm driven to bake and share the bounty of my stress.

When I saw this week's TWD recipe, I thought "This one's easy!" Naturally I had to make it harder, so I pretty much revamped the recipe to suit my whims. This didn't exactly fit in with the time I had available. Oh well!

It seemed like a good idea to make my own coffee ice cream, and when I went to buy the coffee for it, expresso seemed even better than coffee. Making hot fudge seemed like a better idea than melting chocolate over the bottom of the warm tart shell. And making a chocolate shortbread tart shell seemed like an upgrade over the crust in the recipe. The embarrassing photo at the top of this post is proof that this tart made my afternoon (and that of lots of my coworkers) much better. Although it was hard to serve, it was happily attacked and disposed of before it could melt. All of our happy tummies thanked Jessica of Domestic Deep Thought of the Day for her timely pick for Tuesday with Dorie. Jessica has the recipe for you here, and you can find what the other bakers did with this one here.

Friday, April 1, 2011

Salted Butter Break-Ups


What are salted butter break-ups? Easy, fabulously delicious butter cookies. They're also addictive. Make them and you will find it impossible to pass up breaking off a piece every time you pass through the kitchen. The recipe, which is from Around My French Table by Dorie Greenspan, couldn't be easier. The dry ingredients get pulsed in the food processor, then you add the butter pieces and pulse, then a little cold water to bring it all together. Pat the dough into a disk, refrigerate, then bash it into a roundish, thinish giant cookie.  Brush with egg wash and score with the back of your longest knife (I used my slicer). The scoring is optional if you're in a rush.

I've made these twice and have a few of tips to share:
  • If you like the sweet/salty flavor profile, you could up the salt or even use fleur de sel. I love how these taste with fleur de sel.
  • I roll mine out on a sheet of parchment on the BACK of a sheet pan. I use the plastic wrap I stored the dough in on top, and never have to clean my rolling pin. Yes, I am lazy. Using the back of the sheet pan offers a few advantages: no repositioning to roll around the lip of the pan and it's easier to score the dough when the lip isn't in your way. If I need the cookies to cool quickly, I can very easily slide the parchment and giant cookie off the back of the pan onto the cooling rack (or my granite counter top, if I'm in a big rush).
  • Make sure you roll them thin enough, or the middle will be more like a bread than a cookie. Still good, but the star of these cookies is the crispy edge.
  • Experiment with flavors! You could use Dorie's method of rubbing citrus zest into the sugar for lightly lemony cookies (or orange, lime or grapefruit!) Dip them in melted chocolate before serving. Finely chopped nuts or, gasp, cocoa nibs, would take these in an entirely different direction. So would finely chopped rosemary or thyme leaves.
  • My blogging, Twitter and Words with Friends buddy Di suggested dividing the dough in half to make two smaller giant cookies. Her rationale is you would end up with more edge area, and the best part of these cookies is their edge. 
  • Let them cool completely before eating them. The cookie needs cooling time to crisp on the edges. Are you sensing that we like the edges?
Guess I should have taken the photos before sampling the cookie. Next time.

I made these for French Fridays with Dorie. The group made them a couple weeks ago, but I am so behind I'm just getting to posting them. If you want the recipe (after all, who doesn't need an easy butter cookie??), you can find the recipe here.

Monday, March 28, 2011

Daring Bakers (or How I Baked a Hot Mess for My Coworkers)


The March 2011 Daring Baker’s Challenge was hosted by Ria of Ria’s Collection and Jamie of Life’s a Feast. Ria and Jamie challenged The Daring Bakers to bake a yeasted Meringue Coffee Cake.

Even though we know the challenge recipe a month before the posting date, I invariably wait until the day before to bake the Daring Bakers recipe. Or I make it early in the month but wait until the 27th to write my post and can't remember much about the process. Neither of these approaches is recommended. They are called challenges for a reason.

This month, I waited until the day OF the posting to bake, and things went downhill quickly. It was our anniversary and I was a bit scattered. In fact, I forgot to add the yeast until the dough was two thirds through being kneaded. I tossed it in the mixer and hoped for the best. It took twice the usual time to double, but it did. Then M. announced we were going to the coast for lunch. I tucked the dough away in the fridge and off we went. It was a beautiful day after so many rainy days in a row, and Capitola, the little beach town we drove to, had had flooding from the rains. But we managed to find an open restaurant with a patio on the water, and we had lunch. After a bit of walking around (I just got my boot off a few days ago), we came home.

Last night, I pulled the dough out of the fridge and resumed the prep. I rolled out the dough, made the meringue and sprinkled on the filling. Rolling it up was a challenge in itself. The meringue didn’t want to roll up so I folded it more than rolled it. After forming into a roundish shape, I cut the slits, not being afraid to cut too deeply as the recipe instructed. I covered the pastries with plastic wrap, tucked them back into the fridge and went to bed.

When I woke up this morning, I turned on the oven and pulled the pastries out of the fridge. THEY WERE SITTING IN POOLS OF GOO. I knew this would happen. I know that meringue tends to weep, but this meringue cried buckets. And I wanted to cry buckets, too. After sopping up the goo with paper towels, I stuck them in the oven and hoped for the best.

They baked up nicely. I’ll never know if they were supposed to have a different flavor or texture, but my coworkers seemed to enjoy this treat. The meringue mostly melted into the pastry, and the chocolate, pecans and cinnamon gave it a lovely flavor. While it was a success in spite of my neglect, I can only imagine how it was supposed to turn out.

Many thanks to Jamie and Ria for challenging the Daring Bakers to make this coffee cake. Next month I really, really do plan to make the recipe earlier in the month. Really.


*****

I made Jamie’s version of the recipe but I’m also including Ria’s because it sounds so yummy.

FILLED MERINGUE COFFEE CAKE
Makes 2 round coffee cakes, each approximately 10 inches in diameter
The recipe can easily be halved to make one round coffee cake

Ingredients
For the yeast coffee cake dough:

4 cups (600 g / 1.5 lbs.) flour
¼ cup (55 g / 2 oz.) sugar
¾ teaspoon (5 g / ¼ oz.) salt
1 package (2 ¼ teaspoons / 7 g / less than an ounce) active dried yeast
¾ cup (180 ml / 6 fl. oz.) whole milk
¼ cup (60 ml / 2 fl. oz. water (doesn’t matter what temperature)
½ cup (135 g / 4.75 oz.) unsalted butter at room temperature
2 large eggs at room temperature

10 strands saffron for Ria’s version (Saffron might be hard to find and it’s expensive, so you can substitute with ½ - 1 teaspoon of ground cardamom or ground nutmeg. Or simply leave it plain like Jamie’s version)

For the meringue:

3 large egg whites at room temperature
¼ teaspoon salt
½ teaspoon vanilla
½ cup (110 g / 4 oz.) sugar

For the filling:

Jamie’s version:
1 cup (110 g / 4 oz.) chopped pecans or walnuts
2 Tablespoons (30 g / 1 oz.) granulated sugar
¼ teaspoon ground cinnamon
1 cup (170 g / 6 oz.) semisweet chocolate chips or coarsely chopped chocolate

Ria’s version:
1 cup (130 g / 5 oz.) chopped cashew nuts
2 Tablespoons (30 g / 1 oz.) granulated sugar
½ teaspoon garam masala (You can make it at home – recipe below - or buy from any Asian/Indian grocery store)
1 cup (170g / 6 oz.) semisweet chocolate chips ( I used Ghirardelli)

Egg wash: 1 beaten egg
Cocoa powder (optional) and confectioner’s sugar (powdered/icing sugar) for dusting cakes

**Garam (means “hot”) masala (means “mixture”) is a blend of ground spices and is used in most Indian savory dishes. It is used in limited quantities while cooking vegetables, meats & eggs. There is no “one” recipe for it as every household has a recipe of their own. Below, I am going to share the recipe which I follow.

4 or 5 sticks (25 g) Cinnamon Sticks (break a stick and open the scroll)
3 ½ tablespoons (25 g / less than an ounce) Cloves, whole
100 g. (3.5 oz.) Fennel seeds
4 tablespoons (25 g / less than an ounce) Cumin seeds
1 ½ tablespoons (10 g / less than half an ounce) Peppercorns
25 g (less than half an ounce) Green Cardamom pods

In a small pan on medium heat, roast each spice individually (it hardly takes a minute) until you get a nice aroma. Make sure you stir it throughout so that it doesn’t burn. As soon as each spice is roasted, transfer it to a bowl to cool slightly. Once they are all roasted, grind into a fine powder by using a coffee grinder, or pestle & mortar. Store in an airtight container and use as needed.

Directions:

Prepare the dough:

In a large mixing bowl, combine 1 ½ cups (230 g) of the flour, the sugar, salt and yeast.

In a saucepan, combine the milk, water and butter and heat over medium heat until warm and the butter is just melted. Ria’s version: add the 10 saffron threads to the warmed liquid and allow to steep off of the heat for 10 minutes. This will give the mixture a distinct aroma and flavor and a yellowish-orange hue.

With an electric mixer on low speed, gradually add the warm liquid to the flour/yeast mixture, beating until well blended. Increase mixer speed to medium and beat 2 minutes. Add the eggs and 1 cup (150 g) flour and beat for 2 more minutes.

Using a wooden spoon, stir in enough of the remaining flour to make a dough that holds together. Turn out onto a floured surface (use any of the 1 ½ cups of flour remaining) and knead the dough for 8 to 10 minutes until the dough is soft, smooth, sexy and elastic, keeping the work surface floured and adding extra flour as needed.

Place the dough in a lightly greased (I use vegetable oil) bowl, turning to coat all sides. Cover the bowl with plastic wrap and a kitchen towel and let rise until double in bulk, 45 – 60 minutes. The rising time will depend on the type of yeast you use.

Prepare your filling:In a small bowl, combine the cinnamon and sugar for the filling if using. You can add the chopped nuts to this if you like, but I find it easier to sprinkle on both the nuts and the chocolate separately.

Once the dough has doubled, make the meringue:
In a clean mixing bowl – ideally a plastic or metal bowl so the egg whites adhere to the side (they slip on glass) and you don’t end up with liquid remaining in the bottom – beat the egg whites with the salt, first on low speed for 30 seconds, then increase to high and continue beating until foamy and opaque. Add the vanilla then start adding the ½ cup sugar, a tablespoon at a time as you beat, until very stiff, glossy peaks form.

Assemble the Coffee Cakes:

Line 2 baking/cookie sheets with parchment paper.

Punch down the dough and divide in half. On a lightly floured surface, working one piece of the dough at a time (keep the other half of the dough wrapped in plastic), roll out the dough into a 20 x 10-inch (about 51 x 25 ½ cm) rectangle. Spread half of the meringue evenly over the rectangle up to about 1/2-inch (3/4 cm) from the edges. Sprinkle half of your filling of choice evenly over the meringue (ex: half of the cinnamon-sugar followed by half the chopped nuts and half of the chocolate chips/chopped chocolate).

Now, roll up the dough jellyroll style, from the long side. Pinch the seam closed to seal. Very carefully transfer the filled log to one of the lined cookie sheets, seam side down. Bring the ends of the log around and seal the ends together, forming a ring, tucking one end into the other and pinching to seal.

Using kitchen scissors or a sharp knife (although scissors are easier), make cuts along the outside edge at 1-inch (2 ½ cm) intervals. Make them as shallow or as deep as desired but don’t be afraid to cut deep into the ring.

Repeat with the remaining dough, meringue and fillings.

Cover the 2 coffee cakes with plastic wrap and allow them to rise again for 45 to 60 minutes.

Preheat the oven to 350°F (180°C).

Brush the tops of the coffee cakes with the egg wash. Bake in the preheated oven for 25 to 30 minutes until risen and golden brown. The dough should sound hollow when tapped.

Remove from the oven and slide the parchment paper off the cookie sheets onto the table. Very gently loosen the coffee cakes from the paper with a large spatula and carefully slide the cakes off onto cooling racks. Allow to cool.

Just before serving, dust the tops of the coffee cakes with confectioner’s sugar as well as cocoa powder if using chocolate in the filling. These are best eaten fresh, the same day or the next day.

Sunday, March 20, 2011

Irish (Sort of) Soda Bread


I'd never made Irish soda bread up until a month ago, when I made a very traditional recipe from the back of the King Arthur Flour wheatmeal flour package. This recipe from Melissa Murphy's The Sweet Melissa Baking Book wasn't as traditional so I took it in a different direction. I didn't have currants and don't like cloves, so I went with golden raisins, dried cherries and pistachios, plus cinnamon.

Irish soda bread is so easy to make that it was in the oven in 10 minutes and came out at the perfect time to serve with some lentil soup for lunch. It was delicious with the cinnamon, fruit and nuts...not traditional but just perfect.

Julie of A Little Bit of Everything chose this recipe for Sweet Melissa Sundays. Thanks, Julie, for selecting this recipe for us. We enjoyed it a lot.

If you'd like the original recipe, Julie has it for you here. And you can how the other SMS bakers liked it here. If you'd like to make it the way I did, here's the recipe my way.


Irish (sort of) Soda Bread - (adapted from The Sweet Melissa Baking Book)


Printer friendly recipe


1/2 cup golden raisins
1/2 cup dried cherries
1/2 cup shelled pistachios
3 cups all-purpose flour
1 tablespoon baking powder
1 teaspoon baking soda
1/3 cup sugar
1 1/2 teaspoon kosher salt
1 teaspoon Vietnamese cinnamon
6 tablespoons cold unsalted butter, cut into 1/4 inch pieces
1 large egg
1 cup buttermilk

Position a rack in the center of your oven. Preheat the oven to 350 degrees. Line a baking sheet with parchment paper or aluminum foil.

In a medium bowl, combine the raisins, dried cherries and pistachios and set aside. In another bowl, whisk together the egg and buttermilk and set aside. In a bowl of of electric mixer fitted with the paddle attachment, combine the flour, baking powder, baking soda, sugar, salt and cinnamon. Add the cold butter pieces and mix on low speed until the butter is the size of small peas. 

Add the buttermilk mixture to the flour mixture and mix on low speed until just combined. Be sure to scrape down the sides and the bottom of the bowl to combine thoroughly. Do not over mix. Add the fruit and nuts to the dough and mix on low speed for 20 seconds.

Turn the dough onto the lined sheet pan. Kneed the dough lightly, pressing the dough into one large round - or divide it in half to form two small rounds. Don't over handle.

Using a sharp knife, cut the traditional "X" cutting about 1 1/2 inches deep into the top. Bake for 20 minutes, reduce the oven temperature to 325 degrees and bake for an additional 20 minutes for the large loaf, or 10 minutes for the smaller loaves. The loaves will be golden, and a wooden skewer inserted into the center wil come out clean. Remove to a wire rack to cool. It's best the day you make it, but it can be tightly wrapped and stored for a couple of days, or frozen for one month.

Yield: One 3-pound Loaf

Tuesday, March 15, 2011

Citrus Currant Sunshine Muffins


What, no chocolate?

It happens. I've been making Meyer lemon bars and corn muffins and this savory bread, but nary a decadent chocolate recipe. Fear not. I haven't forsaken chocolate. But in the spring (or after an entire week of chocolate), my thoughts turn to fruits and vegetables and I really want it to be spring. So this week I'm willing it to be spring with this aptly named, sunny muffin.

The sunshine in this muffin refers to the generous amount of orange juice, supplemented with a touch of lemon to make it extra perky. I was prepared to be meh about these, but they were actually quite nice. One secret I can share with you is using butter to grease the muffin tins. This made the outsides crunchy, which was a perfect counterpoint to the orangy middles. I know using paper liners is easier, but the crunchy crust stole the show for me. The currants were nice, but don't make a special trip to Whole Foods as I did. Dried cranberries or chopped dried cherries would be lovely as well. I also toyed with chopped crystalized ginger, but that would take these in an entirely different direction.

Lauryn of Bella Baker chose this recipe for the Tuesdays with Dorie bakers to make this week. It's from the epic book Baking From My Home to Yours by Dorie Greenspan. Lauryn will have the recipe for you (I just realized I overbaked mine when I saw her lovely muffins), and you can find the other TWD bakers here. Thanks, Lauryn, for choosing a recipe so evocative of the warmer weather we're all hoping for.

Friday, March 11, 2011

Savory Cheese & Chive Bread


Last week's French Fridays with Dorie recipe was one of the things I made in my flurry of baking two weekends ago. I was celebrating my return to baking (wrist is 98% pain free-yay!) and with the restraint typical of addicts, I was impossible to separate from my kitchen. This bread, with its flavors of chives, Ementhaller cheese and spices was actually my lunch that day. I changed up the recipe quite a bit, using spicy olive oil, substituting pine nuts for walnuts and adding sun-dried tomatoes. It was delicious, though M. and I agreed a little roasted garlic would have made it even better.

The recipe for this loaf came from Dorie Greenspan's book Around My French Table. Every recipe I've tried from this book has been successful and a surprise, either for the flavors or the ease of preparation (or both). Amazon has it for $25. Sweet! But if you're not up for buying the book, you can find the recipe here.

Tuesday, March 8, 2011

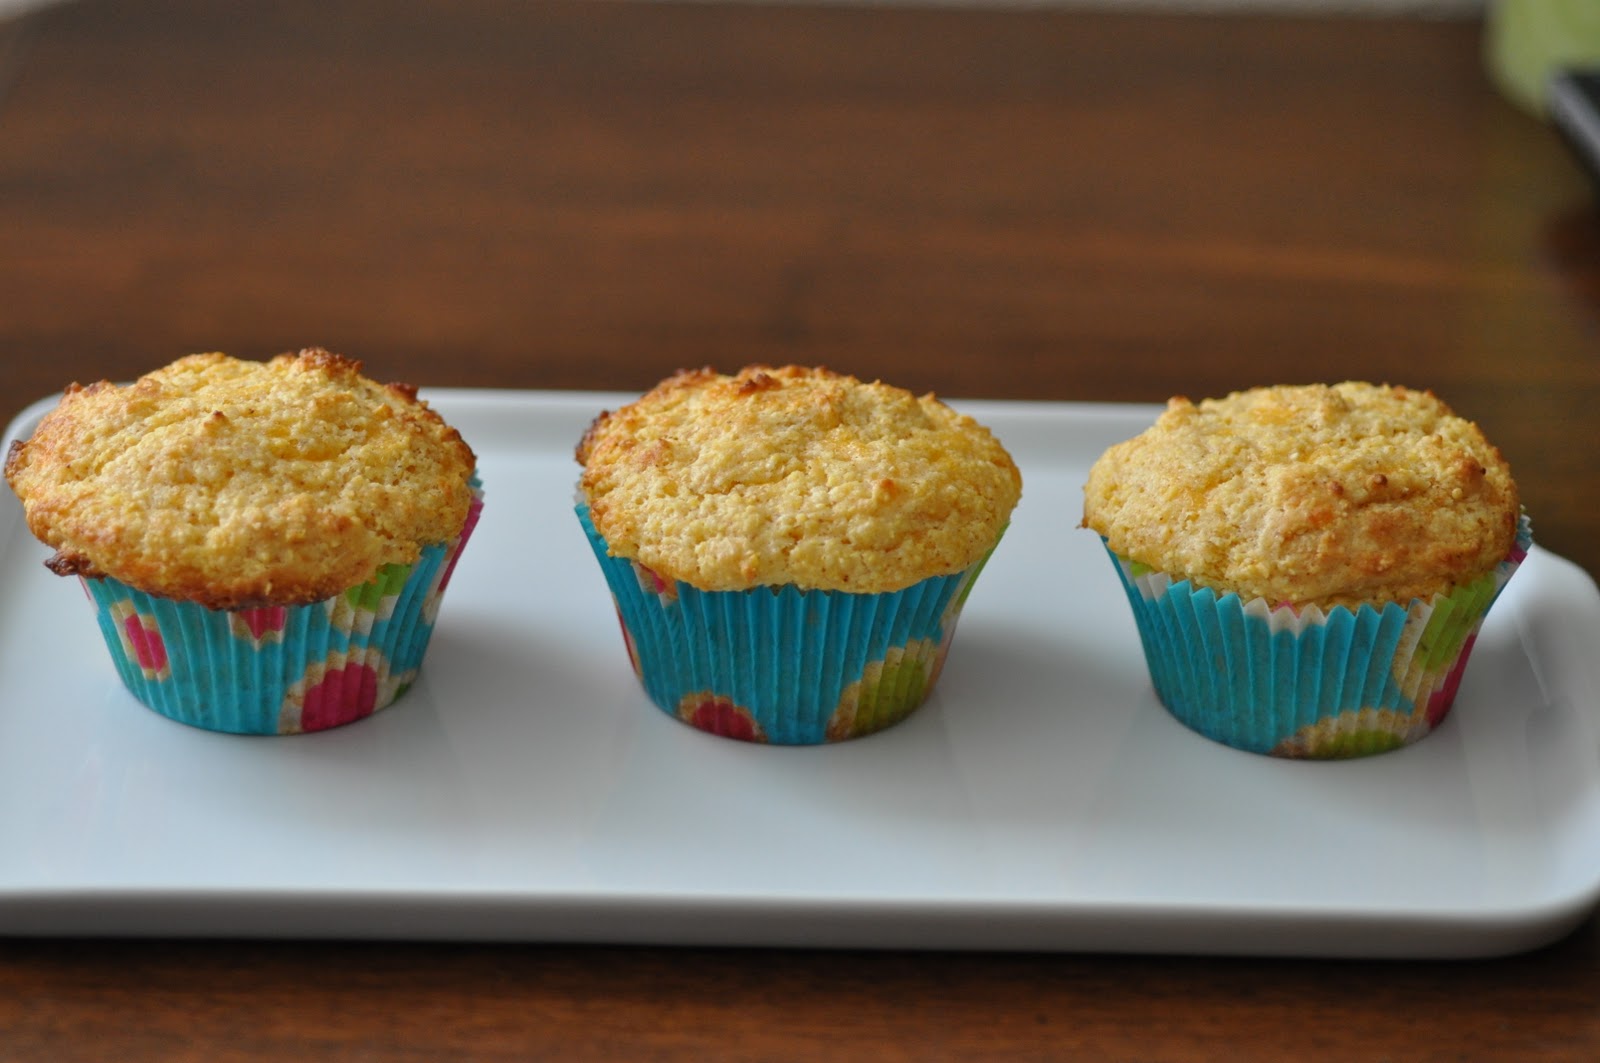
Cheesy Spicy Corny Muffins


Sometimes, you need to trust your instincts in the kitchen. I know that sometimes that results in massive fails, but more often than not, it gives you a great new recipe or helps you avoid disaster.

This week's Tuesdays with Dorie pick was made by Jill of My Next Life. She chose Dorie Greenspan's corniest corn muffin recipe (she'll have Dorie's original recipe for you), but it underwent a transformation in my kitchen. I'm technically from the south (though Miami is its own region) and I don't love sweet cornbread. Strike one. My corn kernels smelled like the freezer. Strike two. And I love cheese...and she lays down a bunt and gets on base!

So I knew I wanted cheddar and I knew I wanted them to have a smoky flavor but not so powerful that it drowned out the corn flavor. Enter my old friend, smoked Spanish paprika. With a couple of tweaks, these little babies were transformed to can't-get-enough savory muffins. They were easy and soooo delicious, so please make them soon.

Cheesy Spicy Corny Muffins
Printer friendly recipe
1 cup all-purpose flour
1 cup yellow cornmeal, preferably stone-ground
2 tablespoons granulated sugar
2 1/2 teaspoons baking powder
1/4 teaspoon baking soda
1/2 teaspoon salt
1/2 teaspoon smoked Spanish paprika
1 cup buttermilk
6 tablespoons unsalted butter, melted and cooled
1 large egg
1 large egg yolk
1 cup shredded cheddar cheese

Center a rack in the oven and preheat the oven to 400 degrees F. Butter or spray the 12 molds in a regular-size muffin pan or fit the molds with paper muffin cups. Place the muffin pan on a baking sheet.

In a large bowl, whisk together the flour, cornmeal, sugar, baking powder, baking soda, salt and paprika. In a large glass measuring cup or another bowl, whisk the buttermilk, melted butter, egg and yolk together until well blended; stir in the cheese. Pour the liquid ingredients over the dry ingredients and, with the whisk or a rubber spatula, gently but quickly stir to blend. Don’t worry about being thorough – the batter will be lumpy. Divide the batter evenly among the muffin cups.

Bake for 15 to 18 minutes (12 minutes for minis), or until the tops are golden and a thin knife inserted into the center of the muffins comes out clean. Transfer the pan to a rack and cool for 5 minutes before carefully removing each muffin from its mold.

Yields 12 muffins

Sunday, March 6, 2011

Chocolate Pudding


As I mentioned on this post, this is chocolate pudding week at Lethally Delicious. It started a week ago with chocolate panna cotta, then we had chocolate pots de creme on Tuesday, and finally good old chocolate pudding today for Sweet Melissa Sundays.

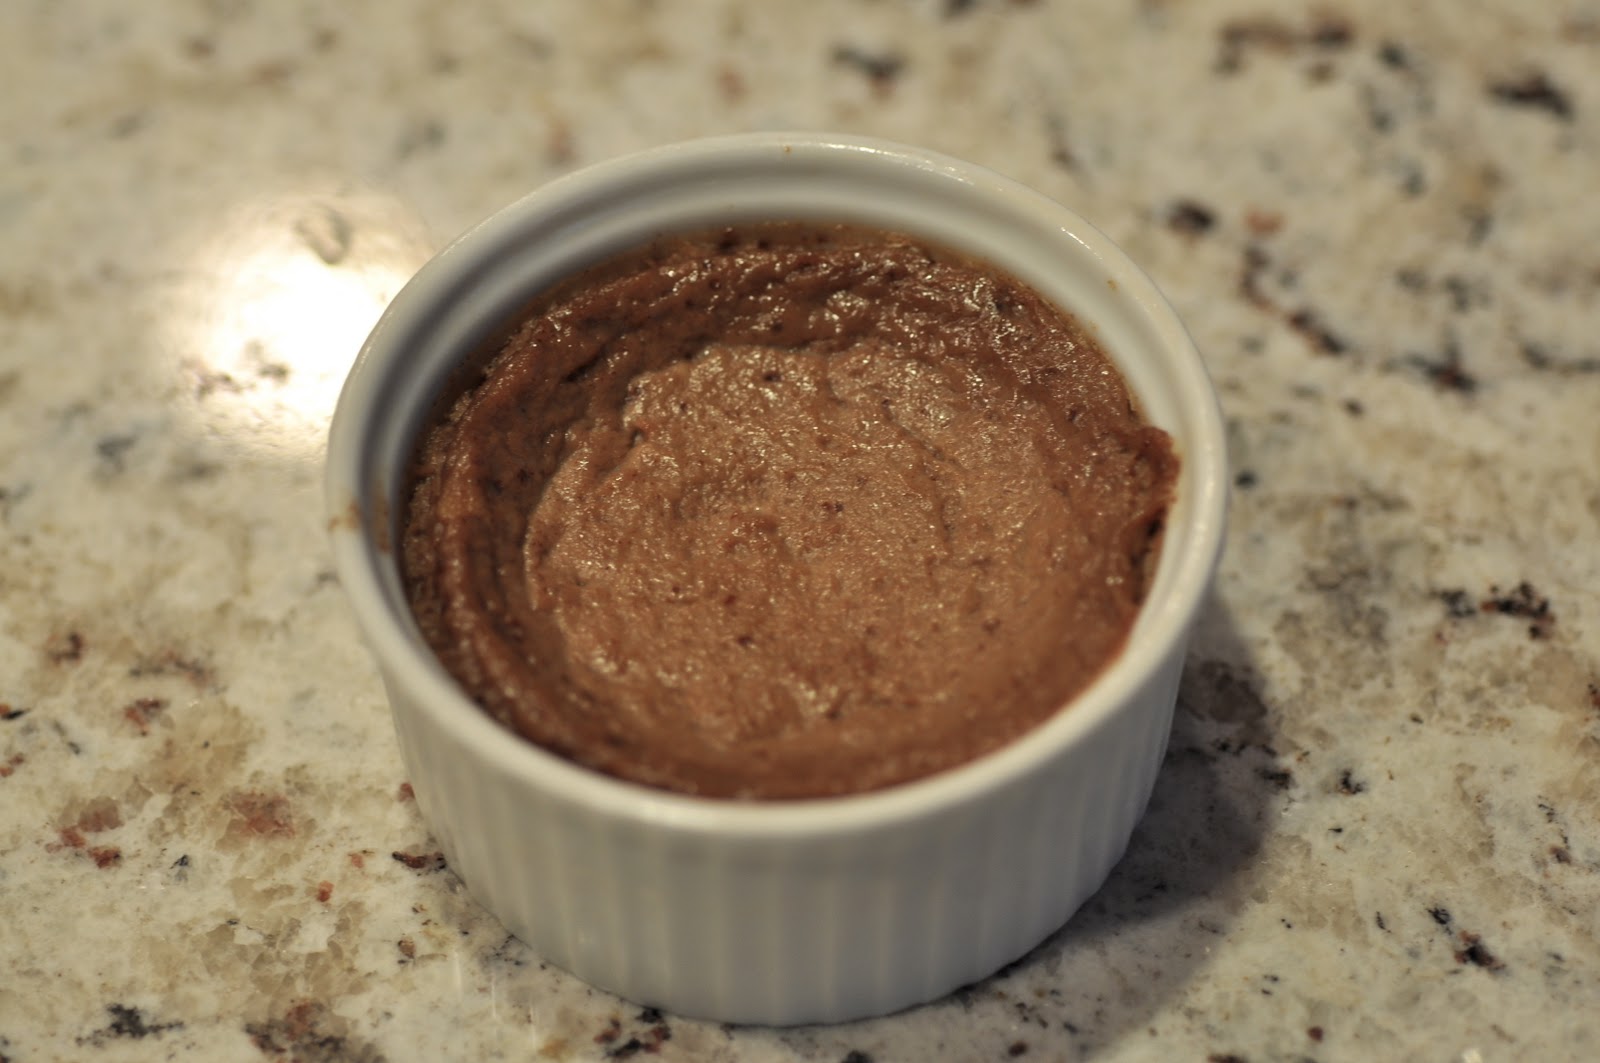
This recipe is from The Sweet Melissa Baking Book by Melissa Murphy. As you can tell from the odd appearance of my pudding, I had a few problems. I didn't have the 6 ounce ramekins the recipe specifies so I used my 4 ounce ramekins. The recipe didn't instruct us to poke holes in the foil so I didn't. My puddings steamed (or was that the intention?) When I checked them after 40 minutes, they were the ugliest little over cooked, water logged desserts I've ever seen!

However, even though they were a bit curdled, they were tasty once they chilled. I debated making them again but couldn't bear to go through another-gasp-three cups of heavy cream. So promise me you won't make them the way I did when you make them!

Chocolate Pudding
3 cups heavy cream
1/4 cup plus 1 tablespoon sugar
2 1/4 ounces best-quality semisweet (58%) chocolate, finely chopped (about 1/2 cup) (I used 70%)
5 large egg yolks
1/2 teaspoon salt
1/4 teaspoon pure vanilla extract

Before you start, position a rack in the center of your oven. Preheat the oven to 300 degrees F. Place six 6-ounce ramekins in a 9 x 13-inch roasting pan.

In a medium, heavy-bottomed saucepan, bring the cream and about half of the sugar to scalding, or until the milk is steaming and tiny bubbles have formed along the edges. Do not boil.

Place the chopped chocolate in a medium-sized bowl. Pour enough scalding cream over the chocolate to cover. Let sit for 5 minutes and then whisk until smooth. Pour the remaining cream over the chocolate and whisk until smooth.

In a large bowl, gently whish together the egg yolks, the remaining half of the sugar, the salt, and vanilla until smooth. Temper the chocolate cream into the yolk mixture, pouring it little by little and whisking all the while. Strain the mixture into a clean pitcher and skim off any bubbles with a spoon.

Pour the mixture into the prepared ramekins. Fill the roasting pan with hot water until it reaches halfway up the sides of the ramekins. Cover the pan with aluminum foil. Bake 50 to 60 minutes, or until just set. Begin checking after 45 minutes. When gently shaken, a pudding should no longer look liquidy; it will move as one mass (albeit somewhat jiggly) and register 150 to 155 degrees F on an instant-read thermometer. Remove to a wire rack to cool to room temperature in the water bath. Remove the ramekins from the pan and refrigerate, uncovered, until cool. Cover with plastic wrap and chill for several hours to overnight before serving.

Tuesday, March 1, 2011

Chocolate Pots de Creme


I didn't plan it this way, but it's shaping up to be pudding week at Lethally Delicious. We started with chocolate panna cotta (Italian chocolate pudding to me), are moving on to chocolate pots de creme (French chocolate pudding) and I'll have another chocolate pudding post on Sunday.

And while I never would have chosen to consume so much heavy cream in one week, it has presented an interesting opportunity to compare and contrast different methods for making what is basically an emulsion of chocolate in heavy cream.
While the panna cotta was thickened with gelatin, these pots de creme rely on egg yolks and cook in a water bath.

I used Valrhona 70% bittersweet chocolate because I was searching for deep chocolate flavor and with only 4 ounces of chocolate for 3 cups of cream and milk, high percentage chocolate was a must. Although the custard seemed like the flavor would be light weight, the finished pots de creme were lushly chocolate and creamy. Very dangerous, I must somehow share the rest...

Check out what the other Tuesdays with Dorie bakers thought here. And please visit Christine of Black Cat Cooking for the recipe. She's our host this week and I have her to thank for finding this week's best pudding recipe!

Monday, February 28, 2011

Cracaos


When I saw that Astheroshe at Accro had chosen cracaos for this month's Chocolate with Francois recipe, I had no idea what it was. Cake, tart, confection? No clue.

It turns out that cracaos are slice and bake chocolate nut cookies. They're easy to mix and bake and rely on Dutch process cocoa, cinnamon, walnuts and pistachios for their personality. I made the dough ahead and sliced off a few to bake fresh when we wanted a cookie. After a few days I baked the rest of the dough and shared the cookies at work.

They were good, though not overly exciting. The first time I made some I baked them 10 minutes (the lower end of the range) and they ended up very crisp though not overdone. After that experience I pulled them out at 8-9 minutes, while they were still chewy with crispy edges. Much better.

If you'd like the recipe, Astheroshe will have it for you here. The other Chocolate with Francois bakers are here. Thanks Astheroshe, for hosting this month and picking an easy, do ahead recipe!