Showing posts with label Rotation. Show all posts
Thursday, November 10, 2011
Jacques Torres's Mudslide Cookies
If ever there was the perfect chocolate cookie, this is it. If I stopped my search for the perfect chocolate experience with this cookie, I wouldn't feel like I was missing anything.
I've tried a lot of chocolate cookies in my time. Many I've baked but I've also bought. Some were mediocre, some good, some delicious, a few fabulous.
This is an extraordinary cookie.
I found them on the Crepes of Wrath (great name!) and I knew I had to make them pronto. I dreamt about them. I daydreamed about them. I plotted to have a free evening to make them. And finally, I managed to put together a few hours (not that they take that long, I just wanted to be able to savor them when not in a work-induced freak out).
I pulled out my Valrhona chocolate and flaky Malden sea salt to get the best result I could. Use the very best chocolate you can afford. You'll use a lot of it, but you won't mind a bit once you've had that first bite. Promise.
Chocolate Mudslide Cookies - adapted from Jacques Torres
Printer-friendly recipe
1/2 cup plus 3 tablespoons all-purpose flour
1 tablespoon baking powder
1/8 teaspoon kosher salt
6 ounces unsweetened chocolate
2 pounds chopped bittersweet chocolate, divided
6 tablespoons unsalted butter, cubed and room temperature
2 1/4 cups plus 1 tablespoon granulated sugar
5 eggs, room temperature
1 1/4 cups plus 1 tablespoon walnuts, chopped
fleur de sel or flaky sea salt, for sprinkling
parchment paper, for lining the baking sheets
Preheat oven to 350 degrees F. Whisk together the flour, baking powder, and salt and set aside. Melt 16 ounces of the bittersweet chocolate with the unsweetened chocolate in a medium pan over medium-low heat, stirring frequently. Set aside to cool while you prepare the rest of the recipe.
Beat together the butter and sugar for a few minutes, until it has the texture of wet sand. Add in the eggs, one at a time, scraping down the sides of the bowl as necessary. Add in the flour mixture, and mix on the lowest speed until just moistened, then beat in the melted chocolate, until just combined. The dough will seem very wet at this point, but it will come together.
Fold the walnuts and remaining 16 ounces of bittersweet chocolate into the batter. Refrigerate the dough for 15-30 minutes before scooping the cookies.
Use a 2-tablespoon sized scoop or two spoons to drop the dough onto the baking sheets (it will be too wet to actually handle with your hands), then sprinkle with a bit of fleur de sel or sea salt. Bake at 350 degrees F for 10 minutes or so. Allow to cool completely before removing from the sheets. Also delicious warm if you can't wait.
Tuesday, July 26, 2011
Mine, Mine, Mine
Even preschoolers know that sharing is caring.
They haven't tried this chocolate sorbet. As much as I love chocolate ice cream, this sorbet is ten times better. With no egg yolks and no custard, the flavor of the chocolate dominates in a very good way.
Start with your best quality bittersweet chocolate (I used Valrhona 70% bittersweet). If you have a scale, put your pan on it and turn it on, then add all of the ingredients. Fewer dishes to wash!
This recipe was selected by Steph at A Whisk and a Spoon for Tuesdays with Dorie. It's so delicious I may never go back to traditional chocolate rice cream. Fortunately I made it within a few days of when I made this mango sorbet (which M. loves), so I don't even have to share with him. Sweet!
Deepest, Darkest Chocolate Sorbet (adapted from Baking From My Home to Yours)
Printer-friendly recipe
7 ounces/200 grams bittersweet chocolate, coarsely chopped
1 cup/232 grams milk
1 cup/222 grams water
3/4 cup/150 grams sugar
Stir the ingredients together in a 3- to 4-quart heavy-bottomed saucepan. Put the pan over medium heat and bring the ingredients to a boil, stirring frequently.
Lower the temperature and boil for 5 minutes, stirring constantly with a heatproof spatula.
Pour the mixture into a heatproof bowl (a one quart measuring cup is perfect) and refrigerate until chilled before churning the sorbet.
Scrape the chilled sorbet mixture into the bowl of an ice cream maker and churn according to the manufacturer’s instructions. Pack the sorbet into a container and freeze for at least 2 hours, until it is firm enough to scoop.
1 cup/222 grams water
3/4 cup/150 grams sugar
Stir the ingredients together in a 3- to 4-quart heavy-bottomed saucepan. Put the pan over medium heat and bring the ingredients to a boil, stirring frequently.
Lower the temperature and boil for 5 minutes, stirring constantly with a heatproof spatula.
Pour the mixture into a heatproof bowl (a one quart measuring cup is perfect) and refrigerate until chilled before churning the sorbet.
Scrape the chilled sorbet mixture into the bowl of an ice cream maker and churn according to the manufacturer’s instructions. Pack the sorbet into a container and freeze for at least 2 hours, until it is firm enough to scoop.
Tuesday, July 12, 2011
Blueberry Cream Scones
Behold, the scone. So few ingredients, so ethereal when executed well, so leaden when executed poorly. I speak from experience because my first batch was a comedy of errors. I was doubling the recipe, but forgot to double the flour until I was about to cut them out. Noting the dough was extremely wet, it dawned on me that I had left half the flour out. I mixed it in with golden raisins and all seemed fine. Knowing scones bake in the blink of an eye in my oven, I set the timer for 18 minutes, 2 less than the recipe called for. When my nose told me they were done, I peeked in at them, thought "but it's not 18 minutes yet" and left them in. Duh! They were browned and smelled done. Why didn't I pull them out??? When I did take them out, they were very brown and the golden raisins were little black knobby things. Accustomed to leaden coffee house scones, my coworkers thought they were pretty good. Tasting one, I knew all my errors cost me the fluffy, flakey texture I was seeking.
So even though I overslept yesterday morning, I was determined to make these scones again. I'd leave out the raisins, sub blueberries instead, add all the flour at the correct time, and take them out when they were done, no matter what the timer said.
This time, I was rewarded with the crispy outside and fluffy inside I was hoping for. These were fabulous, even to a non-blueberry lover like me. And who can beat a recipe you can prepare on a morning when you sleep an hour later than you planned and still make it to work in a respectable time?
Here's what I did that made these such a success this time:
- I cut the butter into small cubes and stuck in the freezer for 10 minutes.
- Add the butter to the dry ingredients and turn your mixer on to the lowest setting. When your mixture looks partly like small peas and partly like oats, pour in the cream mixture.
- When mixture still looks wet and floury, remove bowl from the mixer, and using a spatula, gently mix in the berries
- My triangular scones are never the same size, so I cut mine with a biscuit cutter.
Cream Scones with Blueberries - adapted from Baking From My Home to Yours
Printer-friendly recipe
3 tablespoons sugar
Grated zest of one lemon
In a measuring cup or small bowl, stir the egg and cream together.
Add the flour, baking powder, salt and the zest and sugar mixture to the bowl of a stand mixer fitted with the paddle attachment and turn it on to the very lowest setting. Drop in the butter and mix until the mixture is a combination of pea sized pieces and pieces the size of oats.
Pour the cream mixture over the dry ingredients and when there is still both liquid and flour visible, stop the mixer. Remove the bowl from the mixer and add the blueberries. Gently mix them in with a rubber spatula. Your mixture should have bits of flour peeking out and look pretty shaggy.
1 large egg
2/3 cup/155 grams heavy whipping cream
2 cups/280 grams all-purpose flour
1 tablespoon baking powder
1/4 teaspoon salt
5 tablespoons unsalted butter, cut into small pieces and frozen for about ten minutes
3/4 cup blueberries (or raspberries, chopped cherries, strawberries, or peaches, etc.)
Center a rack in the oven and preheat the oven to 400°F. Line a baking sheet with parchment or a silicone mat.
2/3 cup/155 grams heavy whipping cream
2 cups/280 grams all-purpose flour
1 tablespoon baking powder
1/4 teaspoon salt
5 tablespoons unsalted butter, cut into small pieces and frozen for about ten minutes
3/4 cup blueberries (or raspberries, chopped cherries, strawberries, or peaches, etc.)
Center a rack in the oven and preheat the oven to 400°F. Line a baking sheet with parchment or a silicone mat.
In a small bowl, add the zest to the sugar and with your fingers or a spoon, rub the zest and sugar together to bring out the oils from the zest.
In a measuring cup or small bowl, stir the egg and cream together.
Add the flour, baking powder, salt and the zest and sugar mixture to the bowl of a stand mixer fitted with the paddle attachment and turn it on to the very lowest setting. Drop in the butter and mix until the mixture is a combination of pea sized pieces and pieces the size of oats.
Pour the cream mixture over the dry ingredients and when there is still both liquid and flour visible, stop the mixer. Remove the bowl from the mixer and add the blueberries. Gently mix them in with a rubber spatula. Your mixture should have bits of flour peeking out and look pretty shaggy.
Lightly dust a work surface with flour and turn out the dough. Pat the dough into a rough circle that's about 1 1/4 inches in high, and using a biscuit cutter dipped in flour, cut as many scones as you can, keeping the cuts as close as possible (a little divit on one side will disappear in the oven) and place each scone on the baking sheet. (At this point, the scones can be frozen on the baking sheet, then wrapped airtight. Don't defrost before baking- just add about 2 minutes to the baking time.)
Bake the scones for 16 to 19 minutes, or until their tops are golden brown and firm. Transfer them to a rack and cool for 10 minutes before serving, or wait for them to cool to room temperature.
Makes about 12 scones
Tuesday, June 21, 2011
Date Nut Bread Extraordinaire
The beauty of baking your way through a cookbook is that you routinely discover recipes you never would have chosen on your own, and you absolutely and unexpectedly fall in love with them.
Even though this has happened to me many times with Baking From My Home to Yours, I really couldn't imagine it would happen with this recipe. I've never liked date bread and scarcely ate dates until about six years ago when I gave them another try and found I liked them. But a lifetime of not liking something takes time to reprogram, so my initial reaction to this pick was "great...date bread...ugh." But it was picked by my friend and blogging buddy Mary of Popsicles and Sandy Feet. If Mary had chosen brussels sprouts pudding, I would have gamely attempted it.
The recipe calls for 3 ounces of cream cheese, and cream cheese is something I never buy unless I'm making a cheese cake. It might be the secret weapon that gives this bread its lovely texture and makes it an excellent keeper. The preparation is typical quick bread except that it bakes for a long time. It smelled great while it baked and made me curious (I wouldn't say eager, nope).
Once it cooled, I sliced off a piece and took a tentative bite. It was incredibly delicious, crusty on the outside, soft and tender on the inside, little pockets of sweet, chewy dates contrasted with the crisp crunch of the walnuts. Absolutely fabulous. It was even better the next day. I was in love, so much so that I promptly bought more dates so I could make it again.
If you'd like to try this recipe, Mary has it for you here. She made two versions, one with dates and one with apricots, and they both look scrumptious. As much as we love apricots, I can't imagine making this bread with anything other than dates, my new favorite fruit.
Monday, June 13, 2011
Chocolate Almond Biscotti
My first attempt at biscotti was, shall we say, less than perfect. A lot less. My inexperience led me to follow the recipe exactly without listening to my instincts.
Fast forward a couple of years. I know a lot better and I still make mistakes, but blindly following the recipe is rarely one of them. So I was eager in a nervous sort of way to try this recipe.
What are biscotti? The Italian name roughly translates as "twice baked" because the dough logs are baked, cooled slightly, then sliced. The cookies are then returned to the oven for the final baking, yielding the dry and crumbly texture that makes them so perfect for dipping in coffee or milk.
These were easy to mix up and the scraps (after slicing) were yummy to snack on. In fact, these would be fine cookies without the second baking. I set them out to cool, and then it happened...
They fell in a bowl of melted chocolate.
We gamely ate them anyway, and I must admit that, shockingly, the chocolate dipped biscotti were even better than the plain ones. The plain ones were good, but the chocolate dipped ones were top 10 worthy. Truly.
If you want to make these yummy cookies, visit Jacque of Daisy Lane Cakes. She has the recipe for you here. And it you'd like to dip yours in chocolate, melt about 5 ounces of the very best bittersweet chocolate you can afford, along with 1/2 tablespoon of corn syrup. Tap the biscotti against the plate before dipping (to dislodge any crumbs), dip one side, allow it to drip, then set it down face up on a parchment lined baking sheet. Once dry, your biscotti will keep for a week in a ziptop bag. But they won't last that long.
Monday, April 25, 2011
Maple Oatmeal Wheat Bread
Not to overstate it but this recipe underscores the beauty of the recipe sharing that happens among bloggers.
I first saw this bread on my buddy Margaret's blog Tea and Scones (recipe here). I made it and my coworkers flipped for it. Mags saw my post, and she reworked the recipe to use whole wheat flour (you can see her post here). When I saw her version, I wanted to make it but I wanted to make it even better.
In this case, better means easier. I am in love with Dan Lepard's kneading technique, which involves three 10 second kneads, each followed by a rest period. I wanted to revise this recipe so it would be easy for yeast phobics (I used to be one of you!) to make a flavorful, healthy bread without a stand mixer or big muscles. Although I think this version is just about perfect, I hope you'll make the recipe your own just as Mags and I did.
This bread is wonderful while still warm from the oven, great dipped in a little maple syrup or with maple butter, and makes a spectacular turkey sandwich.
Maple Oatmeal Bread
Printer friendly recipe
2 1/2 cups boiling water
1 cup (80 g) rolled oats
2 1/4 cups (300 g) whole wheat flour
2 3/4 cups (415 g) unbleached bread flour
2 teaspoons instant yeast
2 teaspoons salt
2 tablespoons vital wheat gluten
1/3 cup (50 g) dried milk powder
3/4 cup maple syrup, at room temperature
2 tablespoons butter, melted
Maple syrup for brushing (optional)
Oatmeal for sprinkling (optional)
In bowl of stand mixer, combine boiling water and oats. Cover and let sit for one hour. It's OK if you leave it a bit longer.
In a medium sized bowl or large measuring cup, whisk together the whole wheat flour, the bread flour, yeast, salt, wheat gluten and dried milk powder. Set aside.
When the oats have cooled for one hour, add the flour mixture and mix in with a wooden spoon or spatula. Pour in the maple syrup and stir together with your wooden spoon or spatula then with your hands to bring together as a soft, sticky dough. Pour the warm melted butter over the dough and mix into the dough with your hands. Cover the bowl and let stand for 10 minutes.
In bowl of stand mixer, combine boiling water and oats. Cover and let sit for one hour. It's OK if you leave it a bit longer.
In a medium sized bowl or large measuring cup, whisk together the whole wheat flour, the bread flour, yeast, salt, wheat gluten and dried milk powder. Set aside.
When the oats have cooled for one hour, add the flour mixture and mix in with a wooden spoon or spatula. Pour in the maple syrup and stir together with your wooden spoon or spatula then with your hands to bring together as a soft, sticky dough. Pour the warm melted butter over the dough and mix into the dough with your hands. Cover the bowl and let stand for 10 minutes.
Grease a flat clean surface with olive oil (or, use a Silpat as I do). Remove the dough from the bowl (it will be a bit damp and very sticky) and knead for ten seconds, then form the dough into a smooth round ball. Wipe the bowl clean and grease with olive oil, then return the dough ball to the bowl and leave for 10 minutes. It's OK if you leave it a few minutes longer.
Repeat this ten-second kneading and resting process every 10 minutes twice (a total of three kneadings), then let the dough rest for 30 minutes.
Grease two loaf pans (you can use 8 x 4 or 9 x 5). Divide the dough into two equal pieces, shape into two loaves (which I do by dividing half the dough into two pieces and forming each into a ball, placing them side by side in the pan) and place each in a loaf tin. Lightly cover with plastic wrap and let rise for about one hour, or until the dough crests about an inch over the top of the pans. If using the larger loaf pan, your dough may not crest as much. It should feel lightly springy to the touch.
Preheat oven to 350 degrees. If desired, brush tops of loaves with maple syrup and sprinkle with oatmeal. Place loaves in oven and bake for 40 minutes, rotating pans 180 degrees halfway through the baking time. Remove loaves from the pans and cool on a cooling rack for one hour before slicing. Warm bread is pretty irresistible, but your loaf will have the best texture if you wait until it cools completely. That said, if you cut off a few slices to try, only the cut end will be a little moist, the rest of the loaf will completely normal.
Wednesday, April 13, 2011
Chocolate Pudding Cake
It's Wednesday. Time for some chocolate. Chocolate so deep and dark that it made a frantic workday muuuuch better. It was much easier to eat that it was to get a decent photo against the darkness of my desk.
This chocolate cake is so easy that the steps are melt, whisk, stir and bake. It came from a cookbook that has multipage recipes for grand concoctions. And this humble, moist in the center, crunchy on the outside, melting chocolate cake. Topped with a simple chocolate glaze that had as many fans as the cake did, it was a wonderful way to scratch a midweek chocolate itch.
My dear blogging buddy Peggy of Pantry Revisited chose this recipe for Chocolate with Francois last month. I'm late posting (I'm late in almost everything these days) and I was so grateful to her for choosing such a simple and delectable recipe. If you'd like to make it yourself and scratch that chocolate itch, Peggy has the recipe for you here.
Friday, April 1, 2011
Salted Butter Break-Ups
What are salted butter break-ups? Easy, fabulously delicious butter cookies. They're also addictive. Make them and you will find it impossible to pass up breaking off a piece every time you pass through the kitchen. The recipe, which is from Around My French Table by Dorie Greenspan, couldn't be easier. The dry ingredients get pulsed in the food processor, then you add the butter pieces and pulse, then a little cold water to bring it all together. Pat the dough into a disk, refrigerate, then bash it into a roundish, thinish giant cookie. Brush with egg wash and score with the back of your longest knife (I used my slicer). The scoring is optional if you're in a rush.
I've made these twice and have a few of tips to share:
- If you like the sweet/salty flavor profile, you could up the salt or even use fleur de sel. I love how these taste with fleur de sel.
- I roll mine out on a sheet of parchment on the BACK of a sheet pan. I use the plastic wrap I stored the dough in on top, and never have to clean my rolling pin. Yes, I am lazy. Using the back of the sheet pan offers a few advantages: no repositioning to roll around the lip of the pan and it's easier to score the dough when the lip isn't in your way. If I need the cookies to cool quickly, I can very easily slide the parchment and giant cookie off the back of the pan onto the cooling rack (or my granite counter top, if I'm in a big rush).
- Make sure you roll them thin enough, or the middle will be more like a bread than a cookie. Still good, but the star of these cookies is the crispy edge.
- Experiment with flavors! You could use Dorie's method of rubbing citrus zest into the sugar for lightly lemony cookies (or orange, lime or grapefruit!) Dip them in melted chocolate before serving. Finely chopped nuts or, gasp, cocoa nibs, would take these in an entirely different direction. So would finely chopped rosemary or thyme leaves.
- My blogging, Twitter and Words with Friends buddy Di suggested dividing the dough in half to make two smaller giant cookies. Her rationale is you would end up with more edge area, and the best part of these cookies is their edge.
- Let them cool completely before eating them. The cookie needs cooling time to crisp on the edges. Are you sensing that we like the edges?
Guess I should have taken the photos before sampling the cookie. Next time.
I made these for French Fridays with Dorie. The group made them a couple weeks ago, but I am so behind I'm just getting to posting them. If you want the recipe (after all, who doesn't need an easy butter cookie??), you can find the recipe here.
Tuesday, March 8, 2011
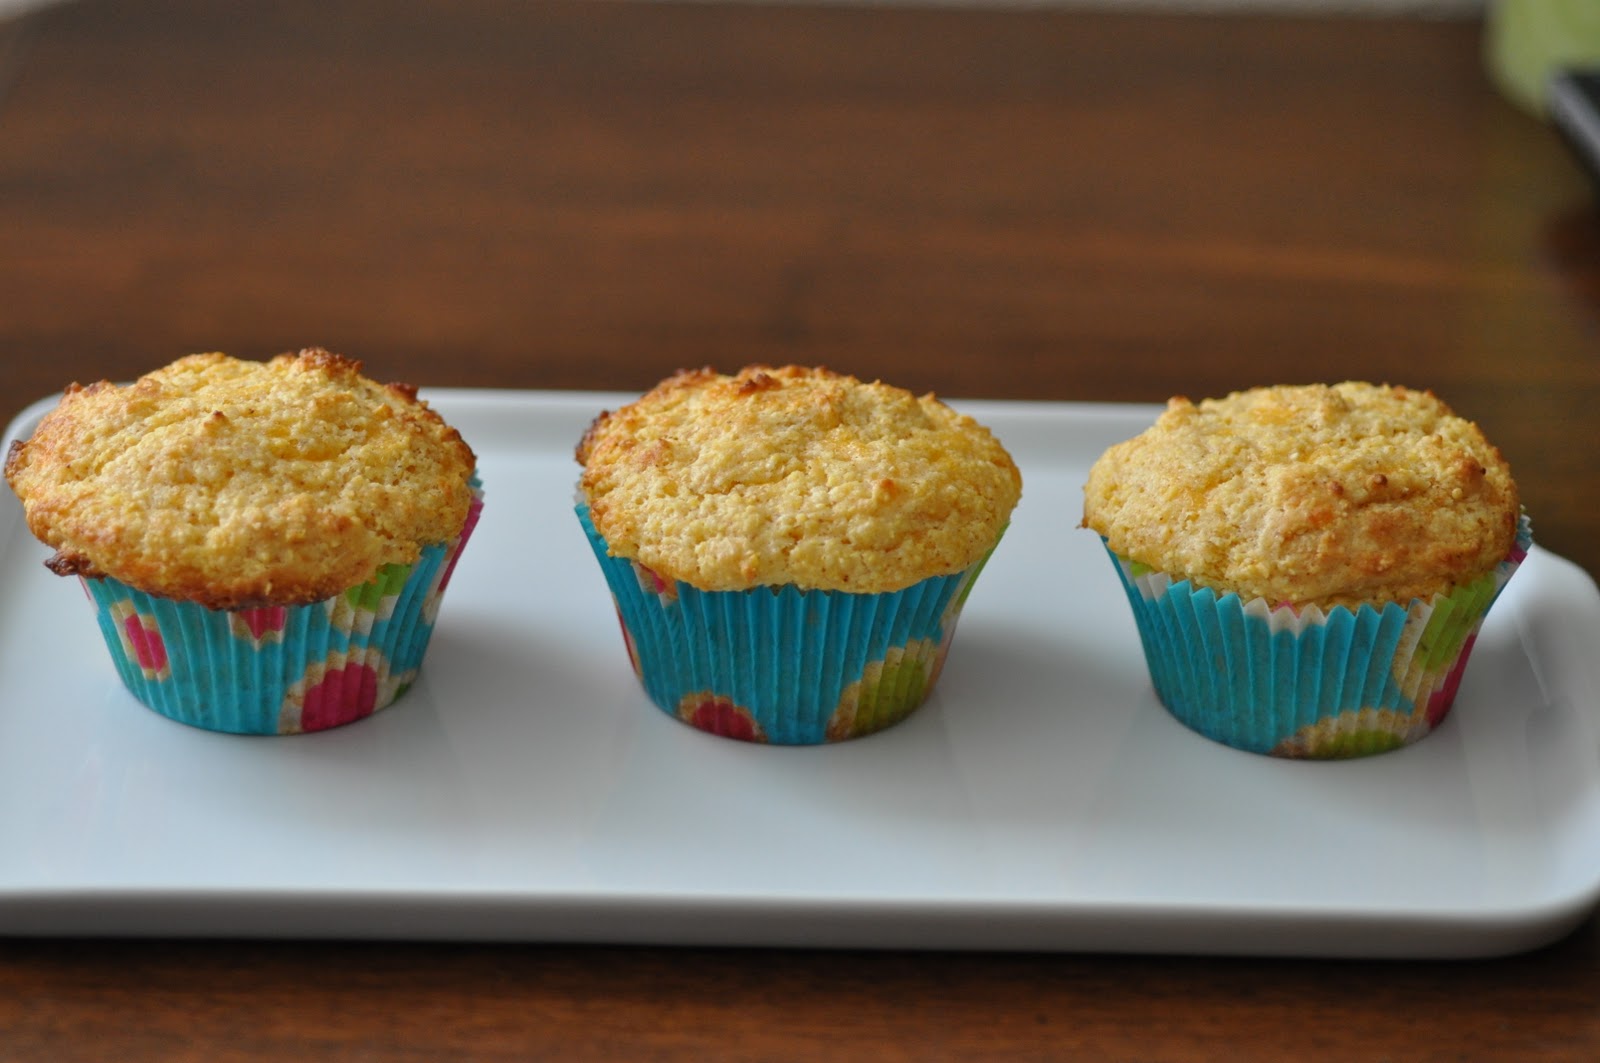
Cheesy Spicy Corny Muffins
Sometimes, you need to trust your instincts in the kitchen. I know that sometimes that results in massive fails, but more often than not, it gives you a great new recipe or helps you avoid disaster.
This week's Tuesdays with Dorie pick was made by Jill of My Next Life. She chose Dorie Greenspan's corniest corn muffin recipe (she'll have Dorie's original recipe for you), but it underwent a transformation in my kitchen. I'm technically from the south (though Miami is its own region) and I don't love sweet cornbread. Strike one. My corn kernels smelled like the freezer. Strike two. And I love cheese...and she lays down a bunt and gets on base!
So I knew I wanted cheddar and I knew I wanted them to have a smoky flavor but not so powerful that it drowned out the corn flavor. Enter my old friend, smoked Spanish paprika. With a couple of tweaks, these little babies were transformed to can't-get-enough savory muffins. They were easy and soooo delicious, so please make them soon.
Cheesy Spicy Corny Muffins
Printer friendly recipe
1 cup all-purpose flour
1 cup yellow cornmeal, preferably stone-ground
2 tablespoons granulated sugar
2 1/2 teaspoons baking powder
1/4 teaspoon baking soda
1/2 teaspoon salt
1/2 teaspoon smoked Spanish paprika
1 cup buttermilk
6 tablespoons unsalted butter, melted and cooled
1 large egg
1 large egg yolk
1 cup shredded cheddar cheese
Center a rack in the oven and preheat the oven to 400 degrees F. Butter or spray the 12 molds in a regular-size muffin pan or fit the molds with paper muffin cups. Place the muffin pan on a baking sheet.
In a large bowl, whisk together the flour, cornmeal, sugar, baking powder, baking soda, salt and paprika. In a large glass measuring cup or another bowl, whisk the buttermilk, melted butter, egg and yolk together until well blended; stir in the cheese. Pour the liquid ingredients over the dry ingredients and, with the whisk or a rubber spatula, gently but quickly stir to blend. Don’t worry about being thorough – the batter will be lumpy. Divide the batter evenly among the muffin cups.
Bake for 15 to 18 minutes (12 minutes for minis), or until the tops are golden and a thin knife inserted into the center of the muffins comes out clean. Transfer the pan to a rack and cool for 5 minutes before carefully removing each muffin from its mold.
Yields 12 muffins
1 cup buttermilk
6 tablespoons unsalted butter, melted and cooled
1 large egg
1 large egg yolk
1 cup shredded cheddar cheese
Center a rack in the oven and preheat the oven to 400 degrees F. Butter or spray the 12 molds in a regular-size muffin pan or fit the molds with paper muffin cups. Place the muffin pan on a baking sheet.
In a large bowl, whisk together the flour, cornmeal, sugar, baking powder, baking soda, salt and paprika. In a large glass measuring cup or another bowl, whisk the buttermilk, melted butter, egg and yolk together until well blended; stir in the cheese. Pour the liquid ingredients over the dry ingredients and, with the whisk or a rubber spatula, gently but quickly stir to blend. Don’t worry about being thorough – the batter will be lumpy. Divide the batter evenly among the muffin cups.
Bake for 15 to 18 minutes (12 minutes for minis), or until the tops are golden and a thin knife inserted into the center of the muffins comes out clean. Transfer the pan to a rack and cool for 5 minutes before carefully removing each muffin from its mold.
Yields 12 muffins
Tuesday, February 8, 2011
You've Got to Have Friends
I never intended to be a blogger. I'm a deeply private person, and until I found some Tuesdays with Dorie bakers, I had no blog, hardly knew what a blog was, and no idea how one "started" one.
Over 2 years later I have become comfortable with the level of sharing when one blogs. And I have found on Twitter a group of like minded bakers who inspire and encourage me, and who mean so much to me. We pop in and out, jump into impromptu baking projects, share experiences with cookbooks and sourdough starters, and prop each other up through life's twists and turns.
It was after a 12 hour day at work that I came home and found an unexpected package waiting for me from Nancy. Inside was a lovely note that brought tears to my eyes, and a gift of a bread pan, a pan just like hers, pans that have been passed down in her family, the ones in which she bakes her glorious breads. After coming into a box of similar pans, Nancy thought of her Twitter pals and wrapped up a pan, wrote a lovely note, and sent off these well-loved pans to some of us. For me, it underlined the meaning of friendships between people who know each other virtually, many of whom have never met.
It had been a while since I had baked a loaf of bread due to a lingering problem with my wrist. I knew the first loaf of bread I wanted to make was one which Nancy had first shared with us, Dan Lepard's simple milk loaf. And so this weekend, I made a double batch of this easy and adaptable bread in my new pan.
Simple milk loaf starts with all-purpose flour and bread flour, but I usually substitute whole wheat flour for a bit more than 1/3 of the total flour. I also add a tad more butter than the recipe calls for, which makes the bread a little silkier than a traditional wheat bread.
Simple Milk Loaf (adapted from Dan Lepard's The Handmade Loaf, thanks to Nancy, Kayte, Margaret, Di, and Tracey)
Printer friendly recipe
350 g (12 oz) whole milk, at room temperature
20 g (3/4 oz) maple syrup (you can use a bit more for a sweeter loaf)
175 g (6 3/4 oz) all-purpose flour
125 g (4 1/2 oz) bread flour
Printer friendly recipe
350 g (12 oz) whole milk, at room temperature
20 g (3/4 oz) maple syrup (you can use a bit more for a sweeter loaf)
175 g (6 3/4 oz) all-purpose flour
125 g (4 1/2 oz) bread flour
200 g (6 3/4 oz) whole wheat flour
1 1/4 tsp fine sea salt
1 tsp instant yeast
37 g (1.5 oz, 3 tablespoons) unsalted butter, melted and cooled slightly, plus extra for brushing loaf
olive oil, for greasing
flour, for dusting
Place the milk and syrup in a measuring cup or bowl and stir together. Whisk the flour, salt and yeast mix together in a mixing bowl. Pour in the milk mixture stir together with a wooden spoon then with your hands to bring together as a soft, sticky dough. Pour the warm melted butter over the dough and mix into the dough with your hands. Cover the bowl and let stand for 10 minutes.
Grease your hands and a flat clean surface with olive oil (or, use a Silpat as I do). Remove the dough from the bowl and knead for ten seconds, then form the dough into a smooth round ball. Wipe the bowl clean and grease with olive oil, then return the dough ball to the bowl and leave for 10 minutes.
Repeat this ten-second kneading and resting process every 10 minutes twice (a total of three kneadings), then let the dough rest for 30 minutes.
Grease a deep 5 x 8 inch loaf pan and dust with flour. Divide the dough into two equal pieces, shape into two balls and place side-by-side into the loaf tin. Cover with plastic wrap and let rise for one and a half hours, or until almost doubled in height.
Preheat oven to 410 F. Brush the top of the loaf with a little melted butter and place in the preheated oven. Bake for 15 minutes, then reduce the heat to 350 F and bake for another 25-30 minutes, or until the top of the loaf is a shiny dark brown and the loaf has come away from the sides of the tin. Remove from the pan and cool on a rack. Warm bread is pretty irresistible, but your loaf will have the best texture if you wait until it cools completely. That said, if you cut off a few slices to try, only the cut end will be a little moist, the rest of the loaf will completely normal.
37 g (1.5 oz, 3 tablespoons) unsalted butter, melted and cooled slightly, plus extra for brushing loaf
olive oil, for greasing
flour, for dusting
Place the milk and syrup in a measuring cup or bowl and stir together. Whisk the flour, salt and yeast mix together in a mixing bowl. Pour in the milk mixture stir together with a wooden spoon then with your hands to bring together as a soft, sticky dough. Pour the warm melted butter over the dough and mix into the dough with your hands. Cover the bowl and let stand for 10 minutes.
Grease your hands and a flat clean surface with olive oil (or, use a Silpat as I do). Remove the dough from the bowl and knead for ten seconds, then form the dough into a smooth round ball. Wipe the bowl clean and grease with olive oil, then return the dough ball to the bowl and leave for 10 minutes.
Repeat this ten-second kneading and resting process every 10 minutes twice (a total of three kneadings), then let the dough rest for 30 minutes.
Grease a deep 5 x 8 inch loaf pan and dust with flour. Divide the dough into two equal pieces, shape into two balls and place side-by-side into the loaf tin. Cover with plastic wrap and let rise for one and a half hours, or until almost doubled in height.
Preheat oven to 410 F. Brush the top of the loaf with a little melted butter and place in the preheated oven. Bake for 15 minutes, then reduce the heat to 350 F and bake for another 25-30 minutes, or until the top of the loaf is a shiny dark brown and the loaf has come away from the sides of the tin. Remove from the pan and cool on a rack. Warm bread is pretty irresistible, but your loaf will have the best texture if you wait until it cools completely. That said, if you cut off a few slices to try, only the cut end will be a little moist, the rest of the loaf will completely normal.
Wednesday, January 19, 2011
Bouchon Roast Chicken
I did it. I made the Bouchon recipe for roasted chicken. I think there should be an Olympic gold medal or Congressional Medal of Honor for this recipe.
I've had the Bouchon cookbook for at least five years, but I never dared to attempt the chicken that gets so much praise. Those who have mastered it acknowledge it is a lot of work, but when I glanced at the recipe, I thought "no big deal."
Yeah, right. I completely glossed over the brine, which has to be heated and then cooled before the chicken goes in. I didn't anticipate a recent freeze would impact the thyme supply in my area (true), and I didn't realize I don't own butcher's twine.
I started with a halal chicken (one which is raised humanely and butchered in accordance with Islamic law), which I rinsed and dried. I had made the brine before leaving for work, and I came home at lunch to stick the bird in the brine. The brine, with its assortment of thyme, parsley, rosemary, garlic, peppercorns, bay leaves, lemon and salt, smelled absolutely fabulous. Even with no prior brining experience, I knew from the smell of the brine that the chicken would be delicious.
When I came home from work, I read the recipe ten times, and searched for a trussing video on YouTube. I found one with none other than Thomas Keller making the Bouchon roast chicken. Except in this video, the chicken roasts on a bed of root vegetables. Great idea. Next time.
Just one problem. No twine and I wasn't about to run to Williams-Sonoma at 7 PM when I still had a chicken to cook. So I improvised--I tied strips of cheesecloth together and used that instead of the twine.
Even with the video, my trussing leaves a lot to be desired. My chicken was listing to one side, and that didn't change after I put it in the pan and into the oven. Keller gives a lot of pointers about roasting the perfect chicken. The chicken should be at room temperature (for more even cooking), sprinkled with lots of kosher salt for even browning, and baked in a hot skillet. After heating the skillet on the cooktop, add a tablespoon of canola oil and let that get hot, then carefully place the chicken in the pan and move to your preheated oven. The chicken roasts at high heat for about 40 minutes. When you remove it from the oven, you baste it all over with the pan juices (to which you've added chopped fresh thyme). Then let it cool until you can eat it without burning off the roof of your mouth.
The chicken turned out to be mindblowingly good. Maybe the best chicken I've ever had. It was so good that I ate the drumsticks and wings for dinner. Standing over the pan. With the skin. I never eat dark meat, or skin, or over the pan. THAT'S how good it was. The breast was even better, moist, tender, melt in your mouth good.
Perhaps it was foolish of me to start my brining and roasting experience with the most revered roast chicken recipe, but my thinking was two-fold. If anyone can teach me how to make a great chicken, it's Thomas Keller. And my blogging friends Kayte and Nancy dreamed up a chef of the month theme for our Twitter avatars, and Kayte chose Thomas Keller for January. We'll all try to cook some dishes from the chef for that month and use one of the photos as our Twitter avatars. Right now, my avatar is Ad Hoc at Home chocolate chip cookies, but this beautiful (to me) roast chicken will have his turn soon. If you'd like the complete recipe (including the brine, which many recipes omit), you can find it here.
Monday, January 17, 2011
Brown Sugar Cookies
I almost passed these cookies by and that would have been a shame. Tracey raved about them, as did a few other bloggers. The first time I made them, I rolled them in sugar as directed, and they were too sweet for me. I now bypass that step (and reduce the sugar and brown sugar accordingly), but I'm giving you the recipe as written in case sweeter cookies are in demand with your tasters.
Brown Sugar Cookies
Adapted from Cook's Illustrated
Printer-friendly version
14 tablespoons unsalted butter
1/4 cup sugar
2 cups brown sugar, divided
2 cups plus 2 tablespoons unbleached flour
1/2 teaspoon baking soda
1/4 teaspoon baking powder
1/2 teaspoon salt
1 large egg
1 large egg yolk
1 tablespoon vanilla extract
Heat 10 tablespoons butter in a deep skillet or large saucepan over medium-high heat until melted, about 2 minutes. Continue to cook, stirring constantly until butter is dark golden brown and has a nutty aroma, 1 to 3 minutes. Remove skillet from the heat and transfer the browned butter to a large heatproof bowl (for real - the first time I made these, my bowl cracked). Stir remaining butter into the hot butter to melt; set aside for 15 minutes.
Adjust oven rack to middle position and preheat oven to 350 degrees. Line two large baking sheets with parchment paper or silicone mats. In a shallow bowl or baking dish, mix the sugar and 1/4 cup packed brown sugar, rubbing between your fingers until combined well; set aside. Whisk the flour, baking soda, and baking powder together in medium bowl; set aside.
Add the remaining 1 3/4 cups brown sugar and the salt to the bowl with the cooled butter and mix until no sugar lumps remain, about 30 seconds. Scrape down the sides of the bowl with a rubber spatula; add egg, yolk, and vanilla and mix until fully incorporated, about 30 seconds. Scrape down sides of bowl. Add flour mixture and mix until just combined, about 1 minute, making sure no flour pockets remain.
Using a medium cookie scoop, scoop out the cookies (you should get approximately 24 cookies, each about 2 tablespoons. Roll the scoops in your hands into balls about 1 1/2 inches in diameter. Working in batches, toss balls in reserved sugar mixture to coat and set on the prepared baking sheet, spacing them about 2 inches apart, 12 dough balls per sheet.
Bake one sheet at a time until cookies are browned and still puffy and edges have begun to set but centers are still soft (cookies will look raw between cracks and seem underdone), 12 to 14 minutes, rotating baking sheet halfway through baking. Do not overbake.
Cool cookies on the baking sheet for five minutes before transferring them to a wire rack. Cool to room temperature. Makes 24 cookies.
Monday, January 10, 2011
Chai, My Way
On cold, wet afternoons, I'll ask M. if he wants a little something warm to drink. Usually the choices are coffee or tea, but he invariably asks for chai.
My chai isn't particularly authentic, but it's easy, tasty and low in fat and sugar. Think of it as an easy way to get in a little extra calcium. Drinking it in front of the fire makes a lazy weekend afternoon extra relaxing.
Chai
Printer friendly recipe
12 ounces 1% milk (use what you have, but I don't recommend fat free)
4 ounces water
1 teaspoon black tea
2 tablespoons brown sugar
1/4 teaspoon (heaping) cinnamon
1/8 teaspoon ground allspice
1/8 teaspoon ground ginger
Put the milk and water in a medium saucepan over low heat and bring the milk up to a simmer, stirring (as it gets hot, watch it carefully as it will well up and over the side of your pan very suddenly). When it reaches the welling-up stage, stir in the remaining ingredients and let it simmer for two minutes, stirring occasionally. Pour through a strainer into a 2 cup measuring cup (I use the one I measured the milk in) and pour into two mugs. Serve immediately. Makes two servings.
Tuesday, January 4, 2011
Midnight Crackles - Dark, Delicious Chocolate Cookies
If you look sideways, this little guy is smiling because he's so delicious
I know it's a new year and lots of people make resolutions that involve eating less chocolate. I think that's a very sad way to start a new year. Fortunately our Tuesdays with Dorie fearless leader Laurie and her trusty helper Julie agree, because they jointly chose this week's recipe for TWD's third anniversary. Midnight Crackles are chocolate cookies with cloves and cinnamon to add mystery to the vast quantity of chocolate. We don't love cloves so I nixed them and added more cinnamon, plus some espresso powder for extra deliciousness.
And, shockingly, I remembered to check the P&Q for input from other TWD bakers. They found the dough very hard after refrigeration, so I chilled the dough for just 20 minutes before scooping the cookies. The dough was still warm in the center, and so easy to scoop. Plus it tasted great!
I baked half of the scooped (and flattened) cookies immediately and refrigerated the rest overnight. There was absolutely no difference in the two batches, except it was nice to have warm chocolate cookies twice in the same weekend.
These were so yummy that it was hard to share but I did, which is good because although I don't make new year's resolutions, I'm all for not gaining more weight. While I was snapping photos for this post, I was moving different cookies to the plate and passing cookies to M. to hold while I posed them. I asked him to find me the perfect cookie but he couldn't find one without cracks. Once I explained that the cracks were desirable he held one up and said "Then this one is the best one." And that's the one you see above. Carefully handpicked by the love of my life.
If you want the recipe (trust me, you do) you can find it here. And make sure you wish Laurie and Julie a happy 3rd anniversary. While you're there, check out what the other TWD bakers thought of these cookies. You can find them here.
Monday, November 15, 2010
Easy All-Butter Pie Crust
I've been cooking and baking since I was 10 years old. My mother was diagnosed with breast cancer (her second time) and it was up to me to feed my stepfather and his two sons. It wasn't pretty, but I learned to cook, more trial by fire than anything, and not even my abysmal failures discouraged me from going back in the kitchen and trying again.
My mother recovered but I kept cooking and baking. Still with mixed results but heck, I was a self taught ten year-old, so they cut me a lot of slack. My mom hated to cook and was thrilled that I liked to. I cooked mostly by trial and error at that age. The years passed and I became a decent cook, but there were certain things I couldn't master, and pie crust was at the top of the list. Until one day, thumbing through cookbooks at the Doubleday bookstore at Bal Harbour Shops in Miami Beach, I found this book:
In it was the pie crust recipe, nay, technique, that would change my life. And that's what I have for you today, a recipe with a technique that will give you the flakiest all-butter pie crust you've ever dreamed of.
Here's how it works (recipe and tips below):
Put the flour in a mixing bowl and freeze for 15 minutes.
Add chunks of butter (just toss them in) and freeze for an additional 15 minutes.
Toss the whole mess on your (clean) counter.
Roll over the mess with your rolling pin, scraping the pile of flour and chunks to the center and roll over it.
Do this until a lot of the butter is in thin flat sheets.
Gather it up and toss it back in the bowl, then pour over a mixture of cold water, cider vinegar and kosher salt.
Lightly flour your counter. Toss the mixture on the counter and roll out (the dough will be a mess so don't worry!)
Gather into a disc, wrap in plastic wrap, roll your rolling pin over it a couple of times and refrigerate for 30 minutes.
Divide the dough in half and roll out the two halves. Congratulations, you've just made pie crust!
When I'm making pie crust for Thanksgiving, I have two mixing bowls going at the same time, one goes in the freezer when the other one comes out, so I can mass produce multiple batches of dough in less time. I find that it makes sense to make extra batches (if I'm messing up my counter, I might as well put some extra batches in the freezer.)
Here are a few tips:
- Always clean your counter first. Even though your crust will bake and the oven's heat will kill any cooties, crumbs from your morning toast or an errant raisin aren't nice additions to your pristine pie crust.
- If you own pets, change your shirt. Nobody loves cat hair in their pie. Not even the cat's owner.
- If the butter chunks seem easy to roll into the flour, your dough is too warm. Gather it back up and put it in the freezer until it firms up a bit.
- Pie crust scraps can be saved to make decorative embellishments for the top. I usually re-roll mine and make jam tarts. Or sometimes I toss them on a sheet pan, sprinkle with cinnamon sugar and bake until lightly browned. Nobody needs to know you have this little treat...it will be our secret!
- If you leave the flour/butter in the freezer too long and your butter chunks are solid, leave the bowl out on the counter for a few minutes.
- When rolling your pie crust, roll from the center to the edge, then rotate. I prefer flouring the counter and rolling on that, but you can sandwich the crust between two pieces of plastic wrap, just be careful to reposition the plastic wrap so it doesn't become embedded in the dough.
Easy All-Butter Pie Crust (adapted from Baking with Jim Dodge)
Makes one 9" double crust or two 9" single crusts
2 cups/280 grams all-purpose flour, plus extra for dusting
14 tablespoons unsalted butter
5 tablespoons cold water
1/2 teaspoon kosher salt
1 tablespoon apple cider vinegar
Put the 2 cups of flour in a mixing bowl and place in the freezer. After 15 minutes, cut butter into 1" chunks and toss into bowl with flour. Combine the water, salt and vinegar, stirring until the salt is dissolved, and put mixture in the fridge.
After 15 minutes, dump flour mixture on your counter and roll over it with a rolling pin. Keep sweeping the pile into the center with a bench scraper or your hand. Keep rolling until all of the butter is in large flakes two to three inches long (or longer). The dough will stick to your rolling pin so scrape it back onto your board and keep rolling.
Once your butter is in large flakes, gather the whole mess and put it back in the mixing bowl. Pour the water mixture over it, and press it together lightly with a spatula. Lightly flour your counter and turn the dough out onto it. Flour your rolling pin and roll the dough out, then using your bench scraper, fold it in half and roll it out to approximately a 9x14" rectangle, fold the two sides in like a letter, and roll out to approximately 8x9". Fold dough in half (it will be crumbly). Carefully wrap it in plastic wrap and refrigerate for 30 minutes before rolling out for your pie.
Divide dough in half and keep the other half wrapped in plastic while you roll the first half. On a well floured counter or board, sprinkle a little flour in the top of the dough and on your rolling pin. Shape the dough into a roundish, 6" patty with your hands before you start rolling (you can roll the crust between pieces of plastic wrap if you like-you won't need to add additional flour this way). Roll from the middle of the dough out to the edge, turn the dough 90 degrees, roll from the center of the dough to the edge, and repeat the turning and rolling until your dough measures approximately 12" across (or about an inch larger for the top crust of a double crust pie). If the dough sticks to the counter while you're rolling it out, sprinkle a little flour underneath. The goal is to use just enough flour to roll it out without sticking. Don't add flour unless you're sticking.
Measure if you've rolled the dough out enough by holding the pie pan over it - it should be a couple inches larger than the pie pan
Brush off any excess flour, gently fold the dough in half, then in half again, and lay it in a buttered 9" pie pan. Unfold the dough and fit it into the pie pan, easing it into the corners gently, trim the excess hanging over the edge of the rim (or fluting the rim if you're so inclined; I'm not a fluter-sorry).
If you're making a two crust pie, you can seal the two crusts together by applying an egg wash to the rim of the bottom crust before you top with the top crust.
I used a glass pie plate here, and flipped pie plate with dough inside over a buttered second pie plate before blind (pre-) baking
To partially bake the crust, preheat your oven to 400 degrees. Butter the OUTSIDE of another pan of the same size. Invert the empty pan on a baking sheet, and put the pan with the pie crust face down on the inverted pan. Bake for 10 minutes, then press down on the pan to force out any air pockets that may have formed. Bake for another 10 minutes, flip over both pie pans and remove the one you placed inside your pie crust. Continue to bake for another 10-15 minutes until the crust is golden brown. Cool on a rack and precede with your pie recipe.
I hope you'll conquer your pie crust fears as I did. Nothing beats a freshly-made pie.
BTW, I'm having a giveaway - you can win a $100 Visa gift card courtesy of BlogHer. You can find it here.
I hope you'll conquer your pie crust fears as I did. Nothing beats a freshly-made pie.
BTW, I'm having a giveaway - you can win a $100 Visa gift card courtesy of BlogHer. You can find it here.
Saturday, October 2, 2010
Seriously Fudgy Brownies, and My 300th Post
It's been quite a week for me. This week:
I celebrated my 2nd blogiversary;
It was my week to pick the recipe for Tuesdays with Dorie (see what I picked here);
French Fridays with Dorie made the first recipe from Around My French Table, gougeres;
This is my 300th post, and
I finally made these brownies.
If you noticed the clouds parting, the sun breaking through and the birds chirping, these brownies are likely the reason. You're welcome.
I found the recipe on the back of the double-Dutch dark cocoa I recently ordered from King Arthur Flour and it's one of those one bowl, throw everything in and stir recipes that are perfect for busy nights. I made them before work Friday and they couldn't be easier. They resulted in absolute rapture among my co-workers. I cynically thought they wouldn't be this good. The expresso powder smelled like it overpowered the cocoa. They are a very chewy, almost wet, brownie. There is a high ratio of sugar. More eggs than I usually see in brownie recipes. Etc.
But no, these were brownie perfection. The edges cook up crunchy from all that sugar. The middle is very fudgy with no perception of flour to break up the chocolaty flavor. I put the nuts on top so they brown and are a counterpoint to the chocolate flavor. I like the punch of chocolate offset with a crunchy nut. I added semisweet chocolate chips to contrast with the deep cocoa flavor.
I don't know how much the double-Dutch dark cocoa had to do with how great these are but I bet a lot. I plan to make these again soon. And often.
Notes:
- I would use a parchment sling next time to make removal from the pan and cutting easier (it may seem like more work but it's worth it);
- Allow to cool completely and sit out for a few hours before serving. It's hard to do, but they'll taste so much better;
- Don't be tempted to cook them until they test done. They won't, and you'll be stuck with overdone brownies. That would be a crying shame. I'm tearing up just thinking about it.
Seriously Fudgy Brownies - (adapted from King Arthur Flour)
2 cups all-purpose flour
3 cups sugar
1 cup powdered sugar
1 1/3 cup Dutch cocoa (preferably King Arthur Flour double-Dutch dark cocoa)
1 1/2 teaspoons kosher salt
2 tablespoons espresso powder
2 cups semisweet chocolate chips
6 eggs
1/4 cup water
1 cup canola oil
1 cup chopped walnuts or pecans (optional)
Preheat oven to 350 degrees. Spray a 13x9 inch pan cooking spray or line with parchment paper to form a sling. If pan is completely lined with the parchment paper, there is no need to use cooking spray.
In a large bowl, whisk together the flour, sugars, cocoa, salt and espresso powder. Stir in the chocolate chips. Add the eggs, water and canola and stir with a spatula until combined. Spread batter evenly in the pan and sprinkle over the nuts if using. Place in the center of the preheated oven and bake for 35-40 minutes, until brownies just start to pull away from the sides of the pan. Cool completely in the pan on a rack. If using parchment, pull the brownies out of the pan using the ends of the sling. Remove the parchment paper and slice into squares.
Friday, October 1, 2010
French Fridays with Dorie - Gougeres
French Fridays with Dorie is the brainchild of Laurie of slush. Laurie formed Tuesdays with Dorie when she committed to cooking her way through Baking From My Home to Yours. The group is so popular that Laurie had to close the group to new members, and several hundred people have been patiently waiting for a group to tackle the new book.
The dilemma of what to make first was solved for me when Dorie herself picked the recipes for the first month of French Fridays with Dorie. And the first recipe for the group is gougeres, the classic French cheesy puff. A group of my Twitter buddies set a date for a Twitter bake-along, and we grated cheese, tweeted and had a great time.
Gougeres are made from choux, and they are easy and delicious. It's very helpful to have all of the ingredients measured and ready. I used my small cookie scoop to measure out the gougeres, and the recipe yielded 46 petit gougeres. I baked some to enjoy for lunch, and the rest went to the freezer (freeze on sheet pans until solid, then transfer to a zip top bag). To prepare frozen gougeres, place them on a baking pan lined with parchment paper or a Silpat, and bake them without defrosting.
These were sooo delicious, they were almost irresistible. They'd make the perfect hors d'oeuvres for a party or an ideal snack if you have company drop by. You can vary the cheese (I used Gruyere) and even add spices to change up the flavor.
Thanks, Dorie, for getting the group off to such a great start with this delicious and easy recipe. If you'd like to see how other FFwD cooks fared, you can find them here. And check out the book here. It's getting rave reviews, and not just from those of us who have followed Dorie for quite some time.
Tuesday, September 28, 2010
Tuesdays with Dorie - Tarte Fine
Fast forward to July 2010. We were picking dates for our vacation and M. pretended to be astonished that I would schedule our vacation around my turn to pick the recipe. Since I thought my turn would fall the first week of October, we decided on mid-October. Imagine my surprise to get an email from Laurie telling me I'd be the host this week. It was time to pick the recipe the group would make.
I knew my ideal pick would be one that had no chocolate (shockingly, since chocolate is a favorite) so that my friend Kayte could enjoy making and eating it. It would have no nuts, since so many of my fellow bloggers (or their kids) don't like nuts. Ditto coconut. It wouldn't have ingredients that are out of season for bakers in the southern hemisphere. There would be no custard, caramel or pie crust to stress out those who feel angst over these things. It would photograph well. It would be easy, not requiring expensive ingredients. And it would be delicious. So I chose tarte fine.
What could be easier? Frozen puff pastry, sliced apples, a squeeze of lemon and a bit of sugar, cream and egg and it's in the oven. It looks impressive, tastes fabulous, and carries you away to Paris. Which is where we'll be vacationing next month. We'll stock up on memories, buy many pastries at Pierre Herme, indulge in our favorite treats at La Maison du Chocolat, fill up on pain Poilane and their punitions, nut oils from J. LeBlanc (I'll definitely be trying the pistachio oil), fresh Maille mustards... And we'll surely have this tart in various guises.
The recipe truly couldn't be easier. Here are my suggestions:
- Unless your kitchen is very warm, get the puff pastry out and let it defrost as you peel and slice the apples. If your kitchen is hot, peel and slice the apples, toss them with a squeeze of lemon, then get out the puff pastry.
- I rolled my puff pastry on a Silpat with a sheet of parchment on top. That way, I didn't roll flour into the puff pastry. It's also easier clean up (laziness is one of my primary drivers). Don't think that the paper that separates the pieces of puff pastry is parchment and you can roll with that. Not that I made that mistake. Well, just once.
- As you roll the puff pastry, start from the middle and roll out toward the edge, but don't roll over the edge repeatedly. You want the pastry to puff around the edges and if it's been compressed by the rolling pin you'll get less lift.
- Move the puff pastry to a sheet pan before arranging the apples.
- I made the tart once with Golden Delicious apples, which Dorie recommends, and once with Gala apples. My Galas were a bit mealy and I had a lot of angst over using them. But they melted into the pastry and the mealiness was not detectable. My tasters liked the tart with Golden Delicious apples but LOVED the one with the Galas. Use whatever apples you like and adjust the sugar accordingly.
- The love of the Gala apple tart may have something to do with using Dorie's playing around suggestion for a sweeter tart: bits of butter, then a sprinkling of sugar on the pastry before arranging the apples. Then brush with melted butter and sprinkle with more sugar. Delicious!
- I didn't glaze either of my tarts, and nobody seemed to mind. The tart I made with the Golden Delicious apples (no butter) could have used a glaze but the version with butter didn't need it.
- If you live close to a Trader Joe's, rejoice! After 18 months of no puff pastry, they are finally stocking their excellent all-butter puff pastry again.
- Although apples are the classic topping for this tart, it should work equally well with any fruit that isn't excessively wet, such as pears or apricots.
- The technique can be just as easily used for savory tarts. Instead of dotting the puff pastry with butter, brush on a little pesto (basil or sun-dried tomato) and top with sliced Roma tomatoes, slivered basil and a sprinkling of cheese, or sliced artichoke hearts, olives and roasted red peppers.
Getting to pick the recipe was an emotional experience for me. This group, this cookbook, its author, and my fellow TWD bloggers all mean the world to me. Dorie is always with me in the kitchen. I imagine her calm, encouraging voice giving advice and reassurance when I need it most. Because of her book I have grown so much as a baker and tried things I never would have attempted before. Dorie, thank you from the bottom of my heart for this cookbook. The recipes I've tried from Around My French Table have exceeded my expectations. French Fridays with Dorie will be a new adventure, and I know you'll be there with me, calmly guiding and encouraging me.
This is Pearl, my co-author
Tarte Fine - makes 6 servings
Printer-friendly recipe
Dorie says: In France, tarte fine is a chic, slender tart made from a slim layer of puff pastry topped with paper-thin slices of apple. In this country, it is often called apple pizza, a name that aptly describes the tart's looks, but not its elegance. In the end, the name is thoroughly unimportant--it's the taste and texture that mean something, and this tart gets a perfect score on those counts.
This tart is an easy treat to put together on short notice, since all it requires is store-bought puff pastry, a couple of apples, an egg, sugar and 15 minutes or less of active cutting and arranging.
The tart can be made with any sweet but lightly acidic apple, but I always make it with firm Golden Delicious apples, because they are most like the apples used for a tarte fine in France.
Note: Pepperidge Farm puff pastry sheets are available in every supermarket across the country. However, I can't encourage you enough to search out an all-butter puff pastry at a local specialty store. If the store doesn't carry frozen all-butter puff pastry, perhaps it will order it for you. The pastry I buy--which is so good I stopped making puff pastry at home--is made by Dufour pastry.
3 medium-size firm sweet apples, preferably Golden Delicious
Squirt of fresh lemon juice
1 sheet (about 8 ounces) frozen puff pastry, preferably all butter (see above), thawed
2 teaspoons milk or heavy cream
1 large egg, beaten with about 1/2 teaspoon water, for egg wash
3-4 teaspoons sugar
1/3 cup apricot jam, for glazing
Center a rack in the oven and preheat the oven to 400 degrees F.
Peel the apples, slice them in half lengthwise and core them. Cut the apples halves in half again and cut about 7 lengthwise slices from each quarter. Put the slices into a bowl and toss them with the lemon juice.
On a sheet of parchment paper or a silicone baking mat, roll the sheet of puff pastry out into a rectangle that is about 9 1/2 x 10 1/2 inches. If the dough is warm, cover it with a piece of plastic wrap and refrigerate it for about 20 minutes. If it's still cool, just lift the paper or mat and place it on a baking sheet. Arrange the apple slices in slightly overlapping rows on the pastry, making sure to leave a border of 1/4 to 1/2 inch bare. Brush the borders lightly with the milk or cream, then brush the egg wash over the apple slices. Sprinkle the apples and the borders with the sugar.
Bake the tart for 30 to 35 minutes, or until the pastry is puffed and golden around the edges and the apples are soft and brown at the borders. Remove from the oven. If you want the edges of the apples to be even darker, you can run the tart under the broiler; be very careful not to overbake the pastry border. (To avoid burning the edges, you can cover the perimeter of the tart with aluminum foil.)
Boil the jam with a smidgen of water until it liquifies, then brush the glaze over the apples (if the jam has any chunks of apricot in it, avoid them).
Serve the tart hot or warm.
Playing Around:
If you'd like a sweeter tart, before you arrange the apple layer, scatter 2 tablespoons butter, cut into bits, over the pastry rectangle and sprinkle over 2 tablespoons sugar. Omit the egg wash, and once the apples are in place, brush them with 3-4 tablespoons melted butter and sprinkle with about 3 tablespoons sugar. Bake and glaze the tart as directed.
Labels:
Apple,
Easy,
French Fridays with Dorie,
Puff Pastry,
Rotation,
Tarts,
TWD
Subscribe to:
Posts (Atom)