Showing posts with label Cinnamon. Show all posts

Thursday, February 16, 2012

Snickerdoodles


I've been enjoying discovering cookies in Alice Medrich's most recent book Chewy Gooey Crispy Crunchy Melt-in Your-Mouth Cookies. I think the enjoyment I get has been heightened by meeting the author when she taught a class in the Bay area. She lives in the area, and she baked cookies for our class herself in her own oven.


That felt very special. It's been about 9 months since that demonstration, but I still love picking up the book and discovering new flavor combinations.

These cookies, though are a classic. Snickerdoodles are a favorite because they have cinnamon sugar coating on a sugar cookie, and they're pretty simple to make. I used Vietnamese cinnamon because of its spicy flavor, and I pressed the cinnamon sugar on to the cookie balls so that the cinnamon would really stick. It must have worked because these were flavorful, if a tad over baked. Watch them carefully and check two minutes before they are supposed to be done. If the edge resists a tiny bit when you nudge it with your finger but you can feel that the edge is the only part that's done, the cookies are perfect chewy cookies. If you like a crisper cookie, bake them a minute or two longer. You can find the recipe here.

Speaking of a crisp cookie, if you're wondering what the wide, flat cookie is, that's the shatteringly thin chocolate chip cookie. I'm not a thin and crispy fan, but these blew me away. Maybe they're next...

Tuesday, February 14, 2012

Brown Sugar-Apple Cheesecake

Behold, the brown sugar-apple cheesecake.


Had I known how good this cheesecake is four years ago when I bought Baking From My Home to Yours, I wouldn't have waited until now to make it.

I am not a cheesecake lover. Cheesecake strikes me as overly heavy and rich, and I'm just not a fan. Or at least I wasn't until I made my first Dorie cheesecake. Her technique involves beating the cream cheese for quite a long time, which makes it light (and eliminates the chunks I used to get). This recipe is a little more complicated, but worth it.

The batter was so yummy. The apples put off such a lovely juice when I sautéed them that I almost cried when I poured it down the sink without thinking. I wished I'd made toast and enjoyed every drop of that elixir. This cheesecake was insanely popular with my tasters at work.

Nancy and Margaret are also working at a feverish pace to get through the remaining recipes in Baking from My Home to Yours. You can find Nancy's post here and Margaret's here.

Brown Sugar-Apple Cheesecake - adapted from Baking From My Home to Yours
Printer-friendly recipe

For the Crust
Scant 2 cups graham cracker crumbs
2 tablespoons light brown sugar
½ teaspoons ground cinnamon (optional)
½ stick (4 tablespoons) unsalted butter, melted

For the Apples
½ stick (4 tablespoons) unsalted butter
3 large Golden Delicious or Fuji apples, peeled, cored and cut into eighths
2 tablespoons (packed) light brown sugar

For the Filling
1½ pounds cream cheese, at room temperature
¾ cup (packed) light brown sugar
6 tablespoons sugar
3 tablespoons apple cider (I used apple juice)
2 teaspoons pure vanilla extract
2 teaspoons ground cinnamon
3 large eggs
¾ cup sour cream
⅓ cup heavy cream

Apple jelly, for glazing, or confectioner’s sugar, for dusting (optional)

To Make the Crust:
Butter the bottom and sides of a 10-inch springform pan.

Put the gingersnaps in a food processor and whir until you have crumbs; you should have a scant 2 cups. (If you are using graham cracker crumbs, just put them in the food processor.) Pulse in the sugar and cinnamon, if you’re using it, then pour over the melted butter and pulse until the crumbs are moistened. Turn the crumbs into the springform pan and, using your fingertips, firmly press them evenly over the bottom and up the sides of the pan as far as they’ll go. Put the pan in the freezer while you preheat the oven. (The crust can be covered and frozen for up to 2 months.)

Center a rack in the oven and preheat the oven to 350 degrees F.

Remove the pan from the freezer and wrap the bottom tightly in aluminum foil, going up the sides. Place the pan on a baking sheet and bake for 10 minutes, or until the crust is set and lightly browned. Transfer to a rack to cool while you make the apples and the filling. Leave the oven at 350 degrees F.

To Make the Apples:
Melt 2 tablespoons of the butter in a large nonstick skillet over medium-high heat. When the foam subsides, toss in half of the apple slices and cook, turning once, until they are golden brown, about 3 minutes. Sprinkle the apples with 1 tablespoon of the sugar and cook them, turning, just until coated, another minute or so. Scrape the apples onto a plate, wipe out the skillet and repeat with the remaining apples. Let the apples cool while you make the filling.

Getting Ready to Bake:
Have a roasting pan large enough to hold the springform pan at hand. Put a kettle of water on to boil.

To Make the Filling:
Working with a stand mixer, preferably fitted with a paddle attachment, or with a hand mixer in a large bowl, beat the cream cheese on medium speed, scraping down the bowl often, for about 4 minutes, or until it is velvety smooth. Add the sugars and beat for another 2 minutes. Beat in the cider, vanilla, and cinnamon. Reduce the speed to low and beat in the eggs one by one, beating for 1 minute after each egg goes in. Finally, beat in the sour cream and heavy cream, beating just until the batter is smooth.

Pour about one third of the batter into the baked crust. Drain the apples by lifting them off the plate with a slotted spoon or spatula, and spoon them into the pan. Cover with the remaining batter and, if needed, jiggle the pan to even the top. Place the springform pan in the roasting pan and pour in enough boiling water to come halfway up the sides of the springform pan.

Bake the cheesecake for 1 hour and 30 to 45 minutes, covering the cake loosely with a foil tent at the 45-minute mark. The cake will rise evenly and crack around the edges, and it should be fully set except, possibly, in the very center-if the center shimmies, that’s just fine. Gently transfer the cake, still in the pan, to a cooling rack and let it cool to room temperature, then refrigerate it for at least 6 hours; overnight would be better.

Run a blunt knife around the edges of the pan to loosen the crust, open the pan’s latch and release and remove the sides.

Tuesday, November 1, 2011

Honey Pecan Scones


Just like a book you read which you come to with no expectations yet end up falling in love with, these scones are a sleeper hit. I made a couple of changes, used my favorite easy mixing technique, and they were a knockout. Absolutely a top three scone, maybe top two.

I might never have gotten around to making these if Jeannette at The Whimsical Cupcake hadn't chosen them for Tuesdays with Dorie. I made them when the November recipes were first announced, and I've been craving one ever since. Try them and you will to.

Honey Pecan Scones - adapted from Baking From My Home to Yours
Printer-friendly recipe

1 large egg
2 tablespoons honey
1/2 cup cold whole milk
1 1/2 cups all-purpose flour
1/2 cup whole wheat flour
1 tablespoon baking powder
1/4 teaspoon baking soda
3/4 teaspoon cinnamon
1/4 teaspoon salt
1 stick cold unsalted butter, cut into small pieces
3/4 cup chopped pecans, toasted

Center a rack in the oven and preheat to 400F. Line a baking sheet with parchment paper or a silicone mat. Lightly flour a counter.

Stir the egg, honey and milk together in a measuring cup or small bowl and set aside.

Measure the flours, baking powder, baking soda, salt and cinnamon into the bowl of a stand mixer fitted with the paddle attachment. Drop in the butter and mix on low speed until the mixture is pebbly. With the mixer on low, pour in the liquid ingredients over the dry ingredients and mix until the mixture is not quite combined. You should have some streaks of flour but no pools of milk. Stir in the chopped pecans with a spatula. The flour should now be almost entirely worked in though streaks are fine (better in fact than no streaks).

Turn the dough onto your lightly floured counter and shape it into a circle about 1" high. Using a 2" biscuit or cookie cutter, cut out the scones, dipping the cutter in flour before each cut and making each cut close to the previous one; place on the baking sheet. Gently gather the scraps together and cut out the remaining scones. You should have about 12 scones.

Bake for 18-20 minutes or until the tops are deeply golden and firmish to the touch. Transfer them to a wire rack. Best served warm, still delicious at room temperature.


Note: My favorite way to make scones is to cut them out, put them on baking sheets, wrap well with plastic wrap and freeze them. To bake, place a few on a parchment lined baking sheet and bake them, still frozen, for 20 minutes.

Thursday, June 16, 2011

Oatmeal Fudge Bars


If imitation is the sincerest form of flattery, then Tracey of Tracey's Culinary Adventures must be blushing. Whenever I'm trolling for a new recipe, her blog is my first stop. Tracey made these bars earlier in the week and like so many things I see there, I had to make them pronto.

That the bars worked in spite of my best efforts to screw up the recipe is a testament to their versatility. Indeed, I added the dry ingredients with the chocolate and still ended up with a sinfully delicious but easy bar cookie. They're flavored with a healthy dose of espresso powder, and I snuck in some cinnamon as well as I learned with this pie that chocolate + espresso + cinnamon = bliss. They're rich, so cut them in tiny little pieces.

Oatmeal Fudge Bars
from America's Test Kitchen Family Baking Book by way of Tracey's Culinary Adventures
Printer-friendly recipe 

Crust/Topping
1 cup (3 oz) quick-cooking oats
1 cup packed (7 oz) light brown sugar
3/4 cup (3 3/4 oz) all-purpose flour
1/4 teaspoon baking powder
1/4 teaspoon baking soda
1/4 teaspoon salt
8 tablespoons (1 stick) unsalted butter, melted

Filling
1/4 cup (1 1/4 oz) all-purpose flour
1/4 cup packed (1 3/4 oz) light brown sugar
2 teaspoons instant espresso
3/4 teaspoon cinnamon (I used Vietnamese for its flavor & spice)
1/4 teaspoon salt
9 oz bittersweet chocolate chips
2 tablespoons unsalted butter
1 large egg

To make the crust: Preheat oven to 325 F. Line an 8-inch square baking pan with parchment paper, leaving an overhang on opposite sides to lift the bars out after they're baked.

In a large bowl whisk together the oats, brown sugar, flour, baking powder, baking soda, and salt. Add the melted butter and use a rubber spatula to stir until all of the dry ingredients are moistened. Set aside about 3/4 cup of the crust mixture for the topping. Press the remaining crust mixture into the prepared baking pan in an even layer.

Bake for 8 minutes, or until light golden brown. Transfer the pan to a wire rack and cool the crust completely, about 1 hour. Maintain oven temperature.

Make the filling: In a medium bowl, whisk together the flour, sugar, espresso powder and salt. Add the chocolate and butter to a medium microwave-safe bowl. Heat in 30 second intervals at 50% power (stirring in between each interval) until the chocolate and butter are melted and smooth. Let cool slightly. Add the egg to the chocolate mixture and whisk to combine. Use a rubber spatula to fold in the flour mixture just until combined (the mixture will be thick).

Spread the filling over the cooled crust. Smooth the top, then sprinkle the reserved oat topping over the filling. Bake for 25-30 minutes, or until a toothpick inserted in the center comes out with a few moist crumbs attached.

Transfer the pan to a wire rack and let the bars cool completely in the pan. Use the parchment overhang to lift the bars out of the pan and cut into squares.

Tuesday, May 24, 2011

Oatmeal Cinnamon Scones


These days, when I flip through my copy of Baking From My Home to Yours I think, I've made that, this one was good, I need to make this one again, or I had to skip this one but I really want to make it soon.

There aren't that many pages left that have recipes we haven't made yet for Tuesdays with Dorie and on some days that makes me sad but on other days excited. Excited for the ones we have left and sad because Dorie's book and this group have changed my life, and by the end of the year we will be done with the book. I have formed so many close friendships and let loose my inner baker. I get endless rewards from baking, blogging and testing my limits through this group. I will never forget the fear I felt before making the coconut-roasted pineapple dacquoise and the euphoria I felt when it was completed. That post brought me my first comment from Dorie, and words can't express how meaningful it was for me.

There are still times I don't listen to my instincts and this week was one of them. My scones were just this side of burned. Yes, I admit I didn't watch my scones (hard to do when you're in the shower) and they baked up into crispy critters. But my coworkers still enjoyed them (maple butter helped moisten them up). Although they were good, I think they would have been a lot better if I took them out of the oven two minutes earlier.

Patricia of Life with a Whisk chose this week's recipe for us. I was very grateful for an easy and adaptable one. Here's what I did:
  • I used cinnamon instead of nutmeg, and it was perfect.
  • Scones don't like to be handled--shaggy dough is preferable. If the dough is cohesive, your scones will be less flaky and light.
  • I made one giant disk of dough instead of two, laid it on parchment instead of flouring the counter and cut it on the parchment before lifting the scones onto a prepared baking sheet. I liked the easier clean up, but this was a very moist dough and needed a little extra flour. My suggestion: go with the parchment, but give it a good dusting of flour.
  • I cut my scones a little thicker than the recipe called for, which is good since they were a little overdone. 
  • Make sure you check your scones early. I checked them one minute before they were supposed to be done and it was already too late.
Thanks to Patricia for hosting this week. If you'd like the recipe, Patricia will have it for you here. And if you want to see what the other bakers thought, you can find them here.

Monday, April 18, 2011

Chocolate Chip Pecan Banana Bread


As the weather gets warmer, I am often left with spotty bananas as my warmer kitchen makes them ripen faster than we can eat them. Sometimes they get cut up for smoothies, but often they get made into banana bread.

This recipe is adapted from the Flour Bakery recipe. I recently bought the Flour cookbook and I'm discovering the wonderful recipes, which include many of the measurements in grams as well as cups.

This banana bread was delicious. The chocolate played well with the banana, pecans and slight hint of cinnamon. Healthy and delicious don't always go together but this one was a winner. Here's my take on Flour's recipe.

Chocolate Chip Pecan Banana Bread (adapted from Flour Bakery)
Printer-friendly recipe
1 1/2 cups/210 grams all-purpose flour
1 teaspoon baking soda
1/4 teaspoon ground cinnamon
1/2 teaspoon kosher salt
1 cup plus 2 tablespoons/230 grams sugar
2 eggs
1/2 cup/100 grams canola oil
3 1/2 bananas, very ripe, mashed (about 1 1/3 cups/340 grams)
2 tablespoons creme fraiche or sour cream
1 teaspoon vanilla extract
2/3 cup/75 grams pecans, toasted and chopped
3/4 cup/125 grams semisweet chocolate chips

Preheat oven to 325 degrees. Spray a 9x5" loaf pan with cooking spray.

Sift together the flour, baking soda, cinnamon and salt. Beat sugar and eggs with the whisk attachment of your mixer on medium speed until light and fluffy, about 5 minutes. Reduce the speed to low and slowly drizzle in the oil. Add the mashed bananas, sour cream, and vanilla. Fold in the flour mixture, pecans and chocolate chips. Pour into the prepared loaf pan and bake for about 1 hour to 1 hour 15 minutes or until it tests done. Cool in the pan on a rack for 10 minutes before turning out on the rack to cool completely (unless you don't mind if your banana bread looks as mangled as mine, which was cut 10 minutes out of the oven.)

Monday, March 28, 2011

Daring Bakers (or How I Baked a Hot Mess for My Coworkers)


The March 2011 Daring Baker’s Challenge was hosted by Ria of Ria’s Collection and Jamie of Life’s a Feast. Ria and Jamie challenged The Daring Bakers to bake a yeasted Meringue Coffee Cake.

Even though we know the challenge recipe a month before the posting date, I invariably wait until the day before to bake the Daring Bakers recipe. Or I make it early in the month but wait until the 27th to write my post and can't remember much about the process. Neither of these approaches is recommended. They are called challenges for a reason.

This month, I waited until the day OF the posting to bake, and things went downhill quickly. It was our anniversary and I was a bit scattered. In fact, I forgot to add the yeast until the dough was two thirds through being kneaded. I tossed it in the mixer and hoped for the best. It took twice the usual time to double, but it did. Then M. announced we were going to the coast for lunch. I tucked the dough away in the fridge and off we went. It was a beautiful day after so many rainy days in a row, and Capitola, the little beach town we drove to, had had flooding from the rains. But we managed to find an open restaurant with a patio on the water, and we had lunch. After a bit of walking around (I just got my boot off a few days ago), we came home.

Last night, I pulled the dough out of the fridge and resumed the prep. I rolled out the dough, made the meringue and sprinkled on the filling. Rolling it up was a challenge in itself. The meringue didn’t want to roll up so I folded it more than rolled it. After forming into a roundish shape, I cut the slits, not being afraid to cut too deeply as the recipe instructed. I covered the pastries with plastic wrap, tucked them back into the fridge and went to bed.

When I woke up this morning, I turned on the oven and pulled the pastries out of the fridge. THEY WERE SITTING IN POOLS OF GOO. I knew this would happen. I know that meringue tends to weep, but this meringue cried buckets. And I wanted to cry buckets, too. After sopping up the goo with paper towels, I stuck them in the oven and hoped for the best.

They baked up nicely. I’ll never know if they were supposed to have a different flavor or texture, but my coworkers seemed to enjoy this treat. The meringue mostly melted into the pastry, and the chocolate, pecans and cinnamon gave it a lovely flavor. While it was a success in spite of my neglect, I can only imagine how it was supposed to turn out.

Many thanks to Jamie and Ria for challenging the Daring Bakers to make this coffee cake. Next month I really, really do plan to make the recipe earlier in the month. Really.


*****

I made Jamie’s version of the recipe but I’m also including Ria’s because it sounds so yummy.

FILLED MERINGUE COFFEE CAKE
Makes 2 round coffee cakes, each approximately 10 inches in diameter
The recipe can easily be halved to make one round coffee cake

Ingredients
For the yeast coffee cake dough:

4 cups (600 g / 1.5 lbs.) flour
¼ cup (55 g / 2 oz.) sugar
¾ teaspoon (5 g / ¼ oz.) salt
1 package (2 ¼ teaspoons / 7 g / less than an ounce) active dried yeast
¾ cup (180 ml / 6 fl. oz.) whole milk
¼ cup (60 ml / 2 fl. oz. water (doesn’t matter what temperature)
½ cup (135 g / 4.75 oz.) unsalted butter at room temperature
2 large eggs at room temperature

10 strands saffron for Ria’s version (Saffron might be hard to find and it’s expensive, so you can substitute with ½ - 1 teaspoon of ground cardamom or ground nutmeg. Or simply leave it plain like Jamie’s version)

For the meringue:

3 large egg whites at room temperature
¼ teaspoon salt
½ teaspoon vanilla
½ cup (110 g / 4 oz.) sugar

For the filling:

Jamie’s version:
1 cup (110 g / 4 oz.) chopped pecans or walnuts
2 Tablespoons (30 g / 1 oz.) granulated sugar
¼ teaspoon ground cinnamon
1 cup (170 g / 6 oz.) semisweet chocolate chips or coarsely chopped chocolate

Ria’s version:
1 cup (130 g / 5 oz.) chopped cashew nuts
2 Tablespoons (30 g / 1 oz.) granulated sugar
½ teaspoon garam masala (You can make it at home – recipe below - or buy from any Asian/Indian grocery store)
1 cup (170g / 6 oz.) semisweet chocolate chips ( I used Ghirardelli)

Egg wash: 1 beaten egg
Cocoa powder (optional) and confectioner’s sugar (powdered/icing sugar) for dusting cakes

**Garam (means “hot”) masala (means “mixture”) is a blend of ground spices and is used in most Indian savory dishes. It is used in limited quantities while cooking vegetables, meats & eggs. There is no “one” recipe for it as every household has a recipe of their own. Below, I am going to share the recipe which I follow.

4 or 5 sticks (25 g) Cinnamon Sticks (break a stick and open the scroll)
3 ½ tablespoons (25 g / less than an ounce) Cloves, whole
100 g. (3.5 oz.) Fennel seeds
4 tablespoons (25 g / less than an ounce) Cumin seeds
1 ½ tablespoons (10 g / less than half an ounce) Peppercorns
25 g (less than half an ounce) Green Cardamom pods

In a small pan on medium heat, roast each spice individually (it hardly takes a minute) until you get a nice aroma. Make sure you stir it throughout so that it doesn’t burn. As soon as each spice is roasted, transfer it to a bowl to cool slightly. Once they are all roasted, grind into a fine powder by using a coffee grinder, or pestle & mortar. Store in an airtight container and use as needed.

Directions:

Prepare the dough:

In a large mixing bowl, combine 1 ½ cups (230 g) of the flour, the sugar, salt and yeast.

In a saucepan, combine the milk, water and butter and heat over medium heat until warm and the butter is just melted. Ria’s version: add the 10 saffron threads to the warmed liquid and allow to steep off of the heat for 10 minutes. This will give the mixture a distinct aroma and flavor and a yellowish-orange hue.

With an electric mixer on low speed, gradually add the warm liquid to the flour/yeast mixture, beating until well blended. Increase mixer speed to medium and beat 2 minutes. Add the eggs and 1 cup (150 g) flour and beat for 2 more minutes.

Using a wooden spoon, stir in enough of the remaining flour to make a dough that holds together. Turn out onto a floured surface (use any of the 1 ½ cups of flour remaining) and knead the dough for 8 to 10 minutes until the dough is soft, smooth, sexy and elastic, keeping the work surface floured and adding extra flour as needed.

Place the dough in a lightly greased (I use vegetable oil) bowl, turning to coat all sides. Cover the bowl with plastic wrap and a kitchen towel and let rise until double in bulk, 45 – 60 minutes. The rising time will depend on the type of yeast you use.

Prepare your filling:In a small bowl, combine the cinnamon and sugar for the filling if using. You can add the chopped nuts to this if you like, but I find it easier to sprinkle on both the nuts and the chocolate separately.

Once the dough has doubled, make the meringue:
In a clean mixing bowl – ideally a plastic or metal bowl so the egg whites adhere to the side (they slip on glass) and you don’t end up with liquid remaining in the bottom – beat the egg whites with the salt, first on low speed for 30 seconds, then increase to high and continue beating until foamy and opaque. Add the vanilla then start adding the ½ cup sugar, a tablespoon at a time as you beat, until very stiff, glossy peaks form.

Assemble the Coffee Cakes:

Line 2 baking/cookie sheets with parchment paper.

Punch down the dough and divide in half. On a lightly floured surface, working one piece of the dough at a time (keep the other half of the dough wrapped in plastic), roll out the dough into a 20 x 10-inch (about 51 x 25 ½ cm) rectangle. Spread half of the meringue evenly over the rectangle up to about 1/2-inch (3/4 cm) from the edges. Sprinkle half of your filling of choice evenly over the meringue (ex: half of the cinnamon-sugar followed by half the chopped nuts and half of the chocolate chips/chopped chocolate).

Now, roll up the dough jellyroll style, from the long side. Pinch the seam closed to seal. Very carefully transfer the filled log to one of the lined cookie sheets, seam side down. Bring the ends of the log around and seal the ends together, forming a ring, tucking one end into the other and pinching to seal.

Using kitchen scissors or a sharp knife (although scissors are easier), make cuts along the outside edge at 1-inch (2 ½ cm) intervals. Make them as shallow or as deep as desired but don’t be afraid to cut deep into the ring.

Repeat with the remaining dough, meringue and fillings.

Cover the 2 coffee cakes with plastic wrap and allow them to rise again for 45 to 60 minutes.

Preheat the oven to 350°F (180°C).

Brush the tops of the coffee cakes with the egg wash. Bake in the preheated oven for 25 to 30 minutes until risen and golden brown. The dough should sound hollow when tapped.

Remove from the oven and slide the parchment paper off the cookie sheets onto the table. Very gently loosen the coffee cakes from the paper with a large spatula and carefully slide the cakes off onto cooling racks. Allow to cool.

Just before serving, dust the tops of the coffee cakes with confectioner’s sugar as well as cocoa powder if using chocolate in the filling. These are best eaten fresh, the same day or the next day.

Monday, February 28, 2011

Cracaos


When I saw that Astheroshe at Accro had chosen cracaos for this month's Chocolate with Francois recipe, I had no idea what it was. Cake, tart, confection? No clue.

It turns out that cracaos are slice and bake chocolate nut cookies. They're easy to mix and bake and rely on Dutch process cocoa, cinnamon, walnuts and pistachios for their personality. I made the dough ahead and sliced off a few to bake fresh when we wanted a cookie. After a few days I baked the rest of the dough and shared the cookies at work.

They were good, though not overly exciting. The first time I made some I baked them 10 minutes (the lower end of the range) and they ended up very crisp though not overdone. After that experience I pulled them out at 8-9 minutes, while they were still chewy with crispy edges. Much better.

If you'd like the recipe, Astheroshe will have it for you here. The other Chocolate with Francois bakers are here. Thanks Astheroshe, for hosting this month and picking an easy, do ahead recipe!

Tuesday, January 25, 2011

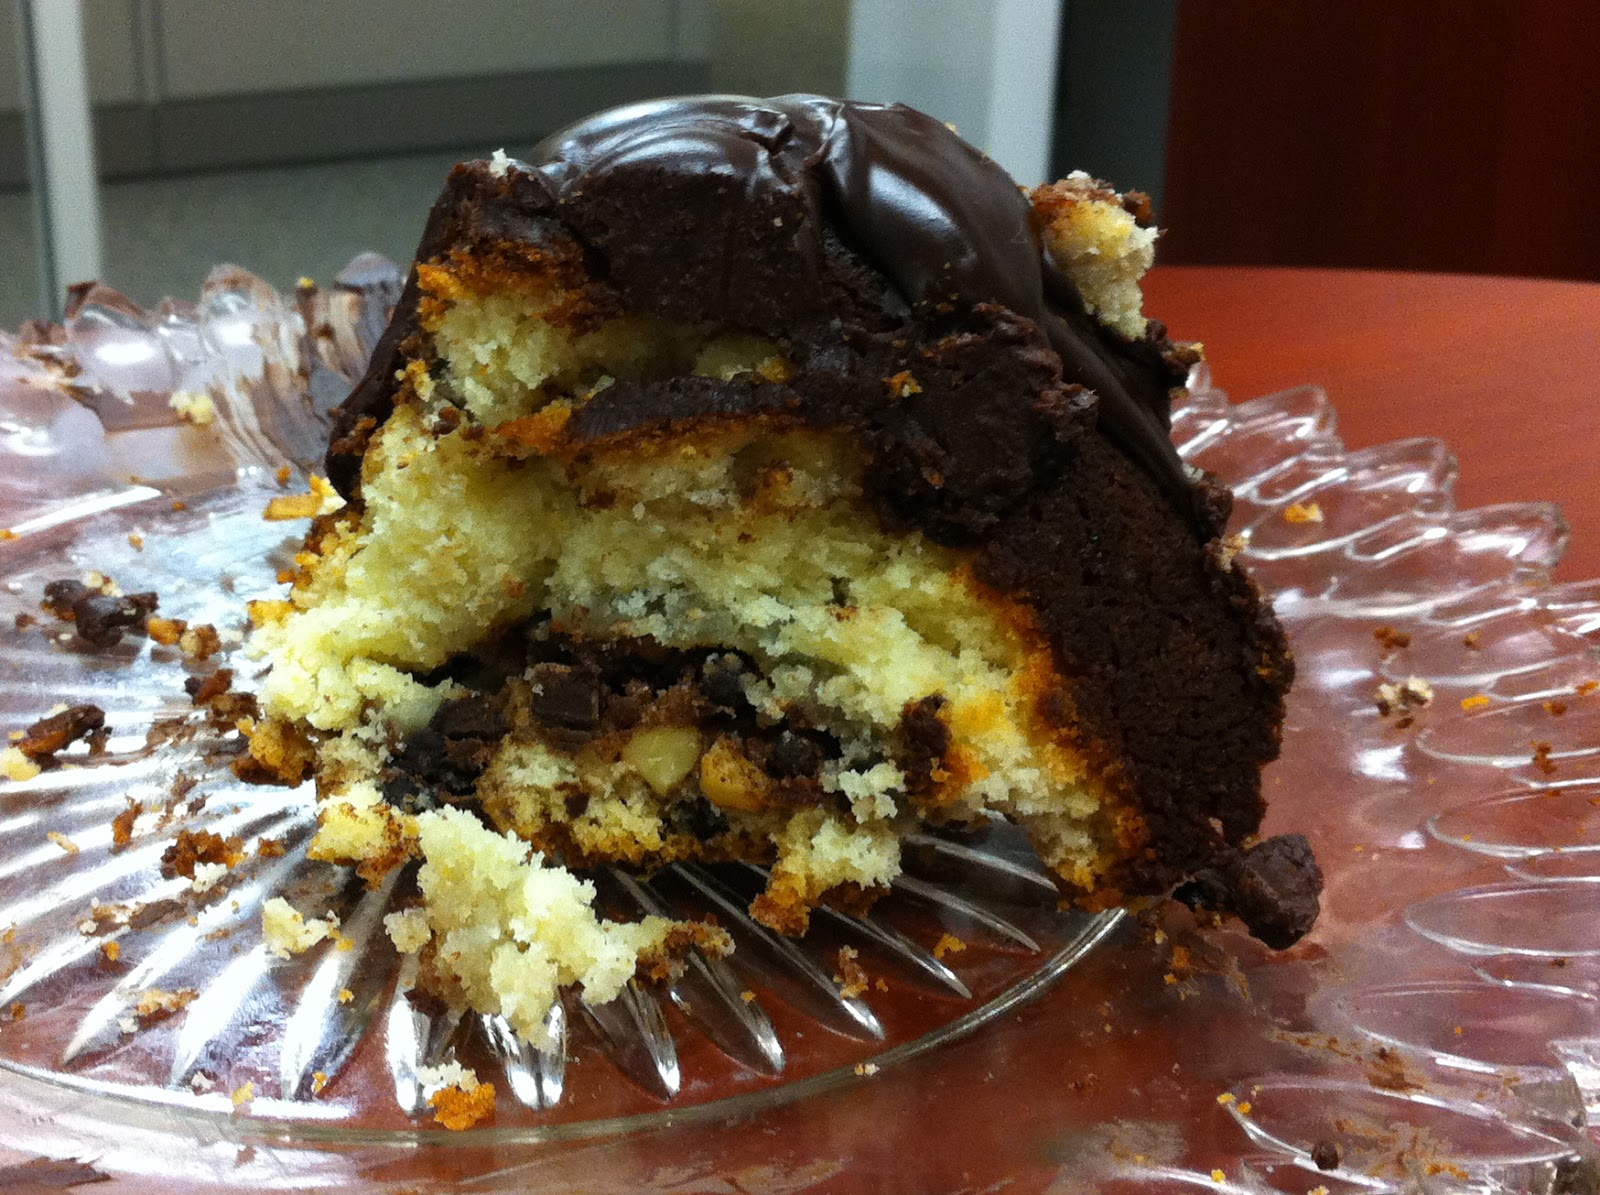
Nutty, Chocolatey, Swirly Sour Cream Bundt Cake


Sour cream pound cake, swirled with a brown sugar-chocolate-cinnamon-nut mixture, baked in a bundt pan. Sounds pretty good, right?

Jennifer of Cooking for Comfort selected this bundt cake (recipe here) for all of the Tuesdays with Dorie bakers to make this week. It's quite a responsibility to pick the recipe and host, and we all have to wait so long before it's our turn. That's why I hate to say it, but I didn't love this one.

I nixed the raisins in the swirl, and doubled the walnuts. I had a lot of trouble with the swirl layer. I couldn't get the batter to cover it because the sugar in the swirl made it very difficult to cover up. Nonetheless, the cake baked up beautifully with a lovely, crunchy exterior, and a chewy, moist interior. So why didn't I love it?


It was the swirl. The swirl didn't melt in the batter and remained as a layer of raw sugar with a sprinkling of walnuts and chocolate chips. It made the cake fall apart when it was sliced. I'm not a fan of dusting things with powdered sugar, so I topped the cake with Dorie's ganache. That made it a crunchy-chewy-falling-apart-dripping-in-chocolate hot mess.

I do plan to make this one again because the flavor and texture of the cake were great. But I'll skip the swirl and add cinnamon to the cake instead.

Thanks, Jennifer, for hosting this week! Sorry I messed up your pick. :-)

Monday, January 24, 2011

Curried Butternut Squash Soup


One of my favorite things about winter (and it's a short list) is when butternut squash shows up in the markets. I serve it many different ways, but our recent favorite is this soup. Once you've wrestled the squash out of it's shell, you're done with the hard work. Change up the spices if you like, and then sit down to enjoy a soup that has absolutely no added cream or butter, yet tastes silky and rich. I like to top it with a dollop of fat free sour cream (or the real stuff, if that's what I have on hand). If you have some butter fried mushrooms, you can put a few of those in the bowl before you ladle in the soup. Butter fried mushrooms? That's another post.


Curried Butternut Squash Soup
Printer friendly recipe
1 butternut squash (approximately 3 pounds)
Olive oil spray
1-2 tablespoons olive oil
1 medium onion, chopped
1 teaspoon curry powder
3/4 teaspoon cinnamon
1/4 teaspoon cayenne pepper
Salt and pepper
2 cups chicken stock

Preheat oven to 450 degrees. Peel the butternut squash and slice it in half lengthwise. Scoop out the strings and seeds, then cut it into 1" cubes. Spray a sheet pan with olive oil spray, toss the squash on the pan and spray it with the olive oil spray. Sprinkle with salt and pepper and bake for 20-30 minutes, until the squash starts browning on some of the edges and it's tender when pierced with the tip of a sharp knife.

While the squash is baking, heat 1 tablespoon of the olive oil in a saute pan over medium heat. Add the onions and saute until they are limp but not brown. Add more olive oil if the pan gets dry or if the onions start getting very brown. When the onions soften add the curry, cinnamon and cayenne to the pan and heat, stirring, for 1-2 minutes to awaken the spices. Set aside until the squash is out of the oven.

In a blender or food processor, puree small batches of the squash with the onions and stock. Don't fill your machine more than 1/3 or 1/2 full when pureeing the vegetables and broth! Hot liquids expand and can cause nasty burns. Puree until smooth (or you can leave it chunky if you like). You may need to add extra stock if your blender is struggling with the squash, which is quite dense. Taste for seasoning and add salt or pepper if needed. Ladle into bowls and serve. Makes 6-8 servings.

Monday, January 10, 2011

Chai, My Way


On cold, wet afternoons, I'll ask M. if he wants a little something warm to drink. Usually the choices are coffee or tea, but he invariably asks for chai.


My chai isn't particularly authentic, but it's easy, tasty and low in fat and sugar. Think of it as an easy way to get in a little extra calcium. Drinking it in front of the fire makes a lazy weekend afternoon extra relaxing.

Chai
Printer friendly recipe

12 ounces 1% milk (use what you have, but I don't recommend fat free)
4 ounces water
1 teaspoon black tea
2 tablespoons brown sugar
1/4 teaspoon (heaping) cinnamon
1/8 teaspoon ground allspice
1/8 teaspoon ground ginger

Put the milk and water in a medium saucepan over low heat and bring the milk up to a simmer, stirring (as it gets hot, watch it carefully as it will well up and over the side of your pan very suddenly). When it reaches the welling-up stage, stir in the remaining ingredients and let it simmer for two minutes, stirring occasionally. Pour through a strainer into a 2 cup measuring cup (I use the one I measured the milk in) and pour into two mugs. Serve immediately.  Makes two servings.

Tuesday, January 4, 2011

Midnight Crackles - Dark, Delicious Chocolate Cookies

If you look sideways, this little guy is smiling because he's so delicious

I know it's a new year and lots of people make resolutions that involve eating less chocolate. I think that's a very sad way to start a new year. Fortunately our Tuesdays with Dorie fearless leader Laurie and her trusty helper Julie agree, because they jointly chose this week's recipe for TWD's third anniversary. Midnight Crackles are chocolate cookies with cloves and cinnamon to add mystery to the vast quantity of chocolate. We don't love cloves so I nixed them and added more cinnamon, plus some espresso powder for extra deliciousness.

And, shockingly, I remembered to check the P&Q for input from other TWD bakers. They found the dough very hard after refrigeration, so I chilled the dough for just 20 minutes before scooping the cookies. The dough was still warm in the center, and so easy to scoop. Plus it tasted great!

I baked half of the scooped (and flattened) cookies immediately and refrigerated the rest overnight. There was absolutely no difference in the two batches, except it was nice to have warm chocolate cookies twice in the same weekend.

These were so yummy that it was hard to share but I did, which is good because although I don't make new year's resolutions, I'm all for not gaining more weight. While I was snapping photos for this post, I was moving different cookies to the plate and passing cookies to M. to hold while I posed them. I asked him to find me the perfect cookie but he couldn't find one without cracks. Once I explained that the cracks were desirable he held one up and said "Then this one is the best one." And that's the one you see above. Carefully handpicked by the love of my life.

If you want the recipe (trust me, you do) you can find it here. And make sure you wish Laurie and Julie a happy 3rd anniversary. While you're there, check out what the other TWD bakers thought of these cookies. You can find them here.

Tuesday, December 21, 2010

Cardamom Crumb Cake


Two days ago, it hit me.

This is not the last week of the month.

I know, I know, at this time of the year it's kind of a "duh!" that I don't have a better grasp of the calendar, but I don't celebrate Christmas so I don't have that great an awareness that the clock is ticking down to Saturday. I thought this week was the week we could do a rewind for Tuesdays with Dorie, and I looked forward to the relaxed posting deadline for the...that I plan to make. No, I'm not telling you what it is. You'll have to come back next week.

Two days ago, I was checking the TWD website and was startled to see the P&Q for Cardamom Crumb Cake. What?!? Oh yeah, it's NOT the last week of the year. Bummer.

Frankly, the recipe didn't thrill me. Cardamom, walnuts, coffee and orange are all things I like, but I couldn't imagine how they would work together. But I trust Dorie and I know she has a terrific palate, so I went with it. And I expanded the panoply of flavors by using some leftover crumb topping from this fruit crumble. That crumb topping is decidedly cinnamon, but cinnamon plays well with the other flavors. Plus, I'm lazy. But you already knew that.

Fortunately, this is a really easy recipe to throw together, and Dorie has thoughtfully arranged it in such a way to minimize dirty dishes. I added chopped walnuts to my leftover crumb topping and sprinkled it over the batter. Dorie gives perhaps the best piece of advice about crumb toppings that I've even seen: lightly press the crumbs into the batter. Brilliant! No more crumbless crumb cake.

Please excuse my iPhone photo. We've had practically zero natural light in the Bay area recently as a series of storms marches through, and I couldn't wait any longer to head into work this morning.

This cake was liked by my tasters, but wasn't wildly popular. I thought the flavor combination was interesting and tasty, and a crumb topping is hard to beat. It was fun to be able to throw it together at the last minute.

Our host this week was Jill of Jill's Blog. I love Jill, she is unusually funny and still visits me even if I can't visit her, like for the past month while I've been trying to get over tendonitis in my right wrist. Jill has the recipe for you here.

Find out how the rest of the Tuesdays with Dorie bakers liked this one, too. You can find them here.

Monday, December 13, 2010

Cinnamon Cookies for Grown Ups


The best cookie exchange you can do is with dear friends, and that's what makes this one so special.

Di of Di's Kitchen Notebook conceived this cookie exchange among several of us who Twitter bake. We often wish we lived closer: I live in California and Marthe lives in the Netherlands, and the rest of the bakers live in between (Di will post a round up in a few days). Yet we often get together virtually and bake and share notes through our tweets.


Normally, I would have selected another recipe but I'm still hampered by tendonitis in my right wrist, so chopping was out of the question. Inspired by a recent post by Katrina, I revamped this recipe to include cinnamon chips. Brown butter + cinnamon = delicious. Perhaps not as delicious as brown butter served by itself, but still yummy.

Cinnamon Cookies for Grown Ups
Printer friendly recipe

1 3/4 cups (8 3/4 ounces) all purpose flour
1/2 teaspoon baking soda
14 tablespoons (7 ounces) unsalted butter
1/2 cup (3 1/2 ounces) granulated sugar
3/4 cups (5 1/4 ounces) packed dark brown sugar
1/2 teaspoon kosher salt
2 teaspoons vanilla extract
1 large egg
1 large egg yolk
1 1/2 cups cinnamon chips

1. Adjust oven rack to middle position and heat oven to 350 degrees. 

2.  Line 2 large (18- by 12-inch) baking sheets with parchment paper. Whisk flour and baking soda together in medium bowl; set aside.

3. Heat 10 tablespoons butter in a deep 10-inch skillet or saucepan over medium-high heat until melted, about 2 minutes. Continue cooking, swirling pan constantly until butter is dark golden brown and has nutty aroma and the milk solids are very brown, 1 to 3 minutes. Remove skillet from heat and, using heatproof spatula, transfer browned butter to large, deep heatproof bowl. Immediately stir remaining 4 tablespoons butter into hot butter until completely melted.

4. Add both sugars, salt, and vanilla to bowl with butter and whisk until fully incorporated. Add egg and yolk and whisk until mixture is smooth with no sugar lumps remaining, about 30 seconds. Let mixture stand 3 minutes, then whisk for 30 seconds. Repeat process of resting and whisking 2 more times until mixture is thick, smooth, and shiny. Using rubber spatula or wooden spoon, stir in flour mixture until just combined. Stir in cinnamon chips and give dough a final stir to ensure no flour pockets remain.

5. Portion out dough: 1 tablespoon will give you 2" cookies and 2 tablespoons of dough yields 3-3 1/2" cookies. Arrange 2 inches apart on prepared baking sheets.

6. Bake cookies 1 tray at a time until cookies are golden brown and still puffy, and edges have begun to set but centers are still soft, 9 to 12 minutes, rotating baking sheet halfway through baking. Transfer baking sheet to wire rack; cool cookies completely before serving.

Makes about 3 dozen 2" cookies


Thanks, Di, for coming up with this fun idea. You're the best! XOXO

Tuesday, September 14, 2010

Peach Upside-Downer


How many of us have looked at the picture of this cake (a cranberry upside-down cake in its original form) and longed to make it? The photo in Baking From My Home to Yours is so inviting. But I never seem to stumble on the photo when cranberries are in season, an obstacle which didn't deter Sabrina of Superflous from making this her pick for Tuesdays with Dorie.

That I'm not the sharpest knife in the drawer won't surprise anyone who knows me outside of this blog, but I never noticed Dorie's Playing Around suggestion to make this a peach upside-downer. Serendipitously, I had two peaches left after making this crumble for the umpteenth time, so a peach upside-downer was easier than finding cranberries in early September.

I had some second thoughts about using brown sugar instead of granulated, or deepening the color of the caramel before pouring it in the cake pan, but I did it the way Dorie said to. In the end, it was great, but I think I'd like a more developed caramel flavor. Or maybe even a brown butter caramel flavor...just because brown butter makes everything better. I'd suggest serving it warm with ice cream. It was fine later in the day, but people who ate it warm out of the oven were much more enthusiastic than those who saved it for later.

If you'd like the recipe to create your own upside-downer, Sabrina will have it for you here. You can find the other TWD members, and their upside-downers, here.

Tuesday, June 15, 2010

Cinnamon Swirl Bread


I don't want to say something polarizing like "Who doesn't love cinnamon bread?", but really, who DOESN'T love cinnamon bread? And if you sneak a little cocoa into the swirl like Dorie Greenspan does, all the better in my book.

I made this a week before leaving on my vacation, and I had no raisins in the pantry. Being lazy and cheap (my main drivers), I passed on making a run to the store to buy some. I thought about adding chopped pecans, but again, I'm lazy, so I didn't.

This lovely, rich yeast bread didn't need either raisins or pecans. It was delicious without. I used instant yeast (my eternal gratitude to Tracey for posting the link for a yeast conversion calculator). I mixed the dough more like the technique in The Bread Baker's Apprentice than in Baking From My Home to Yours (dump most everything in the mixer with the dough hook and turn it on--you can do this when you use instant yeast as it doesn't need to proof).

I mixed the dough, let it rise and shaped it in the evening and let the shaped loaf rise in the fridge overnight. In the morning, I pulled it out an hour before baking to take the chill off, then baked it as Dorie suggested. I highly recommend breaking up the preparation this way as you can have warm cinnamon bread for breakfast without having to get up at 4 AM. Finally, I brushed the hot-from-the-oven loaf with butter and coated the top with cinnamon sugar, a suggestion from The Bread Baker's Apprentice.


The resulting loaf was delicious, familiar yet even better than traditional cinnamon bread. It was almost as good as the BBA cinnamon bread I made last year.

If you want to start a riot, bring just one loaf of this delicious bread into your office.  Swarms of my coworkers made it to the break room after the last crumbs had been devoured, and they were deeply disappointed.

Many thanks to Susan of Food.Baby who chose this recipe for all of the Tuesdays with Dorie bakers to make this week. It's from the book Baking From My Home to Yours by Dorie Greenspan. Susan has the recipe up on her post.

P.S.:  Have you entered my giveaway? You can find it here.
*******
Lethally Delicious is on vacation! I'll be back in a couple of days so responses to comments may be a bit delayed.

Thursday, April 8, 2010

Barefoot Bloggers - Raisin Pecan Oatmeal Cookies


Our first Barefoot Bloggers recipe this month is Raisin Pecan Oatmeal Cookies. I'm not a fan of raisins, nor of oatmeal raisin cookies. But I made them anyway. I kinda had to.

They were my pick.

Excuse me? You don't like raisins or oatmeal raisin cookies and you picked an oatmeal raisin cookie??

I know, I know. I had every intention of picking a savory recipe when my turn came. Like many of us, I belong to several baking groups and need recipes that can also double as dinner. But when I saw Ina Garten make these the other day, I couldn't wait to try them. Mine didn't turn out as lovely as hers, but who cares when they taste amazing? I toyed with replacing the raisins with dried cranberries but found an extra bag of raisins in my pantry. I used Vietnamese cinnamon and the flavor was fantastic. Honestly, the cookie dough was almost better than the baked cookie! And yes, they were good enough that I've overcome my dislike of raisins. Now THAT'S a great cookie.

Tips:
  1. If you love cinnamon, don't be afraid to increase it a little.
  2. I toasted my nuts, chopped them and them combined them (separating any raisins that were stuck together) in a large bowl with the raisins and oatmeal. I find this distributes the mix ins better.
  3. If you wanted to reduce the raisins and add chocolate chips it would probably be pretty yummy.
  4. I made some cookies flattened as Ina instructs and some unflattened, and thought the flattened ones were not chewy enough. If you prefer a thin, crisp cookie, flattened is the way to go. If you like chewy, don't flatten. They will flatten out some but will be chewier.
  5. If you're going for chewy, pull the cookies out when the edge seems set but the middles are still a bit soft. Let them cool on the cookie sheet for a few minutes before transferring them to a cooling rack.

Oatmeal Raisin Pecan Cookies
Printable Recipe

Makes 30-35 cookies

1 1/2 cups pecans
1/2 pound (2 sticks) unsalted butter, at room temperature
1 cup dark brown sugar, lightly packed
1 cup granulated sugar
2 extra-large eggs, at room temperature
2 teaspoons pure vanilla extract
1 1/2 cups all-purpose flour
1 teaspoon baking powder
1 teaspoon ground cinnamon
1 teaspoon kosher salt
3 cups old fashioned oatmeal
1 1/2 cups raisins

Preheat oven to 350 degrees.

Place the pecans on a sheet pan and bake for 5 minutes, until crisp. Set aside to cool. Chop very coarsely.

In the bowl of an electric mixer fitted with the paddle attachment, beat the butter, brown sugar, and granulated sugar together on medium-high speed until light and fluffy. With the mixer on low, add the eggs, one at a time, and the vanilla.

Sift the flour, baking powder, cinnamon, and salt together into a medium bowl. With the mixer on low, slowly add the dry ingredients to the butter mixture. Add the oats, raisins, and pecans and mix just until combined.

Using a small ice-cream scoop or a tablespoon, drop 2-inch mounds of dough onto sheet pans lined with parchment paper. Flatten slightly with a damp hand. Bake for 12-15 minutes, until lightly browned. Transfer the cookies to a baking rack and cool completely.

Wednesday, March 3, 2010

SMS on Wednesday - Cinnamon Sugar Cookies


Cinnamon sugar. Who doesn't love it? It makes me think about toasted cinnamon swirl bread slathered with butter, and plain toast with butter and cinnamon sugar on it. Thanks to Nina of Nina's Cupcakes, I got to enjoy this classic flavor combination in a cookie.

When I first saw Nina picked sugar cookies for this week's Sweet Melissa's Sundays, I was disappointed. For one thing, it wasn't even a real recipe. The book gives directions for rolling it out as a pie crust and casually mentions you can make cut out cookies from the dough, but doesn't give instructions, oven temperature or timing. Thanks to the P&Q, I knew these would need about 10 minutes to bake at 350.

I had a whole other problem. I don't heart sugar cookies. But I wanted to make them because I do heart Nina's blog, so I had to get busy with transforming their plain sugar cookie persona to something flashy and bold.

Enter my favorite Penzey's Vietnamese cinnamon. 1 teaspoon of Vietnamese cinnamon gave these cookies a definite smoky edge. The only other change I made was to leave out the lemon zest, thinking it would complete with the cinnamon.

If you'd like the recipe, you can find it here.

Tuesday, January 12, 2010

TWD - Mrs. Vogel's Scherben

I can't lie. I looked at the name of this week's Tuesdays with Dorie recipe and thought "Mrs. Whose What?" I had never even heard of scherben. But they involved deep frying. All of a sudden, I was anxious.


If you stop by here from time to time, you know that I don't always follow instructions to the letter, and that usually leads to drama. Ever hopeful, I persevere believing that one day I will learn my lesson. Deep frying involves large pots of bubbling oil over a flame which, if not properly monitored, can boil over, ignite and mess up your precious kitchen burn down your house. Caitlin of Engineer Baker successfully baked her scherben, and at one point I tweeted that I might do a side by side comparison of baked and fried.


I don't think I was the only one who looked at this recipe and had a visceral reaction of I'LL BURN DOWN THE HOUSE!!! but I didn't and these were simple to make. I literally made my 1/4 recipe in a large soup bowl. The frying was uneventful, so much so that I turned off the oven and fried all of them.


I don't own a little duster thingy, so I sprinkled on the cinnamon sugar with my fingers. I used regular sugar, and that gave it a nice crunch. M. pronounced them a success, but I may have neglected to tell him they were fried. Maybe even on purpose.

This week's recipe was picked by Teanna of Spork or Foon? Teanna is flat out one of the funniest bloggers out there, whether she's entertaining you with her preparation of Top Chef dishes, thousands of cookies or custom made ice cream. Trust Teanna to select a recipe that many of us might not have noticed until the very end. Thanks, Teanna!

Tuesday, December 22, 2009

TWD - My Favorite Pecan Pie


There are pecan pies, and there are transcendent, life changing, mood lifting, swoon-worthy pecan pies.

This one is one of the latter. Universally LLLLOOOOOOOOVVVVVVVVEEEEDDDD by the gang at Thanksgiving dinner. Not all of them are pecan pie lovers (or even likers), but virtually all 15 people present had some and proclaimed it the sleeper hit of Pie Day Thanksgiving 2009. And that's not surprising as this one, with its notes of cinnamon, coffee and secret sweet pockets of chocolate, is sublime on a plate.

Me? I was prepared to be underwhelmed. I've been making the same pecan pie for over 20 years (yes, I started making pies when I was 6...not). So my pecan pie is obviously the best.

Uh, no. Dorie's is. By miles. So much so that I can't bring myself to consider cheating on it by making another pecan pie.

This pie was SO popular that the only piece left was a crumpled up sliver that I couldn't bring myself to show at the top of this post. So I made it again for yesterday's potluck for our last day in the office until January 5th. Since I was also bringing Dorie's Tall and Creamy Cheesecake, after much angst, I broke down and bought a pre-made pie crust from Trader Joe's. Butter was listed before palm oil, but it was just OK. Since I used a smallish pie plate, I had extra filling left over, which I poured in a buttered ramekin and baked along side the pie.


We have Beth at Someone's in the Kitchen with Brina to thank for picking this one. She went through Dorie Greenspan's book Baking from My Home to Yours and picked out this recipe for us to make this week.

The woman is brilliant. And Dorie? I already *heart* Dorie. Now only more so.