Showing posts with label Sweet Melissa Sundays. Show all posts

Sunday, March 20, 2011

Irish (Sort of) Soda Bread


I'd never made Irish soda bread up until a month ago, when I made a very traditional recipe from the back of the King Arthur Flour wheatmeal flour package. This recipe from Melissa Murphy's The Sweet Melissa Baking Book wasn't as traditional so I took it in a different direction. I didn't have currants and don't like cloves, so I went with golden raisins, dried cherries and pistachios, plus cinnamon.

Irish soda bread is so easy to make that it was in the oven in 10 minutes and came out at the perfect time to serve with some lentil soup for lunch. It was delicious with the cinnamon, fruit and nuts...not traditional but just perfect.

Julie of A Little Bit of Everything chose this recipe for Sweet Melissa Sundays. Thanks, Julie, for selecting this recipe for us. We enjoyed it a lot.

If you'd like the original recipe, Julie has it for you here. And you can how the other SMS bakers liked it here. If you'd like to make it the way I did, here's the recipe my way.


Irish (sort of) Soda Bread - (adapted from The Sweet Melissa Baking Book)


Printer friendly recipe


1/2 cup golden raisins
1/2 cup dried cherries
1/2 cup shelled pistachios
3 cups all-purpose flour
1 tablespoon baking powder
1 teaspoon baking soda
1/3 cup sugar
1 1/2 teaspoon kosher salt
1 teaspoon Vietnamese cinnamon
6 tablespoons cold unsalted butter, cut into 1/4 inch pieces
1 large egg
1 cup buttermilk

Position a rack in the center of your oven. Preheat the oven to 350 degrees. Line a baking sheet with parchment paper or aluminum foil.

In a medium bowl, combine the raisins, dried cherries and pistachios and set aside. In another bowl, whisk together the egg and buttermilk and set aside. In a bowl of of electric mixer fitted with the paddle attachment, combine the flour, baking powder, baking soda, sugar, salt and cinnamon. Add the cold butter pieces and mix on low speed until the butter is the size of small peas. 

Add the buttermilk mixture to the flour mixture and mix on low speed until just combined. Be sure to scrape down the sides and the bottom of the bowl to combine thoroughly. Do not over mix. Add the fruit and nuts to the dough and mix on low speed for 20 seconds.

Turn the dough onto the lined sheet pan. Kneed the dough lightly, pressing the dough into one large round - or divide it in half to form two small rounds. Don't over handle.

Using a sharp knife, cut the traditional "X" cutting about 1 1/2 inches deep into the top. Bake for 20 minutes, reduce the oven temperature to 325 degrees and bake for an additional 20 minutes for the large loaf, or 10 minutes for the smaller loaves. The loaves will be golden, and a wooden skewer inserted into the center wil come out clean. Remove to a wire rack to cool. It's best the day you make it, but it can be tightly wrapped and stored for a couple of days, or frozen for one month.

Yield: One 3-pound Loaf

Sunday, March 6, 2011

Chocolate Pudding


As I mentioned on this post, this is chocolate pudding week at Lethally Delicious. It started a week ago with chocolate panna cotta, then we had chocolate pots de creme on Tuesday, and finally good old chocolate pudding today for Sweet Melissa Sundays.

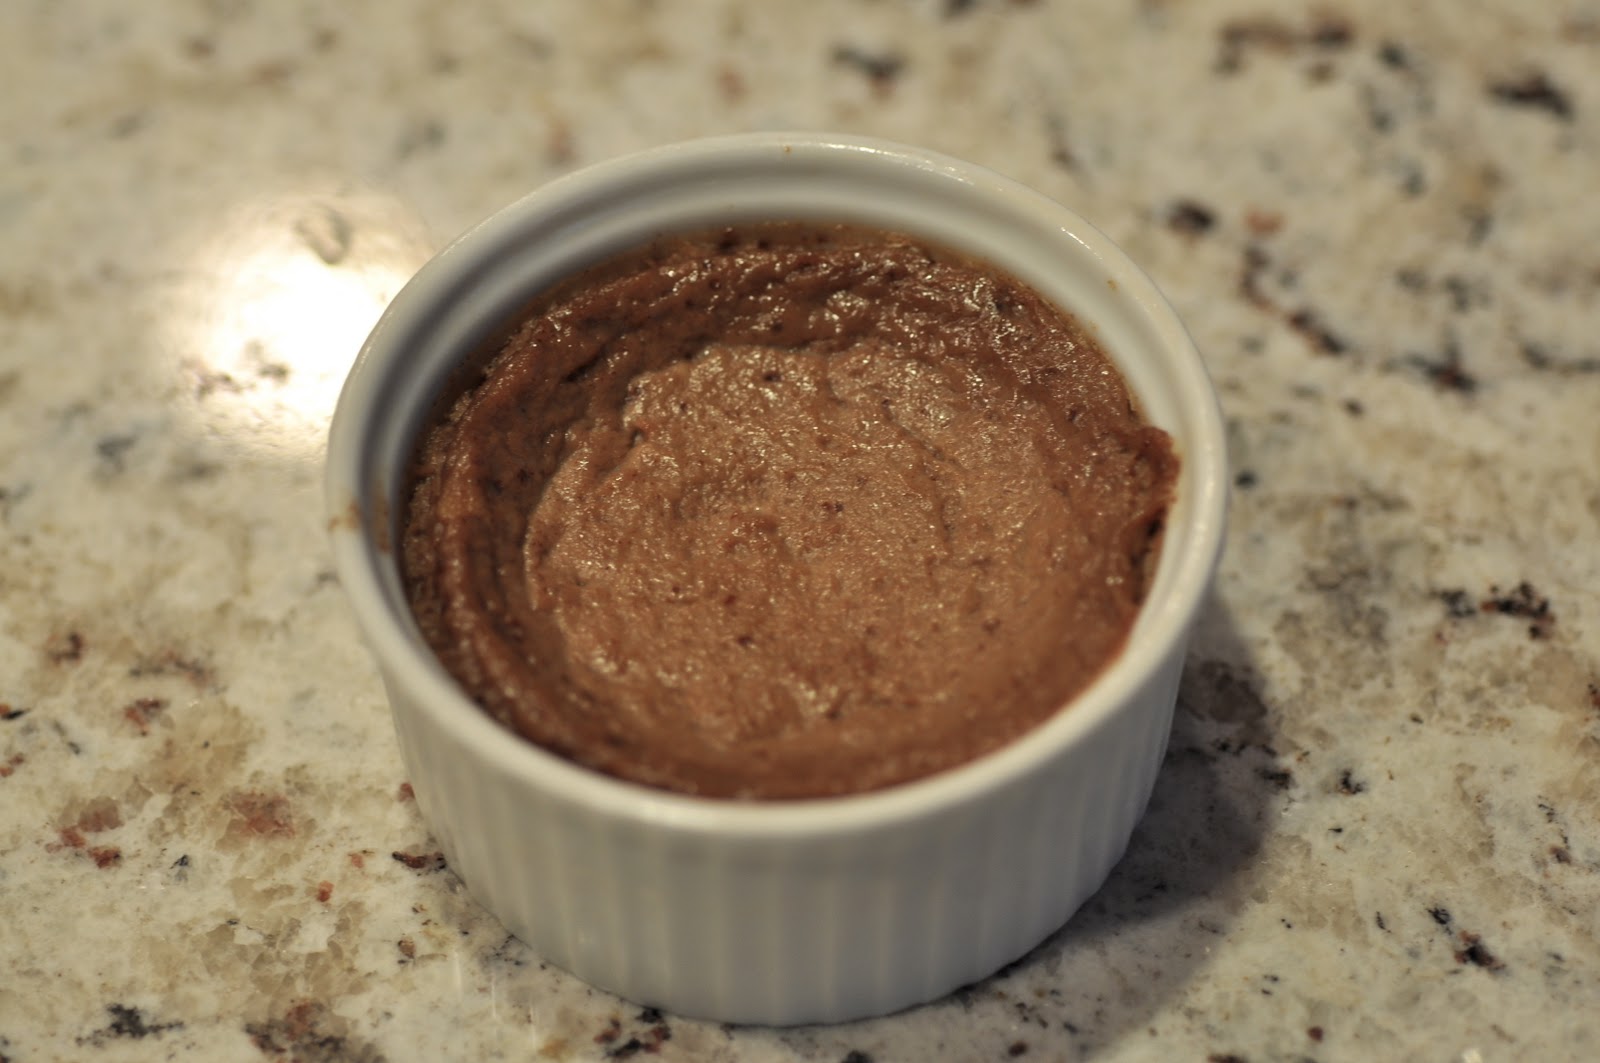
This recipe is from The Sweet Melissa Baking Book by Melissa Murphy. As you can tell from the odd appearance of my pudding, I had a few problems. I didn't have the 6 ounce ramekins the recipe specifies so I used my 4 ounce ramekins. The recipe didn't instruct us to poke holes in the foil so I didn't. My puddings steamed (or was that the intention?) When I checked them after 40 minutes, they were the ugliest little over cooked, water logged desserts I've ever seen!

However, even though they were a bit curdled, they were tasty once they chilled. I debated making them again but couldn't bear to go through another-gasp-three cups of heavy cream. So promise me you won't make them the way I did when you make them!

Chocolate Pudding
3 cups heavy cream
1/4 cup plus 1 tablespoon sugar
2 1/4 ounces best-quality semisweet (58%) chocolate, finely chopped (about 1/2 cup) (I used 70%)
5 large egg yolks
1/2 teaspoon salt
1/4 teaspoon pure vanilla extract

Before you start, position a rack in the center of your oven. Preheat the oven to 300 degrees F. Place six 6-ounce ramekins in a 9 x 13-inch roasting pan.

In a medium, heavy-bottomed saucepan, bring the cream and about half of the sugar to scalding, or until the milk is steaming and tiny bubbles have formed along the edges. Do not boil.

Place the chopped chocolate in a medium-sized bowl. Pour enough scalding cream over the chocolate to cover. Let sit for 5 minutes and then whisk until smooth. Pour the remaining cream over the chocolate and whisk until smooth.

In a large bowl, gently whish together the egg yolks, the remaining half of the sugar, the salt, and vanilla until smooth. Temper the chocolate cream into the yolk mixture, pouring it little by little and whisking all the while. Strain the mixture into a clean pitcher and skim off any bubbles with a spoon.

Pour the mixture into the prepared ramekins. Fill the roasting pan with hot water until it reaches halfway up the sides of the ramekins. Cover the pan with aluminum foil. Bake 50 to 60 minutes, or until just set. Begin checking after 45 minutes. When gently shaken, a pudding should no longer look liquidy; it will move as one mass (albeit somewhat jiggly) and register 150 to 155 degrees F on an instant-read thermometer. Remove to a wire rack to cool to room temperature in the water bath. Remove the ramekins from the pan and refrigerate, uncovered, until cool. Cover with plastic wrap and chill for several hours to overnight before serving.

Sunday, September 26, 2010

Gingered Plum Raspberry Preserves


I almost skipped this week's Sweet Melissa Sundays recipe, and that would have been tragic. If it hadn't been picked by my one of my favorite bloggers, Margot of Effort to Deliciousness, I might have skipped it, but then I saw my dear friend Hanaa urging us not to skip it on the P&Q. I got three lovely plums in my CSA this week, which I paired with raspberries I froze when they were in season a month or so ago, plus lemons from my tree.


I added sliced ginger to give the fruit an additional depth of flavor, and it added complexity without being a dominant flavor. The flavor of the jam was so delicious that I burned the roof of my mouth testing it. It was worth it. If you'd like the recipe, Margot will have it for you here.

Thanks, Margot, for choosing this wonderful recipe. It was truly surprising and has become a favorite here.

NOTE: After reading Margot's post, I just realized I made the recipe wrong. I was supposed to add 2 cups of apples along with the plums and raspberries. It turned out so well that I wouldn't change a thing next time, though, so feel free to make it either with or without the apples. There was enough natural pectin in the fruit that I didn't have a jelling problem.

Sunday, August 29, 2010

Chocolatey Granola - Cocoa Puffs for Grown-Ups


This week, Sweet Melissa Sundays bakers are making the Sweet Plum Clafoutis with Almonds. I'm a little behind, so I made what they made a few couple of weeks ago, the Cherry Almond Granola (chosen by Wendy of Pink Stripes). Although I had bought everything I needed to make the recipe, things have been so busy at work that I didn't have time to make the recipe with the other SMSers. But I spied Jessica's (of My Baking Heart) version, to which she added chocolate chips, and I decided it would have to get made soon.

Granola is a favorite here, and this one, with its chocolate and cinnamon overtones, takes granola to a whole new level. Chocolate for breakfast...yay!

Chocolate Granola - adapted from The Sweet Melissa Baking Book
Printable recipe
4 cups/320 grams old-fashioned (not quick) oats
1/2 cup/66 grams raw sunflower seeds
2/3 cup/92 grams pumpkin seeds
1 1/3 cups/240 grams semisweet or bittersweet chocolate chips
1/4 cup/37 grams dry milk powder (optional)
1/2 cup/225 grams whole almonds
1/4 cup/50 grams canola or vegetable oil
1/3 cup/90 grams clover honey
1/3 cup/75 grams maple syrup
1 1/2 teaspoons ground cinnamon
1/2 cup/80 grams dried blueberries
1 cup/120 grams dried cherries

Preheat oven to 250 degrees. Line two sheet pans or cookie sheets with parchment paper or foil.

In a large bowl, combine the oats, sunflower and pumpkin seeds, almonds, chocolate chips and dry milk powder. Stir well to combine (I used my hands for this part).

In a small saucepan, combine the oil, honey, maple syrup and cinnamon. Bring to a simmer over medium-low heat. Pour the hot mixture over the oat mixture and stir well.

Divide the mixture evenly between the sheet pans and bake for 1 1/2 to 2 hours, stirring every 15 minutes, until golden (it's a little hard to tell because of the chocolate, but you can also monitor the moisture of the granola). Remove to a rack to cool completely.

Break up the granola into a bowl and add the dried fruit. Mix thoroughly.

Store in the refrigerator for up to one month. Makes 2 quarts.

Sunday, July 18, 2010

Chocolate Pecan Brownies & Sour Cherry and Almond Biscotti


I was craving chocolate when I noticed that Tiffany of A Spoonful of Laughter And A Heap of Love had chosen chocolate walnut brownies for this week's Sweet Melissa Sundays.

M. was working away on his laptop when I called out "Walnuts or pecans in the brownies?" I already knew the answer but occasionally he'll surprise me. This week, it was the predictable choice of pecans for our brownies.

The recipe is a little different than the brownie recipes I usually make. Melt chocolate and butter - check. Beat eggs, sugar and vanilla until pale yellow - what? I knew this would make the brownies more light and caky than dense and chewy. Knowing they would tend to be cakier than we like, I set the timer for 40 minutes, the low end of the time range. Melissa's recipes and my oven seem not to be calibrated, so I checked the brownies after 37 minutes. Yikes! The top was dull and they had pulled away from the pan. I yanked them out of the oven and hoped for the best.

Unfortunately, they were a bit drier than we like. They lasted 4 days, an eternity for a brownie in this house, and the extra days didn't make them any moister. The chocolate flavor wasn't as prominent as we like. Although I enjoyed making these and was intrigued by Melissa's technique, these won't be a repeat around here. Sorry, Tiffany!

Check out how the other SMS bakers fared with their brownies. You can find them here.


I also made last week's Sour Cherry & Almond Biscotti. I made them last Sunday, in plenty of time to post, but was struck by a wave of laziness so I never completed the post. I didn't mound my dough up enough and they ended up too brown for my liking, but the flavors were great. I especially liked how the recipe has you reconstitute the dried sour cherries by boiling them in orange juice. That kept them from being hard, chewy nuggets in the biscotti. These biscotti were chosen for Tracey of Made by Tray Tray. Thanks, Tracey! We both ate these for breakfast (I know, I know) on more than one morning.

Sunday, July 4, 2010

North Fork Peach Raspberry Pie


Sometimes, I'm not very smart. Take this pie. I waited until today to make it even though the forecast high was 90, and we don't have air conditioning. Not very smart.

Rebecca of Beurrista picked the recipe for Sweet Melissa Sundays this week. I intended to make it as written, truly I did, but when I saw the crust wasn't all butter, I decided to give Melissa's all butter crust one more try. I made it here and it was a disaster. If I was a pie newbie, I would have sworn off of pie making forever. But lots of SMS bakers were successful with it, so I gave it another go.

After reading Tracey's post, I decided a mini pie was the way to go (check hers out...it's adorable!) I tweeted her...did she use the pie crust from the book? She hadn't but still I stuck to my plan. Inspired by Tracey's mini deep dish pie pan, I went with my heart-shaped pie plate.

The peaches on our tree are finally ripe so I used those with some raspberries I had frozen a few weeks ago. Our peaches are white Babcocks, delicious and juicy but very fragile. I was concerned they would lose their beautiful white color after I peeled and cut them, but the pie was still lovely. I also blew off the tapioca and used very little sugar (resulting in less juice to jell) and just 1/2 teaspoon of cornstarch. I also skipped the egg wash, and instead slathered on some heavy cream with my finger and then lightly dusted with sugar. I baked my little pie for 1 hour and 15 minutes and forced myself to not cut into it while it was hot. I had to go to work for a few hours so it worked out well.


Instead of cutting the pie into wedges, we shared it with a single spoon. It seemed appropriate for a heart shaped pie, don't you agree? The raspberries gave the white peaches a pink hue that was lovely, and the peaches were wonderful and sweet. I was glad I cut way back on the sugar and let the flavor of the fruit come through. In the end, the crust was fine. Not as good as my regular crust, but definitely less fussy and easier to make. It makes a perfectly fine fast all butter crust.

Thanks, Rebecca for choosing this delicious pie for us. I really enjoyed making it, even if I did go a little rogue. Rebecca has the recipe for you here; and if you'd like to see how it's supposed to be made, she has it for you.

Sunday, June 20, 2010

Hazelnut Honey Madeleines


Truth be told, if I hadn't skipped the last several Sweet Melissa Sundays recipes, I would have skipped this one. Even though I've been home from vacation for a few days, I haven't accomplished a lot.

The recipe calls for roasted hazelnuts, and I stressed over this. With skins or without? Dry roasted? Then I realized I had hazelnut flour, so I used that instead of buying roasted hazelnuts and grinding them in the food processor. The recipe calls for chestnut honey, but since it only uses 1 tablespoon for the whole recipe (and I only made a half recipe), I just used clover honey from the pantry. Maybe the chestnut honey would have made this better, but I kind of doubt 1/2 tablespoon of honey could transform a recipe.

This was the easiest madeleine recipe I've ever made. The dry ingredients (hazelnut flour, confectioners' sugar and flour) are whisked. The butter is melted and browned (I skipped straining the browned butter). Egg whites are beaten until frothy, then mixed in with the honey to the dry ingredients. Finally, the browned butter is mixed in to the batter. Spoon the batter into the molds and refrigerate for two hours before baking. How easy is that?! The batter was DELICIOUS, and I was so excited to taste the baked madeleines. I'm sorry to say the baked madeleines were overly sweet and I couldn't taste the browned butter and hazelnuts. Very disappointing.

The full recipe yields 24 madeleines, but I got 15 from my half batch.

This recipe was chosen by Debbie of Cafe Chibita. Thanks for hosting this week, Debbie. I hope you're feeling better! Sorry I wasn't thrilled with your pick.

Sunday, May 16, 2010

Orange-Scented Scones, a Sweet Melissa Sundays Rewind


This week's Sweet Melissa Sundays recipe is Pumpkin Bread Pudding, and it was chosen for us by Carmen of Baking is My Zen. I wasn't feeling the recipe (sorry, Carmen!) so I decided to skip this week. But then I visited my friend Tracey at Tracey's Culinary Adventures. Tracey is also skipping this week but she did a rewind. What a great idea!

I quickly checked out the page of completed recipes (you can find it here). I just joined the group a few months ago, so I've missed a lot of yummy things from the book. I decided on the orange-scented scones for several reasons:

1.  They're easy and fast
2.  I had all the ingredients the recipe calls for
3.  M. flipped for the last scones I made (you can find them here)
4.  The recipe only makes 6 scones

Well, I said I had everything the recipe called for and that's mostly true. Melissa calls for oat flour but gives instructions on how to make your own. I didn't have oat flour but made some in the food processor. The recipe then has you add the rest of the dry ingredients and pulse before adding cubed butter and pulsing until you reach the pea-sized pieces stage. But then Melissa tells us to finish the recipe in a bowl by adding the food processor ingredients to the wet ingredients.

I don't think so. Easy, lazy Sunday morning recipes don't require dirtying a bowl unnecessarily. So I measured out the cream and added the egg right into the measuring cup, gave it a few whirls with a fork and added it to the food processor. Pulse a few times and you're done!


I found the dough a tiny bit dry, so I'd add a little more cream next time, maybe another tablespoon. I cut mine out with my favorite cutter, a stylized heart that I bought on one of our trips to Paris. I finished them up with cream and a sprinkle of turbinado sugar.

The scones were terrific. Light and flaky with delicate orange flavor and nice crunch from the sugar on top. I bet you have the ingredients in your kitchen if you want to make them right now!

Orange-Scented Scones (adapted from The Sweet Melissa Baking Book)

Printable Recipe

2/3 cup rolled oats
1 1/2 cup all-purpose flour
2 teaspoons baking powder
1/2 teaspoon kosher salt
1 1/12 tablespoons sugar
Zest of 2 oranges (or 1 if it's really big)
8 tablespoons cold unsalted butter, diced
2/3 cup cold heavy cream
1 egg
2 tablespoons heavy cream (for brushing)
1 tablespoons turbinado sugar

Preheat oven to 350 degrees. Line a sheet pan or cookie sheet with parchment paper or a Silpat. Set aside.

In the bowl of a food processor, process the oats to a coarse flour. Add the flour, baking powder, salt, sugar and orange zest. Pulse several times to combine. Add the cold diced butter and pulse until the butter is the size of medium peas.

Measure the cream in a 1 cup measure and add the egg. Stir with a fork (or whisk) until combined. Add to the food processor. Pulse 5-6 times until almost combined.

Turn out onto a lightly floured work surface. Working with your hands, corral the ingredients together in a 7" circle. Cut into 6 wedges (or flour a decorative cutter and cut out shapes).

Place the scones on the prepared sheet pan and brush with the cream and sprinkle with the turbinado sugar.

Bake for 25-30 minutes. Scones are done when golden brown and set. Cool on a rack for a few minutes before serving. Makes 6 scones.

Sunday, May 9, 2010

Orange Blueberry Muffins with Pecan Crumble


These muffins, selected by Chaya of My Sweet and Savory, sound perfect for a Mother's Day breakfast treat. I was cautious about making them as the Sweet Melissa Sundays P&Q had numerous comments from bakers who found them dense, dry, doughy and heavy, not good qualities for a muffin. I was making 1/4th of the recipe and I was determined that my muffins would be moist and light. Here's how I did it.

First of all, I decided that I would have to increase the moisture by the use of additional fat so that all of the flour would be adequately hydrated. To do this, I increased the butter and used all heavy cream (the recipe combines heavy cream and milk).

As blueberries are not in season yet, I used Trader Joe's frozen wild blueberries. They'd been in the freezer for several months and had a lot of ice crystals so I did something you're not supposed to do...I rinsed and dried my berries. I didn't want purple muffins and they were definitely going to be purple with all those ice crystals. I also used additional orange zest to boost the orange flavor.


The comments I read said that the pecan crumble really makes these muffins and I couldn't agree more. I doubled the amount of crumble for the number of muffins I made, and it made them even more delicious.

My muffins ended up moist and tender. The crumble gave them a great nutty flavor boost and terrific crunch. We enjoyed these a lot, and I'll definitely make them again because of the wonderful taste. And I'll be adding the pecan crumble to other muffins and baked goods...it's a keeper.


If you'd like the original recipe, you can find it here. Thanks, Chaya, for hosting us this week and choosing such a terrific recipe!

Orange Blueberry Muffins with Pecan Crumble (adapted from The Sweet Melissa Baking Book)

Printable recipe

2 1/2 cups all-purpose flour
1 Tbsp plus 1 tsp baking powder
1/2 cup granulated sugar
1/2 tsp kosher salt
1/8 tsp freshly ground nutmeg
11 Tbsp unsalted butter, melted
1/3 cup firmly packed light brown sugar
2 large eggs, at room temperature
2/3 cup heavy cream, at room temperature
Freshly grated zest from 1 orange
1 cup fresh or frozen blueberries

Pecan Crumble
3/4 cups pecan pieces
3/4 cup plus 2 tablespoons all purpose flour
3/4 cup packed light brown sugar
3/4 teaspoon salt
8 tablespoons (1 stick) unsalted butter, melted and cooled slightly

Position a rack in the center of your oven. Preheat the oven to 350 degrees. Line a standard 12-cup muffin tin with muffin papers (or butter and flour the cups or spray with nonstick vegetable cooking spray).

Make the pecan crumble:
In a large bowl, stir together the pecans, flour, brown sugar, salt, and nutmeg. Stir in melted butter. If mixture seems dry, add a little more melted butter. Set aside.

Make the muffins:
In a large bowl, whisk together the flour, baking powder, granulated sugar, and salt. In a medium bowl, whisk together the melted butter, brown sugar, and eggs until smooth. Stir in the heavy cream.

Add the orange zest to the flour mixture and gently rub the mixture together with your fingers. Add the blueberries and gently combine. Pour the butter mixture over the dry ingredients and gently mix with a spoon until just combined. If the mixture seems dry, add additional heavy cream until it's the appropriate consistency for a muffin.

Divide the batter evenly among the prepared muffin cups, filling each cup until full and top with pecan crumble. Bake for 25-30 minutes, or until lightly golden and a toothpick inserted in the center comes out clean. Remove to a wire rack to cool.

Makes 12-14 muffins

Sunday, May 2, 2010

Truly Insane Peanut Butter Truffles


If you stop by here regularly, you already know I belong to too many baking and cooking groups. Sometimes I bake ahead so I have plenty of time to write the posts, and sometimes I fall behind and make the recipe on the day it's supposed to be posted. Although I prefer the former, today I learned the latter has its appeal, too.

When I delay posting, I can benefit from the P&Qs (Problems and Questions) that other bakers discuss. This week's Sweet Melissa Sundays recipe, Peanut Butter Truffles, is a perfect example. The SMS bakers were disappointed by the laid back peanut butter flavor of these truffles.  Some of them doubled the peanut butter (and even commented they might even go for more next time).

So I went with 2 1/2 times the amount of peanut butter with an extra 20% chocolate.  When I combined the cream and the peanut butter and heated them, they emulsified easily but the mixture was so oily, and yes, almost broken, that I panicked and added more chocolate in an unnecessary attempt to get the chocolate and peanut butter mixture to come together harmoniously. Adding the softened butter helped, but in the end, the chilled mixture was fine for scooping and rolling in chopped nuts.

Melissa calls for chopped peanuts but I wanted to mix it up a little so I used honey roasted peanuts. Perfect! They aren't the loveliest truffles you'll ever see, but they are decadent and delicious.

I am so grateful to Mara of Love your Mother for selecting this delicious recipe! Please check out what she did with these, and then go visit the other SMS bakers. You can find them here. They are a truly amazing and inspiring group!

Peanut Butter Truffles - adapted from The Sweet Melissa Baking Book

Printable Recipe

5 ounces bittersweet (61%) chocolate, finely chopped (or use feves)
7/8 cup heavy cream
175 grams/6 ounces smooth peanut butter (not natural)
3 tablespoons butter, at room temperature
1 cup chopped honey roasted peanuts

Put the chocolate in a medium heatproof bowl and set aside.

Place the cream and peanut butter in a 1 quart saucepan and heat over medium low heat, stirring occasionally with a heatproof spatula until quite warm (but not hot) and small bubbles form around the edge. The mixture will look oily.

Pour the peanut butter cream mixture over the chocolate and let sit for 2 minutes. Stir up from the bottom with your heat proof spatula and let sit for another minute or two. Stir up from the bottom again and stir in the butter in 4 pieces, mixing to combine. Refrigerate for at least two hours.

Using a teaspoon or small scooper, scoop out the truffles, gently shape into round balls and roll in the peanuts, pressing the peanuts onto the truffles. Refrigerate immediately. Serve chilled. Makes about 30 truffles.

Sunday, April 25, 2010

Sweet Melissa Sundays - Strawberry Cobbler Tart

My blogging and tweeting friend Tracey of Tracey's Culinary Adventures is hosting this week's Sweet Melissa Sundays recipe, Strawberry Rhubarb Cobbler Pie. Tracey's encouragement and especially her photo tips have made me a better blogger. She is sweet, kind and generous and her beautiful blog is the first place I look when I need a recipe. This is because her taste is impeccable and she's never disappointed me.

I've been super busy with work, with three separate audits (two of them major) happening concurrently. As if that isn't enough, M's business is at a crossroads where their accountant (me!) has to come up with a manufacturing inventory tracking system. Last night I worked until 11 just to get the year-end financials done and today I'll start on the inventory system.

How to juggle work with my desire to make Tracey's pick? Like Tracey, I have never had rhubarb and looked forward to this recipe so that I could try it. But that just didn't happen. I had fresh strawberries in the fridge, so I went with those. I knew I wouldn't have time to make pie crust and I eschew the store bought ones, so I went with the last sheet of Trader Joe's puff pastry I had in the freezer.

I made 1/4 of the recipe and baked my mini in a 4" spring form pan. I cut way back on the sugar, using only 1 tablespoon since the rhubarb needs a lot and my strawberries were sweet. I also didn't use lemon zest, opting to sprinkle cinnamon sugar over the biscuit. I barely had enough biscuit dough to eke out a thin heart-shaped biscuit to cover my little creation.


My mini baked in about an hour. The biscuit looked very brown before I pulled it out of the oven but the puff pastry and filling still needed more time. The P&Q indicated a lot of bakers had the same issue. Tracey related that her pie was a little soupy and mine was no different, but I was fortunate because it set up nicely.

This made a wonderful treat for us to split after having a small salad for lunch. M. stole most of the strawberry filling and proclaimed the dessert a success. The fresh berry flavor really came through and the crunchy biscuits contrasted nicely with the fruity filling. Puff pastry made this a super easy dessert. I can't call it quick, but if you have puff pastry in the freezer, the hands on time is minimal. I can't wait to try this with cherries, peaches, apricots...

Thanks, Tracey, for a pick that was a runaway hit with us. If you'd like the original recipe, Tracey has it here.

Strawberry Mini Cobbler Tart - adapted from The Sweet Melissa Baking Book
Printable recipe

For the crust:
1 sheet of puff pastry, defrosted in the refrigerator until pliable but not soft

For the filling:
1 cup sliced strawberries (about 10 berries)
1 teaspoon sugar (or more if needed - taste your berries so you know how much to use)
1/4 teaspoon cornstarch (if you add more sugar, use a little more cornstarch)

For the cobbler:
1/4 cup all-purpose flour
1/4 teaspoon baking powder
pinch of cinnamon
pinch of salt
1/2 tablespoon chilled butter, cut onto bits
2 tablespoons heavy cream

For finishing the tart:
Extra cream or milk for brushing the cobbler
1 tablespoon cinnamon sugar

Preheat oven to 350 degrees. Put a sheet of foil on a sheet pan and set aside.

For the crust, lay the puff pastry on a lightly floured surface and cut a 6" circle out of the middle (you can use a 6" plate as a guide, I eyeballed it and it worked fine). Gently line a 4" spring form pan with the puff pastry, tucking in the folds to form a smooth surface around the side of the pan. Put pan in the refrigerator while you prepare the filling and cobbler.

For the filling, in a small bowl, toss the berries with the sugar and cornstarch. Set aside.

For the cobbler, stir together the dry ingredients in a small bowl. Work in the cold butter with your fingers. You should have a lot of flakes and chunks of butter. Add the cream. With your fingers, combine until the mixture comes together. You may need a few drops more cream (I did). The moment the dough comes together, drop it on a piece of plastic wrap and put another piece of plastic wrap on top of it. Push it into a roundish shape about 1/2" thick, and using a 2 1/2" biscuit or decorative cutter, cut a single biscuit. Remove the crust from the refrigerator, arrange the berries in it and top with the biscuit.

Put the tart on the baking sheet and brush the cobbler with some cream or milk. Sprinkle on some cinnamon sugar. Bake in the preheated oven for 45 minutes to 1 hour, checking every few minutes toward the end. The tart is done when the juices are thick and bubbly, the puff pastry is browned and looks flaky and the cobbler is well-browned. Serve warm.

Serves two greedy people.

Sunday, April 4, 2010

Sweet Melissa Sundays - Pecan Shortbread Cookies


Have I forgotten how to bake? I don't think so. But I had problems with this week's Sweet Melissa Sundays recipe, chosen by Lara of The Lab. It was simple, made entirely in the food processor, but I had to rework it in order to get a decent cookie. Unless I wanted the cookie to be shaped like this:


So I reverted to Dorie Greenspan's ziploc bag trick. Joy supervised:

After refrigerating the dough until it firmed, I cut open the bag, sliced the dough into bars and baked them for 17 minutes. I skipped dusting them in confectioner's sugar because they were very tasty without it.

Sunday, March 21, 2010

SMS - Double Crust Apple Pie Epic Fail

For me, failing at pie is like forgetting how to brush my teeth--it just can't happen. Wake me at 3 AM, and I could make a slammin' apple pie without a recipe.

This fail is no reflection on the recipe because plenty of other bakers got beautiful pies. I've gone over and over it in my head and I think I followed the recipe exactly but obviously not when you look at this:


No, something obviously went very wrong. First, the pie crust. I have a tried and true all butter pie crust I've been making for 20 years. This wasn't it. I must have measured the flour wrong because I know I used 2 sticks of butter. It was impossible to work, with little pebbles of butter spread throughout that didn't have enough flour to hold them together. Then there was the filling. I mistakenly thought the caramel was served on top of the pie after it baked. I read the recipe repeatedly and never saw the part where you combine the caramel with the apples. My Granny Smith apples were huge so I only used 6, and the filling of the pie towered over the pan. I almost added cinnamon (apple pie without cinnamon just seems wrong to me) but didn't. After 10 minutes in the oven, the pie crust was dripping butter and the crimped edge fell off in places. But I still baked my pie for the full amount of time (1 hour and 45 minutes) that the recipe called for. It wasn't until after this epic fail that I reread the P&Q and saw that one hour was sufficient. Really, 45 minutes less would not have changed the outcome because at one hour, there was a layer of butter on the sheet pan and the pie still looked awful, just less brown. Perhaps the inside wouldn't have been mush:


Where did the enormous mound of apples go? Obviously, I was making applesauce pie.

One of my favorite bloggers, Susan of Baking with Susan picked this week's recipe. I'm working so much that I probably should have skipped it but I wanted to make her pick. Sorry, Susan, for mangling your pick!

Make sure you visit Susan and see her pie. She'll also have the recipe. And check out the other Sweet Melissa Sundays bakers...you can find them here.

Sunday, March 14, 2010

SMS - Carrot Cupcakes (Muffins?)


Julie of A Little Bit of Everything chose this week's Sweet Melissa Sundays recipe, carrot cake. I have an easier time giving away cupcakes, so I made 24 minis and 15 regular cupcakes. The cream cheese frosting received lukewarm reviews on the P&Q, so I elected to skip it and serve these unadorned.

I used the food processor to shred the carrots and that made this recipe a snap. Even though the recipe called for 1 1/2 tablespoons of cinnamon, which seemed excessive, I stuck with it, using my favorite Vietnamese cinnamon to amp up the flavor. The minis baked for 15 minutes and the regular cupcakes baked in 20. I sampled one warm and found the flavor a bit lacking. I have a favorite carrot cake recipe and will probably stick with it instead of retooling this one.  Sorry, Julie!

If you'd like the recipe, Julie has it here.

Sunday, March 7, 2010

Roasted Pecan Cake with Caramel Orange Marmalade and Burnt Orange Buttercream

This week's Sweet Melissa Sundays pick is Roasted Pecan Cake with Caramel Orange Marmalade and Burnt Orange Buttercream. I know you're thinking "good grief, whose idea was it to make such a high maintenance dessert?"

Umm, that would be me.

Unlike the times I've gotten to pick the recipe for Craving Ellie in My Belly, I didn't choose something easy and popular like granola or grilled cheese. It's like I was challenging myself to see how few of my fellow SMS bakers would be able to play along with me this week.

I'm going to be straight with you. This cake was a lot of work. I made it over a three day period. You can make it in one day, but if you have a life and only one dishwasher, I suggest you do it over two days.
These are the dishes that couldn't go in the dishwasher. 

I started with the orange marmalade filling. It was super easy, and I tucked the saucepan in the fridge until I had time to continue.

A few days later, I rushed home from work and toasted the pecans and started separating eggs (eggs separate better when they are cold, but whip better when they are at room temperature). I was watching House, and it was hard to focus on the recipe with the doctors throwing out possibilities for the mysterious ailment that was killing their patient.


Once I pulsed the pecans and sugar in the food processor, I melted and browned the butter. I browned it past the point that Melissa tells us to take if off the heat because the flavor is so good when the butter is well browned. Then I strained out all the bitter black solids and added the butter to the pecan and sugar mixture, which I had transferred to a bowl. Toasted pecans and browned butter smells better to me than any substance on earth, and I wanted to eat it out of the bowl. But I resisted.

Next, I whipped a dozen egg whites until soft peaks formed, added some sugar, and whipped to the point where the eggs held stiff peaks. I folded the egg whites in to the pecan mixture and divided it between two prepared cake pans. I followed Melissa's advice and spun the cake pans on the counter to level them off. DON'T DO THIS! It piled the batter up against the sides of the pans, and I didn't catch it, so my layers ended up higher on the sides than in the center.


Once the cake cooled, I made the buttercream. It starts with reducing orange juice until it caramelizes. 3/4 of a cup of orange juice netted about 2 tablespoons of reduced caramelized orange juice, which I don't think was enough to flavor the buttercream. If you make this cake, double the orange juice. The buttercream did break as the book said it would, but it came together. When I tasted it, I wasn't impressed. It tasted just like butter, not like burnt orange.

The broken buttercream, before it came together

Once assembled, I completely forgot to finish the cake with toasted pecans, which would have helped cut the butteriness of the frosting and dominant marmalade flavor.

All in all, this was popular at work, but I was disappointed. It was a lot of work for a cake that didn't live up to the allure of its name. I loved the toasted pecans and browned butter (not a big surprise if you saw these cookies), but I found the orange marmalade too sweet and too marmalade-y. If I make this cake again, I'll fill it with orange curd instead of the marmalade. It would be more work, but a superior cake.

Roasted Pecan Cake with Caramel Orange Marmalade and Burnt Orange Buttercream
Printable Recipe

I made this cake for my friend Brandon's wedding, which was held in Virginia, at the beautiful farm where she grew up. She and I used to ride horses together, and Brandon loved to tell me of the adventures she'd had on her pony Irving back when she was a child--how they'd just take off for hours without a saddle or a plan.

When Brandon asked me to make her wedding cake, I wanted the decoration to capture the farm I imagined in my mind. She had a whimsical horsey cake topper that I embellished with fondant daisies. I decorated the rest of the cake to look like green pastures filled with lots of clover and lots of love. I only wish her pony could have had a slice.

Makes one 9-inch cake

FOR THE CAKE
1 2/3 cups coarsely chopped pecan pieces, toasted and cooled (see Note)
2 cups sugar
1 1/4 cups all-purpose flour
1 teaspoon baking powder
1/4 teaspoon salt
1/2 pound (2 sticks) unsalted butter
2 teaspoons pure vanilla extract
12 large egg whites, at room temperature

FOR THE CARAMEL ORANGE MARMALADE
1/2 cup sugar
1/4 cup water
3 tablespoons fresh orange juice
1 cup orange marmalade

FOR THE BURNT ORANGE BUTTERCREAM
3/4 cup fresh orange juice (I suggest doubling the juice, it really cooks down a lot)
2/3 cup plus 3 tablespoons sugar
1/4 cup water
3 large egg whites, at room temperature
3/4 pound (3 sticks) unsalted butter, at room temperature
1 tablespoon pure vanilla extract

TO FINISH THE CAKE
1 cup pecan pieces, toasted

BEFORE YOU START

Position a rack in the center of your oven. Preheat the oven to 350 degrees. butter and flour two 9 x 2-inch round cake pans. Line each pan with a 9-inch round of parchment paper.

TO MAKE THE CAKE
  1. In the bowl of a food processor fitted with the metal blade, combine the pecans with 2/3 cup of the sugar and pulse grind until it is a coarse flour. Transfer to a large bowl. Add the all-purpose flour, an additional 2/3 cup of the sugar, the baking powder and salt. Whisk to combine.
  2. Have ready a fine-meshed strainer. In a medium heavy-bottomed saucepan, brown the butter over medium heat. (The butter will melt first, and then the milk solids will settle to the bottom. After a little while, the milk solids will start to turn golden.) When the milk solids have reached a nutty brown color, immediately remove from the heat.
  3. Using the fine-meshed strainer, strain the butter into the flour mixture. Stir to combine. Discard the butter solids. Stir in the vanilla.
  4. In the very clean bowl of an electric mixer fitted with the very clean whip attachment, beat the egg whites on medium-high speed until they hold soft peaks. In a slow steady stream, with the mixer on medium speed, add the remaining 2/3 cup of the sugar and increase the speed back to high. Beat until there are firm--not dry--glossy peaks of meringue.
  5. Using a rubber spatula, briskly fold in one-third of the meringue mixture into the batter to lighten it. Add the remaining meringue and gently fold it in until just combined.
  6. Divide the batter evenly between the prepared pans. Spin the pans to level the batter. Bake for 25 minutes, or until a wooden skewer inserted into the center comes out clean. Remove to a wire rack to cool in the pans for 20 minutes before turning the layers out onto the rack. Cool completely before filling or frosting.
TO MAKE THE MARMALADE
  1. In a small heavy-bottomed saucepan over medium heat, heat the sugar with the water until amber in color, like clover honey. Immediately remove from heat and stir in the orange juice to stop the cooking.
  2. Add the marmalade and stir to combine. Set aside to cool.
The marmalade may be stored in an airtight container in the refrigerator for up to 2 weeks.

TO MAKE THE BUTTERCREAM
  1. In a small heavy-bottomed saucepan over medium heat, reduce the orange juice until it is syrupy and just starts to caramelize (it turns brown). Watch it closely; don't let it burn! Add a splash of water to the caramel orange syrup to stop the cooking. Set aside to cool.
  2. In another small heavy-bottomed saucepan over medium-high heat, combine the 2/3 cup of the sugar and water and cook to 240 degrees on a candy thermometer, about 7 minutes. 
  3. Meanwhile, in the bowl of an electric mixer fitted with the whip attachment, beat the egg whites on high speed until they hold soft peaks. Slowly add the 3 tablespoons sugar and beat until there are medium-stiff peaks of meringue.
  4. When the sugar syrup reaches 240 degrees, decrease the speed of the mixer to medium, and immediately but slowly pour the hot liquid sugar in a steady stream down the side of the bowl and into the meringue. (Or, if the syrup is not yet 240 degrees when the meringue is ready, turn off the mixer until it is. Then turn the mixer to medium and add the syrup.) Beat together until stiff glossy peaks form.
  5. With the mixer still on medium, add the butter in pieces to the meringue. The mixture will break, but just keep beating and it will come together beautifully. Add the vanilla and reserved caramel orange syrup and mix to combine.
If using the buttercream immediately, set aside at room temperature. If not, refrigerate in an airtight container for up to 2 weeks. If the buttercream has been chilling, let it reach room temperature before beating it in the electric mixer. The buttercream will break, but then it will come together beautifully.

TO COMPLETE THE CAKE
  1. See How to Assemble a Layer Cake (below) for instructions on how to fill and frost a split layer cake. You will split each cake layer in half, and spread one-third of the marmalade over each of the interior layers.
  2. After frosting the cake, gently press the toasted pecans against the sides of the cake with your fingers.
This cake keeps very well, in a cake saver in the refrigerator for up to 5 days. The cake should come to room temperature before serving.

HOW TO ASSEMBLE A LAYER CAKE
Assembling a layer cake seems as though it would be pretty straight forward, but there are a few tips I use so that my results look consistent and professional.

First, the filling:  Before you assemble your cake, be sure that your fillings are at the appropriate temperature. Fruit curds should be cold. Ganache fillings, buttercreams, and frostings should be at room temperature.

Next, the cake:  The layer cake recipes in this book are made up of two separate layers. Before you do anything, use a serrated knife to trim off any excess cake that has domed or risen up, and make your layers as flat and even as possible. Give the scraps to your kids or save them for something like trifle.

FOR SPLIT LAYER CAKES
For fillings that are looser in texture, such as lemon curd, or fillings that taste best in smaller amounts, such as raspberry preserves, you want more layers holding less filling. Therefore, you will need to split each trimmed cake layer in half. This can be done with a long serrated bread knife. If you're good, you can cut the layer without measuring and do so evenly. If you're not sure how good you are, you can use a ruler to measure and toothpicks to mark the center of the layer every 3 inches or so all around. Once you've marked the center all around, lay your knife above the toothpicks and cut through the layer as you turn the cake, always staying on top of the toothpicks and cutting until you have cut the layer completely in half. Don't separate the halves yet. Repeat with your second layer.

While the cakes halves are still together, take a finger full of frosting and mark a vertical smear down the side of the cake, anywhere, from top to bottom, so that later you can line up the layers where they belong.

Slide each of the top layers onto a separate flat plate, or paper plate, and set aside.

Cut four strips of wax or parchment paper about 12 inches long by 3 inches wide. Place the bottom half of a cake layer cut side up on your serving plate. Tuck the wax paper under the edges of your cake on all sides. Later, after frosting the cake, you can pull away the strips to reveal a nice clean serving plate.

Using a metal offset spatula, spread the filling across the top of the layer but leave about 1/2 inch uncovered around the outside edges. (This leaves room for the filling to be squished down but to stay inside the cake.)

Place the matching half of the bottom layer over it cut side down. Spread filling over the trimmed top, leaving a 1/2 inch around the edges uncovered. (You know--squish room.)

Now place the reserved top half of the second layer trimmed side down on the second layer of filling. Spread it with filling, again leaving 1/2 inch around the edges uncovered.

Place the matching half of the second cake cut side down on top of the third layer of filling.

Using your hands, press gently on the center of the top layer to join the layers together. If you have the time, refrigerate the filled layer cake for at least 1 hour. Chilling will make the cake easier to frost.

HOW TO CRUMB COAT AND FROST A LAYER CAKE
You are going to frost your layer cake in two steps. The first step will be a crumb coat, which will keep most of the unsightly crumbs from ruining your finished frosting. To do this, simply apply a light, even layer of frosting on all sides of the cake. (Really, it doesn't matter what it looks like; it will be underneath the final frosting.) Place the cake in the refrigerator to chill for a good 30 minutes.

After the crumb coat has chilled, smooth on your final layer of frosting. It does take a lot of time to get it really smooth and perfect, so I prefer to make the frosting all swirly and peaked--it looks way more delicious this way as well.

If you must travel with your cake, finish it the night before, and refrigerate it overnight. Your layer cake will will be a lot happier on the trip, and have the best odds of getting to the party in one piece.

TO TOAST NUTS
Preheat the oven to 350 degrees. Spread the nuts in a single layer on a cookie sheet. Bake for 10 to 12 minutes or until lightly golden and you can smell them. Remove to a wire rack to cool.

Wednesday, March 3, 2010

SMS on Wednesday - Cinnamon Sugar Cookies


Cinnamon sugar. Who doesn't love it? It makes me think about toasted cinnamon swirl bread slathered with butter, and plain toast with butter and cinnamon sugar on it. Thanks to Nina of Nina's Cupcakes, I got to enjoy this classic flavor combination in a cookie.

When I first saw Nina picked sugar cookies for this week's Sweet Melissa's Sundays, I was disappointed. For one thing, it wasn't even a real recipe. The book gives directions for rolling it out as a pie crust and casually mentions you can make cut out cookies from the dough, but doesn't give instructions, oven temperature or timing. Thanks to the P&Q, I knew these would need about 10 minutes to bake at 350.

I had a whole other problem. I don't heart sugar cookies. But I wanted to make them because I do heart Nina's blog, so I had to get busy with transforming their plain sugar cookie persona to something flashy and bold.

Enter my favorite Penzey's Vietnamese cinnamon. 1 teaspoon of Vietnamese cinnamon gave these cookies a definite smoky edge. The only other change I made was to leave out the lemon zest, thinking it would complete with the cinnamon.

If you'd like the recipe, you can find it here.

Sunday, February 21, 2010

SMS - Strawberry Lemonade


What could be more evocative of spring than strawberries and suggestive of summer than lemonade? Although we don't get snow here in San Jose, I'm still more than ready to be done with the cold and the rain. And raining and gray it was on the day I made this refreshing drink, this week's Sweet Melissa Sundays recipe, selected for us by Jessica of My Baking Heart.

This was very easy to make. I made my simple syrup in the microwave and didn't bother with straining the solids out of the strawberry puree. It was a tart and sweet treat for a rainy day.

If you'd like the recipe, Jessica has it here. And thanks to Jessica for picking such a great recipe for all of us who are weary of winter.

Sunday, February 7, 2010

SMS - Red Velvet Cupcakes


Red velvet cupcakes are the foundation of many of the chic cupcakes shops springing up around the country. One of these shops was the reason my coworkers requested red velvet cupcakes. The shop cupcakes were dry, the frosting overly sweet and stiff, and they wanted the real thing.

Lucky for me this week's Sweet Melissa Sundays pick is red velvet cake, hosted by Rosy of Rosy Lips and Lavendar. I chose to make cupcakes, even though I was a bit intimidated that people would be comparing them to professional cupcakes. I know I've mentioned many times that my piping and decorating skills are primitive, but these cupcakes were exhibit A.

These were a snap to make, and in spite of the three sticks of butter and 12 ounces of cream cheese, the frosting was light and fluffy. And they were a hit at work. Raves all around.

Thanks, Rosy, for a great pick! If you'd like the recipe, stop by Rosy's as she'll have it posted.

Sunday, January 24, 2010

Sweet Melissa Sundays - Black Bottom Brownies


I've said it before: I love chocolate and I love cheesecake, but I don't love chocolate cheesecake. Would this week's Sweet Melissa Sundays recipe, Black Bottom Brownies, change that?

Fortunately, my copy of The Sweet Melissa Baking Book arrived this week so I wasn't squinting at the recipe preview on Amazon (and many thanks to my fellow SMS bakers Raeann and HanaĆ¢ who offered to send me the recipe if the cookbook hadn't arrived). The recipe starts with a deep, dark brownie layer, with a thick and creamy cheesecake layer smoothed over it. Then came the part that left me scratching my head...scatter 2 cups of chocolate chips over the top of the cheesecake. It was probably done 5-10 minutes before I realized it and yanked it out of the oven, so mine had a little more color than I would have liked. After cooling, it went off to the fridge before cutting.


While this didn't change my mind about the chocolate/cheesecake combination, it was very popular at work. If I were to make it again, I'd make some changes, like shifting the chocolate chips to the brownie layer and maybe flavoring the cheesecake with espresso or extra vanilla.

Many thanks to Cynthia of Bakingtherapist's Blog for hosting this week. If you'd like the recipe, visit Cynthia or better yet, buy the book. It has dozens of sweet and delightful recipes like this one.

Sunday, January 17, 2010

Sweet Melissa Sundays - Lemon Walnut Sour Cream Pound Cake


Since I was already so far behind in all areas of my life, I decided it was time for another baking group. See, when the Sweet Melissa Sundays group was formed last year, I had no idea who this Melissa person was or what made her so darned special that my favorite bakers/bloggers wanted to make her recipes each week. Then I started seeing what they were making, and much like The Bread Baker's Apprentice event, I regretted not joining once I realized they were close to new members.

Until recently, that is. When I checked again the other day, lo and behold, they were taking new members! I emailed my request to join and ordered the cookbook, and when I found I was in, I got to work making this week's recipe, Lemon Walnut Sour Cream Pound Cake. I've had plain, chocolate, lemon, poppy seed and brown sugar versions of this quintessentially American cake, but never one with nuts. I made it early this morning to take to a gathering, and I made three mini loaves so it would bake more quickly. The recipe was chosen by Raeann of Basically, Baby Boots. I had to read it as a preview on Amazon but it came together quickly. To completely infuse the flavor, I rubbed the lemon zest into the sugar a la Dorie Greenspan. Although Melissa calls for butter and shortening, I only use butter so I used all butter and cut back 1 tablespoon on the sour cream. My mini loaves baked for 35 minutes. After waiting 20 minutes, I brushed on the lemon syrup and hurried out the door.

This pound cake was a huge hit at our gathering. The cake was absolutely delicious, so light and fluffy, and the walnuts gave it a nice crunch to compete with the tart and sweet lemon glaze. I'll make this one again and again, including suggestions I saw on the P&Q--clementines and pecans (Spike Bakes), orange and pecan, and maybe a few other variations. Check out what the other SMS bakers did with this one...you'll find them all here. If you'd like the recipe, Raeann has it here.


To all the Sweet Melissa Sundays bakers who have been working through this wonderful cookbook from the beginning, thank you for letting me join you! I can't wait to delve into this wonderful book...as soon as my copy arrives!