Monday, February 28, 2011
Cracaos
When I saw that Astheroshe at Accro had chosen cracaos for this month's Chocolate with Francois recipe, I had no idea what it was. Cake, tart, confection? No clue.
It turns out that cracaos are slice and bake chocolate nut cookies. They're easy to mix and bake and rely on Dutch process cocoa, cinnamon, walnuts and pistachios for their personality. I made the dough ahead and sliced off a few to bake fresh when we wanted a cookie. After a few days I baked the rest of the dough and shared the cookies at work.
They were good, though not overly exciting. The first time I made some I baked them 10 minutes (the lower end of the range) and they ended up very crisp though not overdone. After that experience I pulled them out at 8-9 minutes, while they were still chewy with crispy edges. Much better.
If you'd like the recipe, Astheroshe will have it for you here. The other Chocolate with Francois bakers are here. Thanks Astheroshe, for hosting this month and picking an easy, do ahead recipe!
Sunday, February 27, 2011
Florentines + Chocolate Panna Cotta with Coffee Gelée
Normally, one Daring Baker challenge a month is all I can keep up with, so I was a little concerned to learn this month's challenge had two components. Once I read the recipes, I breathed a sigh of relief. I actually made both of these before work. On the same day. And wrote the post before midnight on the posting day. Wow.
The Florentines were so easy that you can throw them together at the last minute, melt the chocolate while they're baking and serve them within 20 minutes. I drizzled half with melted 61% Valrhona (sorry, Nestle) and half with melted gianduja. I found the texture and aesthetics much better after they sat for a couple of hours--the extra time allowed the butter to be reabsorbed in the cookie. Mine spread like crazy but none of my tasters seemed to mind. If you wanted to, you could drape the warm cookies over a rolling pin like tuiles.
The panna cotta was a little more work but not a crazy amount. I opted for the chocolate panna cotta rather than the vanilla one for obvious reasons, and almost made a strawberry gelée but the strawberries were in the garage freezer and it was 6 AM and raining. Yes, I'm lazy. Enough said. I made the coffee gelée first so it could cool while I made the panna cotta. I'm not sure if my gelée turned out the right way as it was more liquée (not an actual word) than gelée. Not so fluid that you could drink it, just a very soft jelly-like substance. The practical joker in me filed that away for a hot summer day...
Because I was in a rush, I didn't do a great job of melting the chocolate so the finished panna cotta had tiny bits of chocolate, almost like a straticella, but no one complained. Anything with chocolate is almost a guaranteed hit here with coffee a close second. The finished panna cotta was a-mazing! I used Valrhona 70% for the panna cotta. It was my first time making panna cotta but it definitely won't be my last. The coffee gelée was a fun technique to try but I think it distracted from the panna cotta and I would skip it next time.
Thanks, Mallory, for picking this challenge for us. I can't wait to see what the other Daring Bakers did with this one (I fully expect wildly creative flavors and presentations).
Chocolate Panna Cotta
Recipe adapted from Bon Appetit
1 cup (240 ml) whole milk
1 tablespoon (15 ml) (7 gm) (¼ oz) unflavored powdered gelatin
2 cups (480 ml) whipping cream (30+% butterfat)
½ cup (115 gm) (4 oz) sugar
¾ cup (145 gm)(5 oz) bittersweet or semisweet chocolate
½ teaspoon (2½ ml) vanilla extract
Pour milk into a small bowl, sprinkle gelatin over the top, set aside for 2-5 minutes.
Place a medium saucepan over medium heat, stir in cream, sugar and vanilla.
Bring to a low boil.
Add chocolate and whisk until melted. Whisk the milk/gelatin mixture into chocolate cream mixture. Whisk until gelatin has dissolved.
Transfer to ramekins, or nice glasses for serving. Cover and chill at least 8 hours, or overnight.
Nestle Florentine Cookies
Recipe from the cookbook “Nestle Classic Recipes”, and their website.
2/3 cup (160 ml) (150 gm) (5.3 oz) unsalted butter
2 cups (480 ml) (160 gm) (5 2/3 oz) quick oats
1 cup (240 ml) (230 gm) (8 oz) granulated sugar
2/3 cup (160 ml) (95 gm) (3⅓ oz) plain (all purpose) flour
1/4 cup (60 ml) dark corn syrup
1/4 cup (60 ml) whole milk
1 tsp (5 ml) vanilla extract
pinch of salt
1½ cups (360 ml) (250 gm) (9 oz) dark or milk chocolate
Preheat oven to moderately hot 375°F (190°C) (gas mark 5). Prepare your baking sheet with silpat or parchment paper.
Melt butter in a medium saucepan, then remove from the heat.
To the melted butter add oats, sugar, flour, corn syrup, milk, vanilla, and salt. Mix well. Drop a tablespoon full, three inches (75 mm) apart, onto your prepared baking sheet. Flatten slightly with the back of your tablespoon, or use a spatula.
Bake in preheated oven for 6-8 minutes, until cookies are golden brown. Cool completely on the baking sheets.
While the cookies are cooling melt your chocolate until smooth either in the microwave (1 1/2 minutes), or stovetop (in a double boiler, or a bowl that fits atop a saucepan filled with a bit of water, being sure the water doesn't touch the bottom of the bowl).
Peel the cookies from the silpat or parchment and place face down on a wire rack set over a sheet of wax/parchment paper (to keep counters clean).
Spread a tablespoon of chocolate on the bottom/flat side of your cookie, sandwiching another (flat end) cookie atop the chocolate.
This recipe will make about 2 1/2 - 3 dozen sandwiched Florentine cookies. You can also choose not to sandwich yours, in which case, drizzle the tops with chocolate (over your wax paper).
Coffee Gelée
Adapted from Gourmet Magazine
2 cups (480 ml) good quality brewed coffee
1/4 cup (60 ml) hot water + 2 tablespoons (30 ml) cold water
1/2 cup (120 ml) (115 gm) (4 oz) granulated sugar
1½ teaspoons (7½ ml) (3½ gm) (1/8 oz) unflavored powdered gelatin
2 teaspoons (10 ml) vanilla extract
Place granulated sugar and 1/4 c. hot water in a small saucepan. Bring to a boil, stir until the sugar has dissolved.
Sprinkle gelatin over 2 tablespoons cold water and let it soften 2 minutes or so.
Stir the coffee, sugar, hot water, and vanilla into a small metal bowl, add gelatin mixture and stir well until gelatin has dissolved. If pouring over Panna Cotta, be sure that this mixture is no longer hot, it will melt Panna Cotta if it is, let it come to room temperature.
Saturday, February 26, 2011
Meyer Lemon Bars
I wish I had a better photo of these for you but they disappeared faster than I could snap the photo.
This week, Mary at The Food Librarian declared this lemon week, which I discovered when I checked in with my Twitter buddies. I made these earlier in the week but it was a hectic week at work and I couldn't get this post written.
My very favorite lemon bar recipe is from Cook's Illustrated, which I usually make with Meyer lemons from a friend's tree. Meyer lemons, with their floral fragrance and sweet/tart flavor, make great lemon bars. Lemon bars are not that hard to make, but the crust is critical. It needs to be firm enough to support the lemon curd and hold together when you take a bite but tender enough to eat without breaking a tooth. These lemon bars will make you realize that the ones you buy at your local coffee shop are not the real deal.
Meyer Lemon Bars - adapted from Cook's Illustrated by way of Leite's Culinaria
Printer friendly recipe
For the crust:
2 1/2 cups/350 grams all-purpose flour
1 cup/120 grams powdered sugar
1 teaspoon salt
16 tablespoons (2 sticks) unsalted butter, cut into 1-inch pieces
For the lemon filling:
14 large egg yolks, plus 4 large eggs
2 cups plus 4 tablespoons/425 grams granulated sugar
1 1/3 cups lemon juice from 8-9 Meyer lemons, plus 1/2 cup finely grated zest
Pinch of salt
8 tablespoons unsalted butter, cut into 4 pieces
6 tablespoons/95 grams heavy cream
Powdered sugar, optional
Make the crust:
Spray a 9x13" baking pan with cooking spray. Create a sling with parchment paper or foil and fit in pan. Spray the sheets with nonstick cooking spray and set aside.
Put the flour, powdered sugar, and salt in a food processor and pulse a few times. Add the butter and pulse 8 to 10 times, then process until the mixture is pale yellow and resembles coarse meal, about three 1-second pulses. Dump the mixture into the prepared pan and press firmly with your fingers into an even layer in the pan. Refrigerate for 30 minutes.
Adjust oven rack to the middle position and heat the oven to 350°F. Bake the crust until golden brown, about 20 minutes.
Meanwhile, make the filling:
In a medium non-reactive bowl, whisk together the yolks and whole eggs until combined. Rub the lemon zest into the sugar, which brings out more lemon flavor, then add to the eggs and whisk until just combined. Add the lemon juice and salt; whisk until combined. Transfer the mixture to a medium non-reactive saucepan, add the butter pieces, and cook over medium-low heat, stirring constantly with a wooden spoon or heatproof spatula until the curd thickens slightly and registers 170°F on an instant-read thermometer, about 5 minutes. Immediately pour the curd through the strainer into the measuring cup or bowl. Stir in the heavy cream; pour the curd into the warm crust immediately.
Bake until the filling is shiny and opaque and the center 3 inches jiggle slightly when shaken, 10 to 15 minutes. Cool to room temperature on a wire rack. Remove the bars from the pan using the sling and transfer to a cutting board. Cut into squares and dust with powdered sugar, if desired.
For the crust:
2 1/2 cups/350 grams all-purpose flour
1 cup/120 grams powdered sugar
1 teaspoon salt
16 tablespoons (2 sticks) unsalted butter, cut into 1-inch pieces
For the lemon filling:
14 large egg yolks, plus 4 large eggs
2 cups plus 4 tablespoons/425 grams granulated sugar
1 1/3 cups lemon juice from 8-9 Meyer lemons, plus 1/2 cup finely grated zest
Pinch of salt
8 tablespoons unsalted butter, cut into 4 pieces
6 tablespoons/95 grams heavy cream
Powdered sugar, optional
Make the crust:
Spray a 9x13" baking pan with cooking spray. Create a sling with parchment paper or foil and fit in pan. Spray the sheets with nonstick cooking spray and set aside.
Put the flour, powdered sugar, and salt in a food processor and pulse a few times. Add the butter and pulse 8 to 10 times, then process until the mixture is pale yellow and resembles coarse meal, about three 1-second pulses. Dump the mixture into the prepared pan and press firmly with your fingers into an even layer in the pan. Refrigerate for 30 minutes.
Adjust oven rack to the middle position and heat the oven to 350°F. Bake the crust until golden brown, about 20 minutes.
Meanwhile, make the filling:
Fit a strainer into a nonreactive mixing bowl or 4 cup measuring cup and set aside.
In a medium non-reactive bowl, whisk together the yolks and whole eggs until combined. Rub the lemon zest into the sugar, which brings out more lemon flavor, then add to the eggs and whisk until just combined. Add the lemon juice and salt; whisk until combined. Transfer the mixture to a medium non-reactive saucepan, add the butter pieces, and cook over medium-low heat, stirring constantly with a wooden spoon or heatproof spatula until the curd thickens slightly and registers 170°F on an instant-read thermometer, about 5 minutes. Immediately pour the curd through the strainer into the measuring cup or bowl. Stir in the heavy cream; pour the curd into the warm crust immediately.
Bake until the filling is shiny and opaque and the center 3 inches jiggle slightly when shaken, 10 to 15 minutes. Cool to room temperature on a wire rack. Remove the bars from the pan using the sling and transfer to a cutting board. Cut into squares and dust with powdered sugar, if desired.
Tuesday, February 22, 2011
Chocolate Oatmeal Drops
I've been quiet for the last week or two as I've tried very hard not use my wrist and to stay off my foot. It must have worked because I'm free of wrist pain and I haven't worn my splint for three days. Yippee! My foot is finally starting to mend, and although I'd be shocked if the doctor released me when I see her Wednesday, I'm still hopeful.
On to the cookies. Looks can be deceiving and these cookies are a prime example of that. You could just as easily call these brownie cookies as this is what they resemble - the crunchy outside edge of a brownie in cookie form. I made this recipe for Tuesdays with Dorie last week (It's deja vu all over again, as Yogi Berra has said) but am just now posting them. I added some walnuts to underscore their brownie roots.
While not especially attractive, they were delicious and easy. After reading the P&Qs, I knew the batter was delicious and the high ratio of butter to dry ingredients made mixing them just right even more important than usual. I was careful not to let the chocolate melt all the way over the heat, and I didn't let the mixture stand too long before scooping out my cookies. This kept the massive amount of butter from leaching out, though they do look pretty shiny.
Many thanks to Caroline and Claire of Bake with Us for choosing this recipe for the group to make last week (they have the recipe posted here). And apologies to Mike of Living Out West as this week's Tuesdays with Dorie recipe. Scones are popular here so I know I'll make them some time, just not this week.
Tuesday, February 8, 2011
You've Got to Have Friends
I never intended to be a blogger. I'm a deeply private person, and until I found some Tuesdays with Dorie bakers, I had no blog, hardly knew what a blog was, and no idea how one "started" one.
Over 2 years later I have become comfortable with the level of sharing when one blogs. And I have found on Twitter a group of like minded bakers who inspire and encourage me, and who mean so much to me. We pop in and out, jump into impromptu baking projects, share experiences with cookbooks and sourdough starters, and prop each other up through life's twists and turns.
It was after a 12 hour day at work that I came home and found an unexpected package waiting for me from Nancy. Inside was a lovely note that brought tears to my eyes, and a gift of a bread pan, a pan just like hers, pans that have been passed down in her family, the ones in which she bakes her glorious breads. After coming into a box of similar pans, Nancy thought of her Twitter pals and wrapped up a pan, wrote a lovely note, and sent off these well-loved pans to some of us. For me, it underlined the meaning of friendships between people who know each other virtually, many of whom have never met.
It had been a while since I had baked a loaf of bread due to a lingering problem with my wrist. I knew the first loaf of bread I wanted to make was one which Nancy had first shared with us, Dan Lepard's simple milk loaf. And so this weekend, I made a double batch of this easy and adaptable bread in my new pan.
Simple milk loaf starts with all-purpose flour and bread flour, but I usually substitute whole wheat flour for a bit more than 1/3 of the total flour. I also add a tad more butter than the recipe calls for, which makes the bread a little silkier than a traditional wheat bread.
Simple Milk Loaf (adapted from Dan Lepard's The Handmade Loaf, thanks to Nancy, Kayte, Margaret, Di, and Tracey)
Printer friendly recipe
350 g (12 oz) whole milk, at room temperature
20 g (3/4 oz) maple syrup (you can use a bit more for a sweeter loaf)
175 g (6 3/4 oz) all-purpose flour
125 g (4 1/2 oz) bread flour
Printer friendly recipe
350 g (12 oz) whole milk, at room temperature
20 g (3/4 oz) maple syrup (you can use a bit more for a sweeter loaf)
175 g (6 3/4 oz) all-purpose flour
125 g (4 1/2 oz) bread flour
200 g (6 3/4 oz) whole wheat flour
1 1/4 tsp fine sea salt
1 tsp instant yeast
37 g (1.5 oz, 3 tablespoons) unsalted butter, melted and cooled slightly, plus extra for brushing loaf
olive oil, for greasing
flour, for dusting
Place the milk and syrup in a measuring cup or bowl and stir together. Whisk the flour, salt and yeast mix together in a mixing bowl. Pour in the milk mixture stir together with a wooden spoon then with your hands to bring together as a soft, sticky dough. Pour the warm melted butter over the dough and mix into the dough with your hands. Cover the bowl and let stand for 10 minutes.
Grease your hands and a flat clean surface with olive oil (or, use a Silpat as I do). Remove the dough from the bowl and knead for ten seconds, then form the dough into a smooth round ball. Wipe the bowl clean and grease with olive oil, then return the dough ball to the bowl and leave for 10 minutes.
Repeat this ten-second kneading and resting process every 10 minutes twice (a total of three kneadings), then let the dough rest for 30 minutes.
Grease a deep 5 x 8 inch loaf pan and dust with flour. Divide the dough into two equal pieces, shape into two balls and place side-by-side into the loaf tin. Cover with plastic wrap and let rise for one and a half hours, or until almost doubled in height.
Preheat oven to 410 F. Brush the top of the loaf with a little melted butter and place in the preheated oven. Bake for 15 minutes, then reduce the heat to 350 F and bake for another 25-30 minutes, or until the top of the loaf is a shiny dark brown and the loaf has come away from the sides of the tin. Remove from the pan and cool on a rack. Warm bread is pretty irresistible, but your loaf will have the best texture if you wait until it cools completely. That said, if you cut off a few slices to try, only the cut end will be a little moist, the rest of the loaf will completely normal.
37 g (1.5 oz, 3 tablespoons) unsalted butter, melted and cooled slightly, plus extra for brushing loaf
olive oil, for greasing
flour, for dusting
Place the milk and syrup in a measuring cup or bowl and stir together. Whisk the flour, salt and yeast mix together in a mixing bowl. Pour in the milk mixture stir together with a wooden spoon then with your hands to bring together as a soft, sticky dough. Pour the warm melted butter over the dough and mix into the dough with your hands. Cover the bowl and let stand for 10 minutes.
Grease your hands and a flat clean surface with olive oil (or, use a Silpat as I do). Remove the dough from the bowl and knead for ten seconds, then form the dough into a smooth round ball. Wipe the bowl clean and grease with olive oil, then return the dough ball to the bowl and leave for 10 minutes.
Repeat this ten-second kneading and resting process every 10 minutes twice (a total of three kneadings), then let the dough rest for 30 minutes.
Grease a deep 5 x 8 inch loaf pan and dust with flour. Divide the dough into two equal pieces, shape into two balls and place side-by-side into the loaf tin. Cover with plastic wrap and let rise for one and a half hours, or until almost doubled in height.
Preheat oven to 410 F. Brush the top of the loaf with a little melted butter and place in the preheated oven. Bake for 15 minutes, then reduce the heat to 350 F and bake for another 25-30 minutes, or until the top of the loaf is a shiny dark brown and the loaf has come away from the sides of the tin. Remove from the pan and cool on a rack. Warm bread is pretty irresistible, but your loaf will have the best texture if you wait until it cools completely. That said, if you cut off a few slices to try, only the cut end will be a little moist, the rest of the loaf will completely normal.
Saturday, February 5, 2011
Self-Frosting Nutella Cupcakes
It's World Nutella Day. How did I celebrate? By swirling a spoonful of Nutella into my oatmeal (you should try it sometime-it's yummy!) and by baking these Nutella cupcakes. I originally saw them on Amy's blog, Playing House, and they went into my mental file of recipes I HAD to make. Although the recipe says to cool them completely, they are sooo yummy while still warm.
Self-Frosting Nutella Cupcakes (adapted from Playing House)
Printer friendly recipe
10 tbsp (140 grams) butter, softened
3/4 cup (150 grams) white sugar
3 eggs, at room temperature
1/2 tsp vanilla
1 3/4 cups (200 grams) sifted all purpose flour (sift before measuring)
1/4 tsp salt
2 tsp baking powder
Nutella, approximately 1/3 cup
Preheat oven to 325F. Line 12 muffin tins with paper liners.
Put the flour, baking powder and salt in a bowl and whisk together to combine. If you're weighing your flour, you can skip the sifting and just whisk the flour, baking powder and salt well. Set aside.
Cream the butter and sugar until light, about 2 minutes. Add in the eggs one at a time, mixing until fully incorporated. Don’t worry if the batter doesn’t look smooth. Add vanilla. Stir in the flour mixture until batter is uniform and no flour remains.
Using a small ice cream scoop for uniformity, fill each muffin liner with batter. They should be 3/4 full, if you’re not using a scoop. Top each cake with about 1 1/2 tsp Nutella. Swirl the Nutella in with a toothpick, skewer, or sharp knife, making sure to fold a bit of batter up over the Nutella. Don't worry about making it look pretty.
Bake for 18-20 minutes, or until cupcakes test done (poke the cupcake with a toothpick, making sure to miss the Nutella swirl). Remove to a wire rack to cool completely. Makes 12 cupcakes.
Friday, February 4, 2011
Banana + Chocolate Crumb Muffins
A couple of years ago, before I started my blogging and baking journey with Tuesdays with Dorie, I followed baking recipes to the letter. Although baking is chemistry, a certain amount of modification is possible. Two plus years of weekly baking has taught me a lot about what to play with and what to leave alone.
One of the big favorites from the last two years is this banana bundt cake. I recently bought these cute tulip cupcake liners and I wanted to use them. And I had brown bananas. Banana crumb muffins were born.
Revisiting the banana bundt cake recipe from Baking From My Home to Yours, I was shocked to discover it didn't have chocolate chips. I've made it many times, and I could swear the recipe calls for chocolate chips. Well, my version of it does. And because I had the dramatic height of these tulip cupcake liners, I added some crumb topping I had made and frozen a couple of months ago.
These are a little more work than some muffins, but they are so worth it.
Banana + Chocolate Crumb Muffins (adapted from BFMHTY and Ina Garten)
Printer friendly recipe
Crumb topping:
1 cup all-purpose flour
1/3 cup granulated sugar
1/4 cup light brown sugar, lightly packed
1/2 teaspoon kosher salt
1/4 teaspoon ground cinnamon
1/4 pound (1 stick) cold unsalted butter, diced
Cake:
3 cups all-purpose flour
2 teaspoons baking soda
1/2 teaspoon salt
2 sticks (8 ounces) unsalted butter, at room temperature
2 cups sugar
2 teaspoons pure vanilla extract
2 large eggs, preferably at room temperature
About 4 very ripe bananas, mashed (you should have 1 1/2 - 1 3/4 cups)
1 cup sour cream or plain yogurt
1 cup semi-sweet chocolate chips
Center a rack in the oven and preheat to 350 degrees F. Place cupcake liners in two muffin tins.
Working with a stand mixer, preferably fitted with a paddle attachment, or with a hand mixer in a large bowl, beat the butter until creamy. Add the sugar and beat at medium speed until pale and fluffy. Beat in the vanilla, then add the eggs one at a time, beating for about 1 minute after each egg goes in. Reduce the mixer speed to low and mix in the bananas. Finally, mix in half the dry ingredients (don’t be disturbed when the batter curdles), all the sour cream and then the rest of the flour mixture. Stir in the chocolate chips with a spatula. Scoop the batter into the cupcake liners and sprinkle each muffin with 1 tablespoon of the crumb topping. Remaining crumb topping can be frozen, well wrapped, for up to two months.
Bake for 20 minutes, or until a thin knife inserted deep into the center of a muffin comes out clean. Transfer the muffin tins to a rack and cool for 10 minutes before moving the muffins to the rack to cool to room temperature.
Center a rack in the oven and preheat to 350 degrees F. Place cupcake liners in two muffin tins.
Make the crumb topping: combine the flour, granulated sugar, brown sugar, salt, cinnamon, and the butter crumb topping ingredients in the bowl of an electric mixer fitted with a paddle attachment. Mix on low speed until the butter is the size of peas. Rub the mixture with your fingertips until it's in big crumbles, then set aside in the refrigerator, tightly covered, until ready to use.
Whisk the flour, baking soda and salt together.
Working with a stand mixer, preferably fitted with a paddle attachment, or with a hand mixer in a large bowl, beat the butter until creamy. Add the sugar and beat at medium speed until pale and fluffy. Beat in the vanilla, then add the eggs one at a time, beating for about 1 minute after each egg goes in. Reduce the mixer speed to low and mix in the bananas. Finally, mix in half the dry ingredients (don’t be disturbed when the batter curdles), all the sour cream and then the rest of the flour mixture. Stir in the chocolate chips with a spatula. Scoop the batter into the cupcake liners and sprinkle each muffin with 1 tablespoon of the crumb topping. Remaining crumb topping can be frozen, well wrapped, for up to two months.
Bake for 20 minutes, or until a thin knife inserted deep into the center of a muffin comes out clean. Transfer the muffin tins to a rack and cool for 10 minutes before moving the muffins to the rack to cool to room temperature.
Tuesday, February 1, 2011
Great Grains Chocolate Chip Muffins
Who says chocolate can't be good for you? Or that things made with whole grains are boring?
Not these delectable muffins. Christine of Happy Tummy selected Great Grains Muffins for the Tuesdays with Dorie bakers to make this week. They looked good to me as is, but in case you're new around here, I like adding chocolate to almost anything I bake. These were no exception. When armed with a muffin with chocolate chips, it's a happy morning. A muffin made with whole wheat, cornmeal, oats, maple syrup and dried blueberries with chocolate chips? It's going to be a great day!
These muffins were even good after several days of sitting in my car. I ate one for dinner on my way to an evening event and it was still moist and delicious, and, of course, chocolaty.
Stop by and visit Christine. She'll have the recipe for you. And you can see what the other bakers thought by checking them out here.
Monday, January 31, 2011
Chocolate-Nut Loaf Cake
Chocolate with Francois is a delightful group of bakers who are making one recipe a month from Francois Payard's book Chocolate Epiphany. This month it was my turn to pick the recipe.
The first time I picked a recipe for this group, I chose chocolate macarons. I had an idea the recipe wasn't one of those you throw together at the last minute to thrill guests who drop in unannounced. While the recipe didn't disappoint (you can read about my first experiences with macarons here), this time around I wanted something a little easier. This recipe definitely delivered on that goal.
Although the recipe calls for three kinds of nuts, you could mix it up and use different nuts based on what you have on hand, or even substitute chopped dried cherries (or even prunes, very French) or cocoa nibs for the nuts.
Because I was contributing goodies to a bake sale, I doubled the recipe and made one loaf, 12 cupcakes and 24 mini-cupcakes. The minis almost didn't make it to the bake sale, they were so delicious warm out of the oven. The loaf went to work with me the next day, and I took extra glaze so my coworkers could moisten up the cake. My loaf was a little dry, even though I pulled it out at 51 minutes, the low end of the range. I liked the texture of the cupcakes and minis far more than I did the loaf, and I would stick with cupcakes and minis the next time I make it. Here are a few pointers to help you get the perfect chocolate nut loaf cake:
- I doubled the recipe across the board and made it in one mixing bowl. Occasionally, I'll double by making two separate batches, but doubling worked just fine.
- I sprayed the bottom of the loaf pan with cooking spray before putting the parchment in it. That keeps it in position until you pour in the batter.
- I have a beater blade that I read about on Dorie Greenspan's blog a year or two ago. It makes a huge difference when you're creaming butter and sugar, and it made it easier to beat the almond paste and sugar together for this recipe. If you're interested, you can find it here. They come in different sizes, so make sure you get the right one for your mixer.
- I don't generally have whole milk, so I combine 1% or skim with heavy cream (which I usually do have on hand). I poured two tablespoons of heavy cream in the measuring cup, and added milk to make 1/2 cup.
- My hazelnuts were mostly skinned, but some had skins clinging to them. Since the cake is so profoundly chocolate, I didn't worry too much about having perfectly skinned hazelnuts. The skins can be bitter, but they weren't detectable in this cake.
- Don't let your butter cool too much before using it. Mine did, and I had small chunks of butter in the batter. When they melted, some of the muffins practically boiled in butter. How can this be a bad thing?!? It reminded me of the chocolate canneles, one of my favorite recipes this group has made.
- I substituted white whole wheat flour for 1/4 of the flour. I could tell there was whole wheat flour based on the texture, but I was looking for it. Because of the nuts and almond meal, I really don't think anyone else noticed.
- My loaf was done in 51 minutes, my cupcakes at 17 minutes and my minis at 10 minutes.
- Rather than glazing the cupcakes and minis, I dipped them upside down in the bowl of glaze. I poured the glaze over the loaf, which I had flipped over (so the flat bottom became the top).
We loved this one, and even though my loaf turned out a little crumbly, the cupcakes were perfect, even without the glaze. Check out what the other CwF bakers thought...you can find them here.
Printer friendly recipe-cake and glaze
Francois says: Loaf cakes are a staple in French home kitchens. This version is a little more elaborate than a plain chocolate loaf, since it contains a variety of nuts, which add texture to the cake, and two types of chocolate and almond paste for an extra-rich taste. For all these reasons, this particular loaf makes a great dessert, too; sprinkle chopped toasted nuts and dried fruits over the warm glaze, and serve with Creme Anglaise or vanilla ice cream.
Printer friendly recipe-cake
Vegetable cooking spray, for the pan
1 1/4 cups (135 grams) all-purpose flour
1/3 cup plus 1 tablespoon (37 grams) Dutch-processed cocoa powder
3/4 teaspoon (3 grams) baking powder
3 1/2 ounces (105 grams) almond paste
1/2 cup plus 2 tablespoons (125 grams) sugar
3 large eggs
1/2 cup (112 grams) whole milk
1/4 cup (52 grams) semisweet chocolate chips
1/2 cup (60 grams) chopped toasted hazelnuts
1/4 cup (45 grams) chopped toasted almonds
1/3 cup (45 grams) toasted pistachios
1 1/4 cups (20 tablespoons, 270 grams) unsalted butter, melted
Make the cake: Place a rack in the center of the oven and preheat the oven to 350 degrees. Line the bottom of a 9x5x3-inch loaf pan with parchment paper, spray the pan and paper with vegetable cooking spray, and set aside. Sift the flour, cocoa powder, and baking powder together over a bowl or piece of waxed paper. Set aside.
Place the almond paste and sugar in the bowl of an electric mixer fitted with the paddle attachment, and mix on medium speed until the sugar is incorporated into the almond paste. Mix in the eggs one at a time until they are all incorporated and the mixture is smooth. Scrape the sides and bottom of the bowl to make sure that everything gets mixed in and that lumps don't form.
Stop the mixer, and switch to the whisk attachment. Whip the mixture on medium speed for about 8 minutes, until it is light and fluffy, then gradually mix in the milk. Add the dry ingredients to the batter, and mix until smooth. Scrape the bowl again. Mix in the chocolate chips, hazelnuts, almonds and pistachios until incorporated, then mix in the butter.
Pour the butter into the prepared pan, and bake for 50 to 60 minutes, until a wooden skewer inserted in the center of the cake comes out clean and the sides slightly pull back from the edges of the pan. Remove from the oven, and let the cake cool to room temperature in the pan, then unmold it over a wire cooling rack and let it cool completely. If you unmold it too rapidly, it will break. You can make the cake 3-4 days ahead, keeping it very well wrapped. Glaze it only when you are ready to serve it.
Chocolate Glaze (make enough to cover a 9-inch cake)
Francois says: Glazing cakes gives them the beautiful, shiny finish you see in pastry shops. A glaze is a loose ganache, made by melting chocolate with hot cream and adding a little corn syrup for shine. In order for the glaze to cover the cake smoothly, it should feel warm to the touch, close to body temperature. If needed, and particularly if the chocolate is not fully melted, fill a medium pot one-third full with water and bring it to a gentle simmer over medium heat. Reduce the heat to low and, ensuring that the bowl containing the glaze doesn't touch the water, place it over the pot. Mix until the glaze is smooth and reaches the desired temperature.
Glaze is best used immediately, but you can keep it, covered and refrigerated, for two to three days. Reheat it as directed above, adding a teaspoon of light corn syrup to regain some of the shine that will have been lost in the refrigeration process.
Printer friendly recipe-glaze
8 ounces (250 grams) 61% or 72% chocolate, chopped
1 tablespoon (12 grams) light corn syrup
1 cup (250 grams) heavy cream
Place the chocolate and corn syrup in a medium bowl.
Bring the heavy cream to a boil in a small saucepan over medium-high heat. Pour the hot cream over the chocolate, and whisk until the chocolate is melted and the mixture is smooth. Strain the mixture into a bowl. Use immediately.
Glazing a cake
Line a baking sheet with wax paper, and place a wire cooling rack on top of the paper. Place the cake to be glazed (make sure it has been chilled) on the rack, and pour the glaze over its top. Use a spatula to even out the glaze and help it run down the sides of the cake. Let it cool at room temperature, and serve within a few hours to make sure that the glaze retains its shine.
Tuesday, January 25, 2011
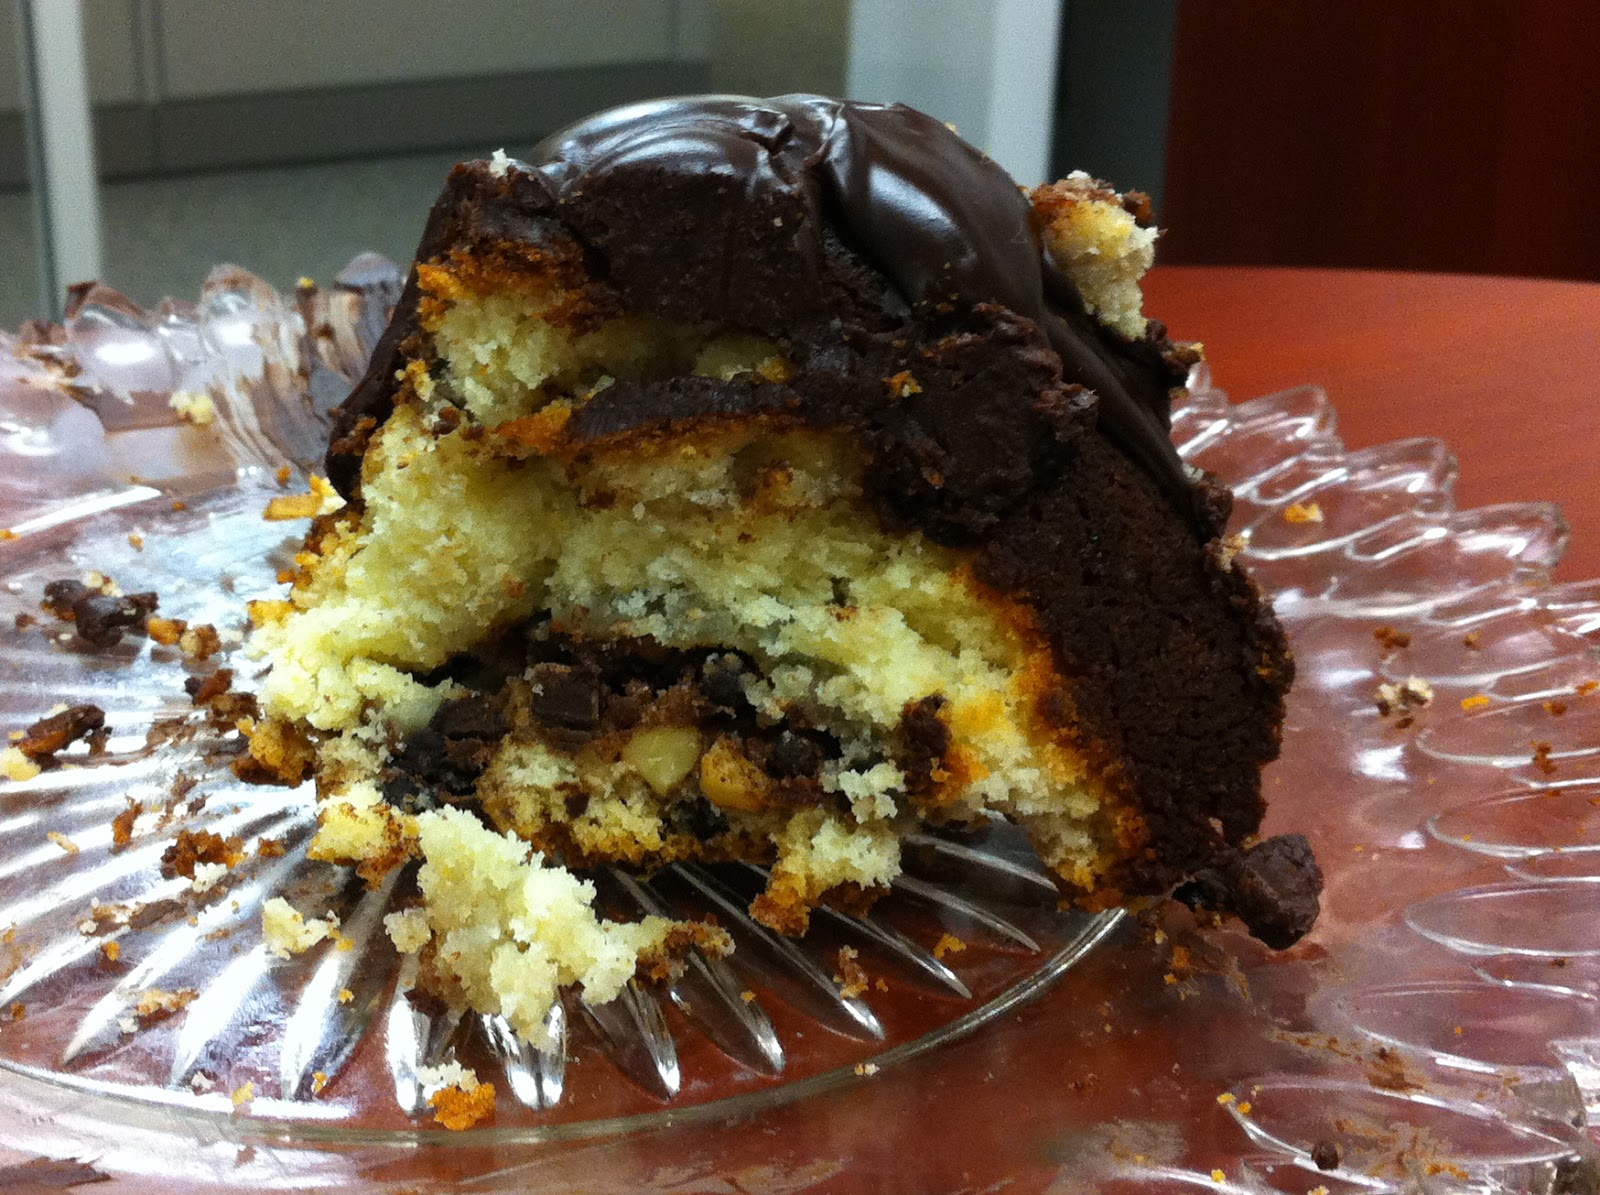
Nutty, Chocolatey, Swirly Sour Cream Bundt Cake
Sour cream pound cake, swirled with a brown sugar-chocolate-cinnamon-nut mixture, baked in a bundt pan. Sounds pretty good, right?
Jennifer of Cooking for Comfort selected this bundt cake (recipe here) for all of the Tuesdays with Dorie bakers to make this week. It's quite a responsibility to pick the recipe and host, and we all have to wait so long before it's our turn. That's why I hate to say it, but I didn't love this one.
I nixed the raisins in the swirl, and doubled the walnuts. I had a lot of trouble with the swirl layer. I couldn't get the batter to cover it because the sugar in the swirl made it very difficult to cover up. Nonetheless, the cake baked up beautifully with a lovely, crunchy exterior, and a chewy, moist interior. So why didn't I love it?
It was the swirl. The swirl didn't melt in the batter and remained as a layer of raw sugar with a sprinkling of walnuts and chocolate chips. It made the cake fall apart when it was sliced. I'm not a fan of dusting things with powdered sugar, so I topped the cake with Dorie's ganache. That made it a crunchy-chewy-falling-apart-dripping-in-chocolate hot mess.
I do plan to make this one again because the flavor and texture of the cake were great. But I'll skip the swirl and add cinnamon to the cake instead.
Thanks, Jennifer, for hosting this week! Sorry I messed up your pick. :-)
I do plan to make this one again because the flavor and texture of the cake were great. But I'll skip the swirl and add cinnamon to the cake instead.
Thanks, Jennifer, for hosting this week! Sorry I messed up your pick. :-)
Monday, January 24, 2011
Curried Butternut Squash Soup
One of my favorite things about winter (and it's a short list) is when butternut squash shows up in the markets. I serve it many different ways, but our recent favorite is this soup. Once you've wrestled the squash out of it's shell, you're done with the hard work. Change up the spices if you like, and then sit down to enjoy a soup that has absolutely no added cream or butter, yet tastes silky and rich. I like to top it with a dollop of fat free sour cream (or the real stuff, if that's what I have on hand). If you have some butter fried mushrooms, you can put a few of those in the bowl before you ladle in the soup. Butter fried mushrooms? That's another post.
Curried Butternut Squash Soup
Printer friendly recipe
1 butternut squash (approximately 3 pounds)
Olive oil spray
1-2 tablespoons olive oil
1 medium onion, chopped
1 teaspoon curry powder
3/4 teaspoon cinnamon
1/4 teaspoon cayenne pepper
Salt and pepper
2 cups chicken stock
Preheat oven to 450 degrees. Peel the butternut squash and slice it in half lengthwise. Scoop out the strings and seeds, then cut it into 1" cubes. Spray a sheet pan with olive oil spray, toss the squash on the pan and spray it with the olive oil spray. Sprinkle with salt and pepper and bake for 20-30 minutes, until the squash starts browning on some of the edges and it's tender when pierced with the tip of a sharp knife.
While the squash is baking, heat 1 tablespoon of the olive oil in a saute pan over medium heat. Add the onions and saute until they are limp but not brown. Add more olive oil if the pan gets dry or if the onions start getting very brown. When the onions soften add the curry, cinnamon and cayenne to the pan and heat, stirring, for 1-2 minutes to awaken the spices. Set aside until the squash is out of the oven.
In a blender or food processor, puree small batches of the squash with the onions and stock. Don't fill your machine more than 1/3 or 1/2 full when pureeing the vegetables and broth! Hot liquids expand and can cause nasty burns. Puree until smooth (or you can leave it chunky if you like). You may need to add extra stock if your blender is struggling with the squash, which is quite dense. Taste for seasoning and add salt or pepper if needed. Ladle into bowls and serve. Makes 6-8 servings.
Saturday, January 22, 2011
Best Blondies Ever, for National Blond Brownie Day
A while back, I perused a list of food-related "holidays" and put some of them on my calendar. I don't always get a chance to bake the honored food on the right day, but blondies, especially these, are so easy I managed to fit them in.
I haven't always been a fan of blondies. I've written before that I think they're a pale wannabe to their wildly popular sibling, the brownie. It took a couple of blondie recipes made with brown butter to make me change my mind. This recipe (which I found on Smitten Kitchen) doesn't call for browned butter, but it has the same deep caramel notes I like in the brown butter blondies I've tried. It's a one bowl recipe and the list of possible mix-ins is practically endless. I made them with milk chocolate and white chocolate chips because I had supplies of both that I wanted to use up, but they would be fantastic with my favorite, chopped up Skor bars and walnuts.
I doubled the recipe and baked them in a 13 x 9 pan. They're basically butter with enough other stuff thrown in to hold them together.
Blondies - adapted from Deb of Smitten Kitchen, who found them in How to Cook Everything
Printer friendly recipe
8 tablespoons butter, melted
1 cup/230 grams brown sugar (I used half light, half dark)
1 egg
1 teaspoon vanilla extract
Pinch of salt
1 cup/140 grams all-purpose flour
Preheat oven to 350°F. Line an 8×8 pan with a parchment paper or heavy-duty foil sling, covering all four sides of the pan. If using foil, butter the foil.
Stir the flour and salt together in a small bowl.
Mix melted butter and brown sugar in a mixing bowl and whisk until smooth. Beat in the egg and then the vanilla.
Stir in the flour and salt mixture. Mix in any additions (below). Don't over mix, but you don't want pockets of dry flour.
Pour into prepared pan. Bake at 350°F 20-25 minutes (if you double the recipe, they'll need about 30 minutes), or until set in the middle. You don't want them to be gooey in the center, but don't think they'll test done. Cool on rack before lifting the parchment or foil from the pan, peeling it off the blondies and cutting them into tiny squares. Makes 16 blondies, or 32 teeny tiny ones.
For additions, use one or a combination of:
1/2 to 1 cup chopped Skor bars, or half Skor bars and half chopped nuts
1/2 to 1 cup chopped nuts, toasting them first for even better flavor
1/2 to 1 cup chocolate chips
1/2 cup lightly toasted coconut with 1/2 cup chopped toasted macadamias
2 tablespoons of espresso powder with the vanilla, with or without nuts
1/2 cup Nutella
Stir 1/2 cup dried fruit, especially dried cherries, into the prepared batter
Top with a vanilla butter cream or chocolate peanut butter cream frosting (I can't imagine these with frosting unless you're already at the emergency room and are trying to bring on the heart attack)
Thursday, January 20, 2011
Vanilla Spice Oatmeal
When I looked at this recipe this morning, I found myself thinking, "Hey, wait a minute! This is what I eat for breakfast almost every day, only better."
Ellie Krieger dreamed up a way to make my morning oatmeal even more yummy, with minimally more calories. I make mine a little differently than she does (I make a single serving in the microwave every morning). With the added flavors of vanilla, chopped toasted pecans and brown sugar, this was so fabulous it will be hard for me to make it any other way from now on.
My blogging friend Mary of Popsicles and Sandy Feet thoughtfully selected this recipe for Craving Ellie in My Belly. The recipe is available here, or on Mary's blog. If you don't know Mary and her adorable kiddos, make sure you pay her a visit. She's hilarious and sweet, the best combination in my book. Thanks, Mary, for picking a recipe that couldn't have been easier!
Wednesday, January 19, 2011
Lime Poppy Seed Muffins, and Tips for Baking Before Work
This week's Tuesdays with Dorie recipe was chosen by Betsy of A Cup of Sweetness. Lime poppy seed muffins may not be the standard, but I'm going with what I have. I love lemon. When I was thinking of ways to mix it up, I thought of using a pomelo, but then the lime tree caught my eye and I went with lime.
I made these minis one morning and took them in to share with my coworkers. I get a lot of questions from them as they wonder how I manage to bake in the morning before coming to work. Here are a few tips:
- Coffee comes first. Enough said.
- I measure most of the ingredients the night before and leave them in the microwave overnight. Why the microwave? I have two adorable but curious 1 year old kittens who love to play in the middle of the night. One morning I woke up to sugar scattered all over the counter and floor. In my early morning stupor, I might turn on the oven without looking inside, but not the microwave.
- I keep butter in a cereal bowl with a silicone pastry brush in the fridge. When I need to butter a pan (or muffin tins) I pull it out, warm it up in the microwave, butter my pans and stick the bowl and brush back in the fridge.
- Pick easy recipes. I know better than to attempt a cheesecake before work (I'm an early riser, just not that early).
- Don't be afraid to finish a dessert at work. I have been known to frost cakes and whip cream in the break room. Sometimes it's easier to haul a bowl of frosting and the cake layers to work than it is to protect your frosted cake from auto mishap (as with this dessert).
- If you're making brownies, you can put the batter in the pan and refrigerate, unbaked, overnight. Leave the pan out on the counter while you drink your coffee and preheat the oven.
- I scoop and refrigerate (or freeze) cookie dough all the time. Some recipes tell you not to defrost, just to bake them a couple of minutes longer, but I like them better when I let them defrost in the fridge over night. You may feel differently, but both methods work. Scooping first makes a big difference. Frozen (or refrigerated) cookie dough is hard to scoop.
There you have it. There are many ways to enjoy fresh, warm baked goods in the morning and these are just a few of them. Experiment and find what works for you!
Bouchon Roast Chicken
I did it. I made the Bouchon recipe for roasted chicken. I think there should be an Olympic gold medal or Congressional Medal of Honor for this recipe.
I've had the Bouchon cookbook for at least five years, but I never dared to attempt the chicken that gets so much praise. Those who have mastered it acknowledge it is a lot of work, but when I glanced at the recipe, I thought "no big deal."
Yeah, right. I completely glossed over the brine, which has to be heated and then cooled before the chicken goes in. I didn't anticipate a recent freeze would impact the thyme supply in my area (true), and I didn't realize I don't own butcher's twine.
I started with a halal chicken (one which is raised humanely and butchered in accordance with Islamic law), which I rinsed and dried. I had made the brine before leaving for work, and I came home at lunch to stick the bird in the brine. The brine, with its assortment of thyme, parsley, rosemary, garlic, peppercorns, bay leaves, lemon and salt, smelled absolutely fabulous. Even with no prior brining experience, I knew from the smell of the brine that the chicken would be delicious.
When I came home from work, I read the recipe ten times, and searched for a trussing video on YouTube. I found one with none other than Thomas Keller making the Bouchon roast chicken. Except in this video, the chicken roasts on a bed of root vegetables. Great idea. Next time.
Just one problem. No twine and I wasn't about to run to Williams-Sonoma at 7 PM when I still had a chicken to cook. So I improvised--I tied strips of cheesecloth together and used that instead of the twine.
Even with the video, my trussing leaves a lot to be desired. My chicken was listing to one side, and that didn't change after I put it in the pan and into the oven. Keller gives a lot of pointers about roasting the perfect chicken. The chicken should be at room temperature (for more even cooking), sprinkled with lots of kosher salt for even browning, and baked in a hot skillet. After heating the skillet on the cooktop, add a tablespoon of canola oil and let that get hot, then carefully place the chicken in the pan and move to your preheated oven. The chicken roasts at high heat for about 40 minutes. When you remove it from the oven, you baste it all over with the pan juices (to which you've added chopped fresh thyme). Then let it cool until you can eat it without burning off the roof of your mouth.
The chicken turned out to be mindblowingly good. Maybe the best chicken I've ever had. It was so good that I ate the drumsticks and wings for dinner. Standing over the pan. With the skin. I never eat dark meat, or skin, or over the pan. THAT'S how good it was. The breast was even better, moist, tender, melt in your mouth good.
Perhaps it was foolish of me to start my brining and roasting experience with the most revered roast chicken recipe, but my thinking was two-fold. If anyone can teach me how to make a great chicken, it's Thomas Keller. And my blogging friends Kayte and Nancy dreamed up a chef of the month theme for our Twitter avatars, and Kayte chose Thomas Keller for January. We'll all try to cook some dishes from the chef for that month and use one of the photos as our Twitter avatars. Right now, my avatar is Ad Hoc at Home chocolate chip cookies, but this beautiful (to me) roast chicken will have his turn soon. If you'd like the complete recipe (including the brine, which many recipes omit), you can find it here.
Subscribe to:
Posts (Atom)