Showing posts with label Strawberries. Show all posts

Thursday, May 10, 2012

La Palette's Strawberry Tart Goes Chocolate


I know. Another recipe from Baking From My Home to Yours. But this one features strawberries (available now fresh anywhere in the northern hemisphere). I made it in February, when the first organic local strawberries showed up at Trader Joe's. They were beauties, sweet and floral, juicy, and the first harbinger of a spring that was way too early this year, at least in our area.

When the berries are fresh and luscious, it masks almost any error one might make, like over baking the tart shell, nuking cold ganache until it almost broke, forgetting the original recipe also called for strawberry jam, and fumbling the berries so they tumbled randomly into the shell (I had every intention of an artful design, but you know that's just not me). I had planned to use both the jam and the ganache (my addition to the recipe), but completely forgot. We didn't miss it. It would have been a shame to cover the strawberries' flavor with jam. Hindsight...

I have a tart shell crust that I've fallen in love with, and it's the one from The New Best Recipe from Cook's Illustrated. It doesn't look like it from this photo but it's very easy to work with (I mauled it once it was in the pan). It's like a buttery shortbread, and that's a good thing in a tart shell.

Wednesday, July 27, 2011

Daring Bakers - Fraisier


Jana of Cherry Tea Cakes was our July Daring Bakers’ host and she challenges us to make Fresh Frasiers inspired by recipes written by Elisabeth M. Prueitt and Chad Robertson in the beautiful cookbook Tartine.

I completely changed my approach this month, not just making the recipe (the first I've made since March) but making it EARLY in the month. Thanks to the long weekend for Independence Day, I got this baby done early. I think we need a long weekend every month.

It was stinking hot here that weekend, and the thought of turning on the oven filled me with dread. So I made the lemon chiffon cake layer before the sun was up when I could have the window open and the fan bringing in what little cooler air there was. And that's when I ran into a problem.

Let me just say I think Daring Bakers needs to have a reading skills test for new bakers. I read the recipe carefully and REPEATEDLY and saw "8" cake pan" every time. Except the time when I read it as I was about to prepare my 8" cake pan. Whuuutt, 8" springform pan?!?!? Who changed the recipe on me??

I have three springform pans, none of them 8". So do I make it in a 9" (have two of those) or the 8" cake pan? Since it's a chiffon cake, with parchment in the bottom I figured it would be easy to get out of the pan, so I went with the 8" cake pan. (Why I didn't think of my 8x8 with 3" sides I'll never know, but a square frasier would have been cool). Then I realized the 8" springform was so all the cake batter would fit in the same pan. So I quickly prepped two 4" springform pans and scooped the excess batter into them and baked the 8" for a few minutes less than the recipe called for, and it was glorious, puffy and lightly browned.


Other than the pan trauma, the recipe was uneventful. The pastry cream was easy. I made my simple syrup with POG (passion fruit-orange-guava juice) to temper the sweetness of the fruit. Loved the technique of lining the ring from a springform with plastic wrap before assembling the fraisier. Assembly was not a big deal, no trauma, nothing to mar my enjoyment of making this lovely dessert. I did bypass the thin topping of almond paste because, well, I hate the stuff. So my fraisier is no doubt less beautiful as a result, but it's something I enjoyed eating. So much so that I took the leftovers to work.

This was a fun challenge, and a recipe that I imagine I'll return to in the future, but with different fruit. Thanks, Jana, for a great recipe that even I could make!

Basic Chiffon Cake:

Ingredients:
1 cup + 2 tablespoons (270 ml) (5½ oz/155 gm) all-purpose flour
1 teaspoon (5 ml) (4 gm) baking powder
3/4 cups (180 ml) (6 oz /170 gm) sugar
1/2 teaspoon (2½ ml) (1½ gm) salt, preferably kosher
1/4 cup (2 fl oz/60 ml) vegetable oil
3 large egg yolks
⅓ cup + 1 tablespoon (3.17 fl oz/95 ml) water
1 teaspoon (5 ml) pure vanilla extract
3/4 teaspoon (3¾ ml) (3 gm) lemon zest, grated
5 large egg whites
¼ teaspoon (1¼ ml) (1 gm) cream of tartar
Directions:
  1. Preheat the oven to moderate 325°F (160°C/gas mark 3).
  2. Line the bottom of an 8-inch (20 cm) spring form pan with parchment paper. Do not grease the sides of the pan.
  3. In a large mixing bowl, stir together the flour and baking powder. Add in all but 3 tablespoons (45 ml.) of sugar, and all of the salt. Stir to combine.
  4. In a small bowl combine the oil, egg yolks, water, vanilla and lemon zest. Whisk thoroughly.
  5. Combine with the dry ingredients and mix thoroughly for about one minute, or until very smooth.
  6. Put the egg whites into a stand mixer, and beat on medium speed using a whisk attachment on a medium speed, until frothy. Add cream of tartar and beat on a medium speed until the whites hold soft peaks. Slowly add the remaining sugar and beat on a medium-high speed until the whites hold firm and form shiny peaks.
  7. Using a grease free rubber spatula, scoop about ⅓ of the whites into the yolk mixture and fold in gently. Gently fold in the remaining whites just until combined.
  8. Pour the batter into the prepared pan. Bake for 45 to 55 minutes or until toothpick inserted into the center comes out clean.
  9. Removed the cake from the oven and allow to cool in the pan on a wire rack.
  10. To unmold, run a knife around the sides to loosen the cake from the pan and remove the spring form sides. Invert the cake and peel off the parchment paper. Refrigerate for up to four days.

Variations to the Basic Chiffon Cake:

Lemon Chiffon Cake

Ingredient Alterations:
Reduce water to 1/4 cup (60 ml)
Add 1/8 cup (30 ml) lemon juice
Increase lemon zest to 1½ teaspoon (7½ ml) (5 gm)
Remove the vanilla from the recipe
Direction Alterations:
Follow the directions, same as above, adding the lemon juice and zest to the oil, egg yolks and water in step 4.

Orange Chiffon Cake

Ingredient Alterations:
Replace the full amount of water with orange juice
Replace lemon zest with the zest of one orange
Remove the vanilla from the recipe
Direction Alterations:
Follow the directions, same as above, adding the orange juice and zest to the oil, and egg yolks in step 4.

Coconut Chiffon Cake

Ingredient Alterations:
Add ¼ teaspoon (1¼ ml) (1 gm) freshly ground nutmeg
Reduce oil to 1/8 cup (1 fl oz/30ml)
Reduce water to 1/8 cup (1 fl oz/30ml)
Add 1/3 cup (2 ⅔fl oz/80 ml) unsweetened coconut milk
Remove the vanilla from the recipe
Direction Alterations:
Follow the directions, same as above, adding the nutmeg to the flour mixture in step 3, and the coconut milk to the oil, water and egg yolks in step 4.

Chocolate Chiffon Cake

Ingredient Alterations:
Reduce all-purpose flour to ¾ cup + 1 tablespoon (195 ml) (4 oz/110 g)
Add 1/4 cup (60 ml) (3/4 oz/20 g) cocoa powder
Direction Alterations:
Follow the directions, same as above, adding the cocoa to the flour mixture in step 3.

Pastry Cream Filling:

Ingredients:
1 cup (8 fl oz/250 ml) whole milk
1/2 teaspoon (2½ ml) pure vanilla extract
1/8 teaspoon (1/2 ml) (¼ gm) salt, preferably kosher
2 tablespoons (30 ml) (10 gm)cornstarch
1/4 cup (60 ml) (2 oz/55 gm) sugar
1 large egg
2 tablespoons (30 ml) (1 oz/30 gm) unsalted butter
3/4 teaspoon (3¾ ml) (4 gm) gelatin
1/2 tablespoon (7½ ml) water
1 cup (8 fl oz/250 ml) heavy cream
Directions:
  1. Pour the milk, vanilla, and salt into a heavy sauce pan. Place over medium-high heat and scald, bringing it to a near boiling point. Stir occasionally.
  2. Meanwhile, in a stand mixer add the cornstarch and sugar. Whisk to combine
  3. Add the eggs to the sugar and cornstarch and whisk until smooth.
  4. When the milk is ready, gently and slowly while the stand mixer is whisking, pour the heated milk down the side of the bowl into the egg mixture.
  5. Pour the mixture back into the warm pot and continue to cook over a medium heat until the custard is thick, just about to boil and coats the back of a spoon.
  6. Remove from heat and pass through a fine mesh sieve into a large mixing bowl. Allow to cool for ten minutes stirring occasionally.
  7. Cut the butter into four pieces and whisk into the pastry cream a piece at a time until smooth.
  8. Cover the cream with plastic wrap, pressing the plastic wrap onto the top of the cream to prevent a skin from forming. Chill in the refrigerator for up to five days.
  9. In a small dish, sprinkle the gelatin over the water and let stand for a few minutes to soften.
  10. Put two inches (55 mm) of water into a small sauce pan and bring to a simmer over a medium heat.
  11. Measure 1/4 cup (2 oz/60 ml) of the chilled pastry cream into a small stainless steel bowl that will sit across the sauce pan with the simmering water, without touching the water.
  12. Heat the cream until it is 120 F (48.8 C). Add the gelatin and whisk until smooth. Remove from the water bath, and whisk the remaining cold pastry cream in to incorporate in two batches.
  13. In a stand mixer, fitted with the whisk attachment, whip the cream until it holds medium-stiff peaks. Immediately fold the whipped cream into the pastry cream with a rubber spatula.

Simple Syrup:

You may choose to flavor the syrup. One way is to use flavored sugar (for example: apple cider sugarorange sugar, or vanilla sugar) or to stir in 1-2 teaspoons of flavored extract. You may also infuse with herbs or spices, if desired or add four tablespoons (60 ml) of fruit juice while the syrup is cooling.
Ingredients:
1/3 cup (2⅔ fl oz/80 ml) (2⅔ oz/75 gm) of sugar, flavored or white
1/3 cup (2⅔ fl oz/80 ml) of water
Directions:
  1. Combine the water and sugar in a medium saucepan.
  2. Bring the mixture to a boil and let the sugar dissolve. Stirring is not necessary, but will not harm the syrup.
  3. Remove the syrup from the heat and cool slightly.
  4. Transfer syrup to a lidded container or jar that can be stored in the refrigerator. Simple syrup can be stored for up to one month.

Fraisier Assembly:

Components:
1 baked 8 inch (20 cm) chiffon cake
1 recipe pastry cream filling
⅓ cup (80 ml) simple syrup or flavored syrup
2 lbs (900 g) strawberries
confectioners’ sugar for dusting
½ cup (120 ml) (5 oz/140 gm) almond paste
Directions:
  1. Line the sides of a 8-inch (20 cm) spring form pan with plastic wrap. Do not line the bottom of the pan.
  2. Cut the cake in half horizontally to form two layers.
  3. Fit the bottom layer into the prepared spring form pan. Moisten the layer evenly with the simple syrup. When the cake has absorbed enough syrup to resemble a squishy sponge, you have enough.
  4. Hull and slice in half enough strawberries to arrange around the sides of the cake pan. Place the cut side of the strawberry against the sides of the pan, point side up forming a ring.
  5. Pipe cream in-between strawberries and a thin layer across the top of the cake.
  6. Hull and quarter your remaining strawberries and place them in the middle of the cake. Cover the strawberries and entirely with the all but 1 tbsp. (15 ml) of the pastry cream.
  7. Place the second cake layer on top and moisten with the simple syrup.
  8. Lightly dust a work surface with confectioners' sugar and roll out the almond paste to a 10-inch (25 cm) round 1/16 inch (1.5 mm) thick. Spread the remaining 1 tablespoon (15 ml) of pastry cream on the top of the cake and cover with the round of almond paste.
  9. Cover with plastic wrap and refrigerate for at least 4 hours.
  10. To serve release the sides of the spring form pan and peel away the plastic wrap.
  11. Serve immediately or store in the refrigerator for up to 3 days.

Tuesday, November 30, 2010

Devilish Shortcakes


Last year (or was it earlier this year?) the Tuesdays with Dorie bakers made the Tender Shortcakes, and I remember their extraordinary lightness and addictive flavor. It was a recipe that surprised me with its simplicity and yumminess.

This recipe, selected by Tania of Love Big, Bake Often, turns the volume up a notch. It lacks some of the tenderness but more than makes up for it with a punch of chocolate flavor, thanks to a respectable ratio of cocoa. I doubled the recipe as I made these for a bittersweet occasion at work. One of my coworkers is leaving to go to work at a university closer to her home (cutting 2 1/2 hours from her daily commute) and I wanted to make something especially for her. These devilish shortcakes seemed to combine the two qualities she wanted in a dessert...chocolate or fruit, or both. I served these with the last strawberries of the season, sweetened with a little sugar and served on a puff of freshly whipped cream. They were sweet and nice, the perfect gift for a coworker who is as sweet and kind as she is smart. 

If you'd like the recipe, Tania has it for you here. And you can see what the other TWD bakers thought about it here.

Thursday, September 16, 2010

Whole Wheat Pancakes with Strawberry Sauce


This week's Craving Ellie in My Belly recipe was chosen by Melissa of It's Melissa's Kitchen. Melissa picked Ellie's whole wheat pancakes with strawberry sauce. I've never successfully made pancakes. I've made macarons, but pancakes? No way. Too difficult. Too finicky.

Given that pancakes are full of refined flours, have virtually no redeeming nutritional value and are basically a delivery vehicle for maple syrup, I've never sweated not having mastered them. But Ellie's are made with part whole wheat flour, and the strawberry sauce makes it easier to rationalize having them for breakfast. When my friend Kayte tweeted me a reminder that they were the pick for this week, I still hadn't had breakfast. They were quick to make. I used strawberries I froze earlier in the summer, which I defrosted in the microwave. The sauce gets made in the food processor, and the pancakes are a dry ingredients + wet ingredients = batter recipe. I used my crepe pan instead of a skillet or griddle, and it was a little tight fitting in three at a time. But little bubbles formed on the top, just as they're supposed to, and they flipped easily and intact, a first for me!

From beginning to end, it took 20 minutes to make this recipe, which is perfect for a spur of the moment weekend breakfast. Make sure you serve your strawberry sauce warm, or it will cool off your pancakes before you can eat them. Even better, prepare the strawberry sauce the day before and heat in the microwave.

Thanks, Melissa, for a wonderful pick! I learned how to make pancakes without trauma. You can conquer your pancake fears, too. You can find the recipe here.

Tuesday, June 8, 2010

Tender Strawberry (Jam) Shortcakes


What, you've never heard of jam shortcakes? Well, I plead temporary insanity. I made these the day before I left on vacation last week and that was only because I was sick, forgetful and completely out of strawberries. But this Tuesdays with Dorie recipe was selected by Cathy at The Tortefeasor. Who doesn't love Cathy? I love her posts, her successes, near misses and hilarious fails. I love reading about (and her gorgeous photos of) her three adorable children and her husband David. So even though I was not feeling well and WAY behind on packing and other preparations for my trip, I wanted to make this. So I made 1/6th of the recipe (the math and yield were perfect).

Although Dorie's recipe was easy and described the procedure very well, I recommend this post by Jessica's brother for it's classic Southern technique.

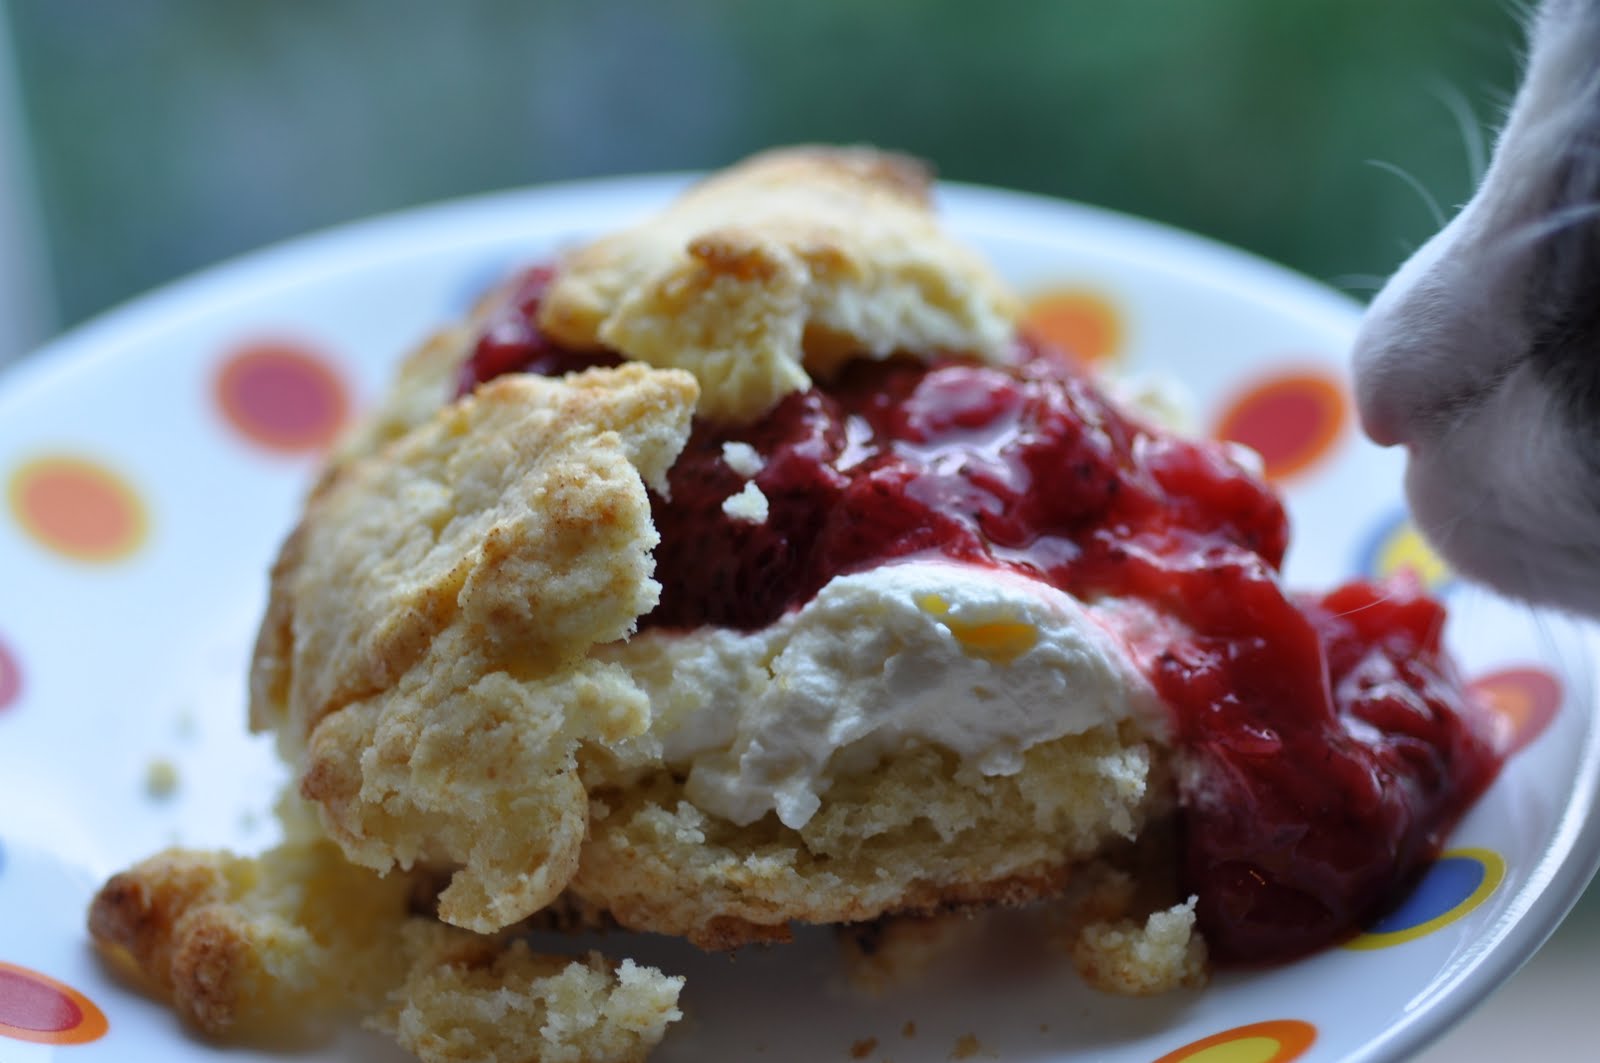
The shortcakes were super easy to make. I portioned out two shortcakes and put them in the oven. 13 minutes later, they were done. I let them cool, quickly whisked some whipping cream in a bowl, spooned it over a split shortcake. They were very tender and the top sort of broke into a few pieces, but no worries. The pieces were just as delicious with the cream and homemade strawberry jam. Too delicious really!

Thanks, Cathy, for picking a recipe I could make less than 24 hours before boarding a plane, with no stress or mess.

P.S. In my rush, I had a hard time getting a photo of these that didn't include Pearl. She was very focused on getting some yummy shortcake for herself:


*******

Lethally Delicious is on vacation, so responses to comments will be delayed. This post (and others) were saved for you and will pop up every few days until I get back next week.

Tuesday, May 11, 2010

Quick Classic Berry Tart Version 2.0

One night last week, when we were both working a lot and under insane amounts of pressure, we ate this for dinner:


Let me back up. Last Wednesday a great dessert was discovered. We came home at about the same time.

"How was your day?"

"Crazy.  We discovered two errors totaling $7 million. People in my office, both phone lines ringing. You know. How about yours?"

"I did an international wire online that the bank turned into a completely different amount.  I was on the phone with customer service for hours and then I had to go to the bank to fix it. At least, I hope it's fixed."

You've heard of breakfast for dinner. At our house last Wednesday, it was dessert for dinner. And I owe it all to my fellow bloggers. Cristine at Cooking with Cristine chose Dorie's Quick Classic Berry Tart for this week's Tuesdays with Dorie recipe. And my blogging friend Nancy has influenced me so much that I had both a mini tart shell and chocolate ganache in the freezer. And for an even more satisfying tart, I made this with organic berries from my CSA box:

Good

Better

Great

I had baked the tart shell the night before, so it only took 5 minutes to assemble the tart. 90 seconds in the microwave to melt the ganache, wash and slice a few berries, and assemble. Brushing it with jam was only for show. If I wasn't posting it, I would have skipped that.

We split it for dinner, and both felt much better. We each still had problems to deal with at work, but I think Cristine's pick made an awful day end on a very happy note. Thanks, Cristine! This is definitely in our top 5 Dorie desserts.

Sunday, April 25, 2010

Sweet Melissa Sundays - Strawberry Cobbler Tart

My blogging and tweeting friend Tracey of Tracey's Culinary Adventures is hosting this week's Sweet Melissa Sundays recipe, Strawberry Rhubarb Cobbler Pie. Tracey's encouragement and especially her photo tips have made me a better blogger. She is sweet, kind and generous and her beautiful blog is the first place I look when I need a recipe. This is because her taste is impeccable and she's never disappointed me.

I've been super busy with work, with three separate audits (two of them major) happening concurrently. As if that isn't enough, M's business is at a crossroads where their accountant (me!) has to come up with a manufacturing inventory tracking system. Last night I worked until 11 just to get the year-end financials done and today I'll start on the inventory system.

How to juggle work with my desire to make Tracey's pick? Like Tracey, I have never had rhubarb and looked forward to this recipe so that I could try it. But that just didn't happen. I had fresh strawberries in the fridge, so I went with those. I knew I wouldn't have time to make pie crust and I eschew the store bought ones, so I went with the last sheet of Trader Joe's puff pastry I had in the freezer.

I made 1/4 of the recipe and baked my mini in a 4" spring form pan. I cut way back on the sugar, using only 1 tablespoon since the rhubarb needs a lot and my strawberries were sweet. I also didn't use lemon zest, opting to sprinkle cinnamon sugar over the biscuit. I barely had enough biscuit dough to eke out a thin heart-shaped biscuit to cover my little creation.


My mini baked in about an hour. The biscuit looked very brown before I pulled it out of the oven but the puff pastry and filling still needed more time. The P&Q indicated a lot of bakers had the same issue. Tracey related that her pie was a little soupy and mine was no different, but I was fortunate because it set up nicely.

This made a wonderful treat for us to split after having a small salad for lunch. M. stole most of the strawberry filling and proclaimed the dessert a success. The fresh berry flavor really came through and the crunchy biscuits contrasted nicely with the fruity filling. Puff pastry made this a super easy dessert. I can't call it quick, but if you have puff pastry in the freezer, the hands on time is minimal. I can't wait to try this with cherries, peaches, apricots...

Thanks, Tracey, for a pick that was a runaway hit with us. If you'd like the original recipe, Tracey has it here.

Strawberry Mini Cobbler Tart - adapted from The Sweet Melissa Baking Book
Printable recipe

For the crust:
1 sheet of puff pastry, defrosted in the refrigerator until pliable but not soft

For the filling:
1 cup sliced strawberries (about 10 berries)
1 teaspoon sugar (or more if needed - taste your berries so you know how much to use)
1/4 teaspoon cornstarch (if you add more sugar, use a little more cornstarch)

For the cobbler:
1/4 cup all-purpose flour
1/4 teaspoon baking powder
pinch of cinnamon
pinch of salt
1/2 tablespoon chilled butter, cut onto bits
2 tablespoons heavy cream

For finishing the tart:
Extra cream or milk for brushing the cobbler
1 tablespoon cinnamon sugar

Preheat oven to 350 degrees. Put a sheet of foil on a sheet pan and set aside.

For the crust, lay the puff pastry on a lightly floured surface and cut a 6" circle out of the middle (you can use a 6" plate as a guide, I eyeballed it and it worked fine). Gently line a 4" spring form pan with the puff pastry, tucking in the folds to form a smooth surface around the side of the pan. Put pan in the refrigerator while you prepare the filling and cobbler.

For the filling, in a small bowl, toss the berries with the sugar and cornstarch. Set aside.

For the cobbler, stir together the dry ingredients in a small bowl. Work in the cold butter with your fingers. You should have a lot of flakes and chunks of butter. Add the cream. With your fingers, combine until the mixture comes together. You may need a few drops more cream (I did). The moment the dough comes together, drop it on a piece of plastic wrap and put another piece of plastic wrap on top of it. Push it into a roundish shape about 1/2" thick, and using a 2 1/2" biscuit or decorative cutter, cut a single biscuit. Remove the crust from the refrigerator, arrange the berries in it and top with the biscuit.

Put the tart on the baking sheet and brush the cobbler with some cream or milk. Sprinkle on some cinnamon sugar. Bake in the preheated oven for 45 minutes to 1 hour, checking every few minutes toward the end. The tart is done when the juices are thick and bubbly, the puff pastry is browned and looks flaky and the cobbler is well-browned. Serve warm.

Serves two greedy people.

Thursday, April 22, 2010

Barefoot Bloggers - Jam Thumbprint Cookies

Yes, April is the Month of the Cookie for the Barefoot Bloggers. We started with raisin oatmeal pecan cookies and now we have the jam thumbprints, chosen by Cassandra of Foodie With Little Thyme!. I for one appreciated that there was less than a pound of butter in these (unlike Ina's pecan squares I made last week). I was so inspired by the recipe I made strawberry jam. Yes, it was a first, but it won't be the last time. The strawberries are glorious here and I had just returned from a nursery sojourn to Watsonville with a friend. Watsonville is about an hour south of San Jose. On the way back, we stopped at a farm stand in San Martin and bought these beauties:

So I made jam with about half of them, froze some (after washing, coring and drying them) and ate a lot of them.

Once the jam was made, it was cookie time. This recipe was pretty easy, if a bit messy. The messiness was due to rolling the balls of dough in egg wash and then rolling them in coconut before smashing them onto the cookie sheet with your thumb. Dribble some jam on to each one and pop them in the oven.

I must admit I went into this one thinking, it's a jam thumbprint cookie, how great could it be? Well, they were really really really great. I wish I could take credit because of the homemade jam, but it was the flavor combination of the buttery cookie with the toasty coconut with the strawberry jam that made these irresistible. I topped a couple with salted caramel ganache from the freezer, but the heat of the oven made the chocolate all curded...still delicious but ugly. Maybe I'll mix strawberry and ganache next time and take it completely over the top.

Thanks, Cassandra, for a fantastic pick! If you'd like the recipe you can find it here.

Sunday, February 21, 2010

SMS - Strawberry Lemonade


What could be more evocative of spring than strawberries and suggestive of summer than lemonade? Although we don't get snow here in San Jose, I'm still more than ready to be done with the cold and the rain. And raining and gray it was on the day I made this refreshing drink, this week's Sweet Melissa Sundays recipe, selected for us by Jessica of My Baking Heart.

This was very easy to make. I made my simple syrup in the microwave and didn't bother with straining the solids out of the strawberry puree. It was a tart and sweet treat for a rainy day.

If you'd like the recipe, Jessica has it here. And thanks to Jessica for picking such a great recipe for all of us who are weary of winter.